
Past Event Menu Process
This guide explains how to add an event page to the Past Events menu. It outlines the steps required to correctly update the event page and ensure it appears in the Past Events section of the website.
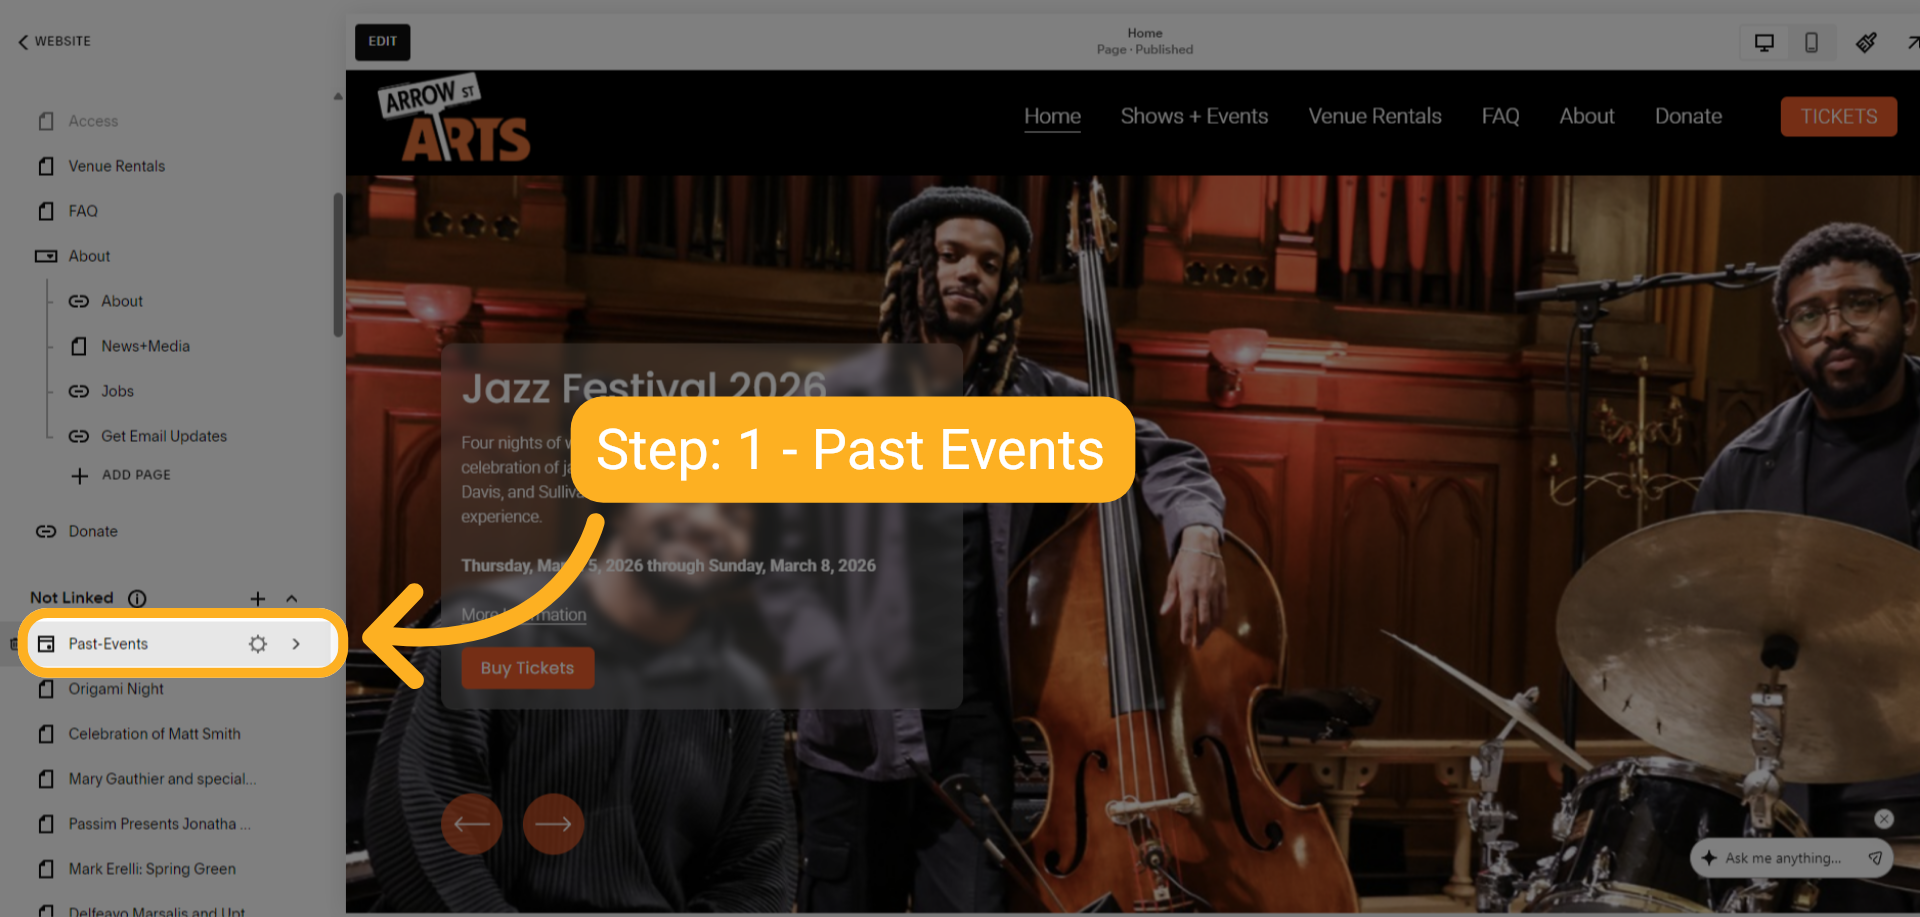
1 Click on Past Events Menu Item
Navigate and click on the Past Events Menu item (this page is currently in the unlinked section).
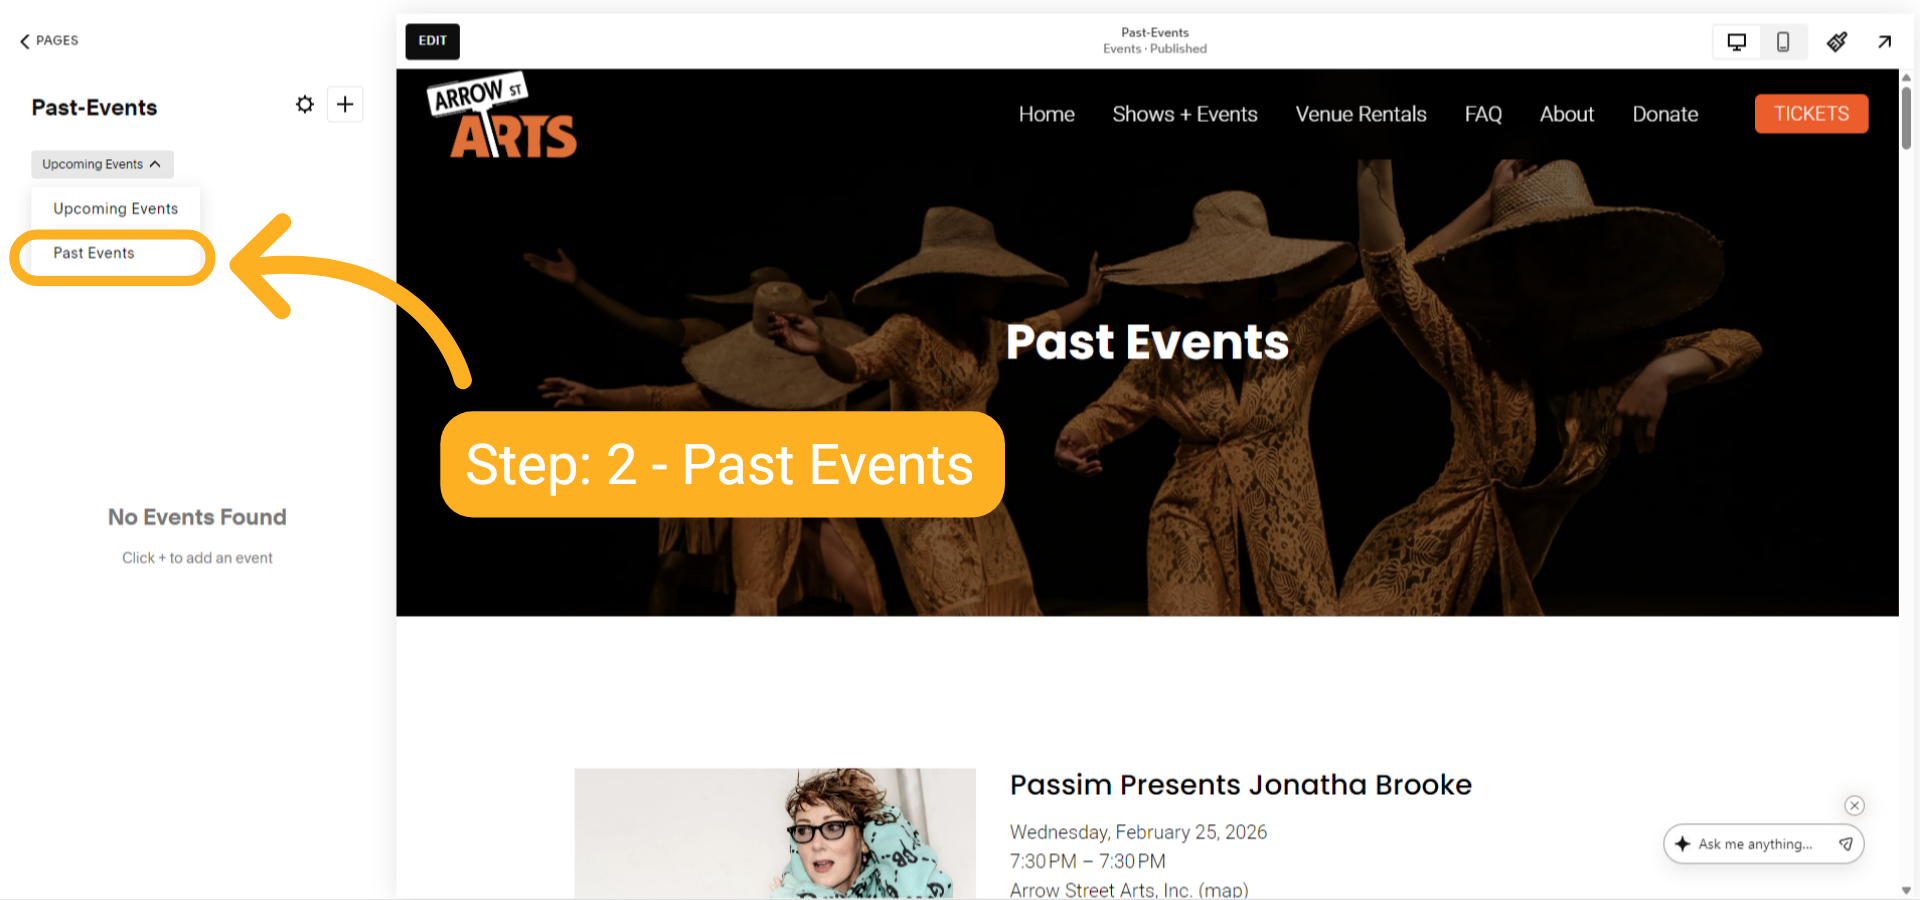
2 From the dropdown menu, select Past Events
From the dropdown menu, select Past Events.
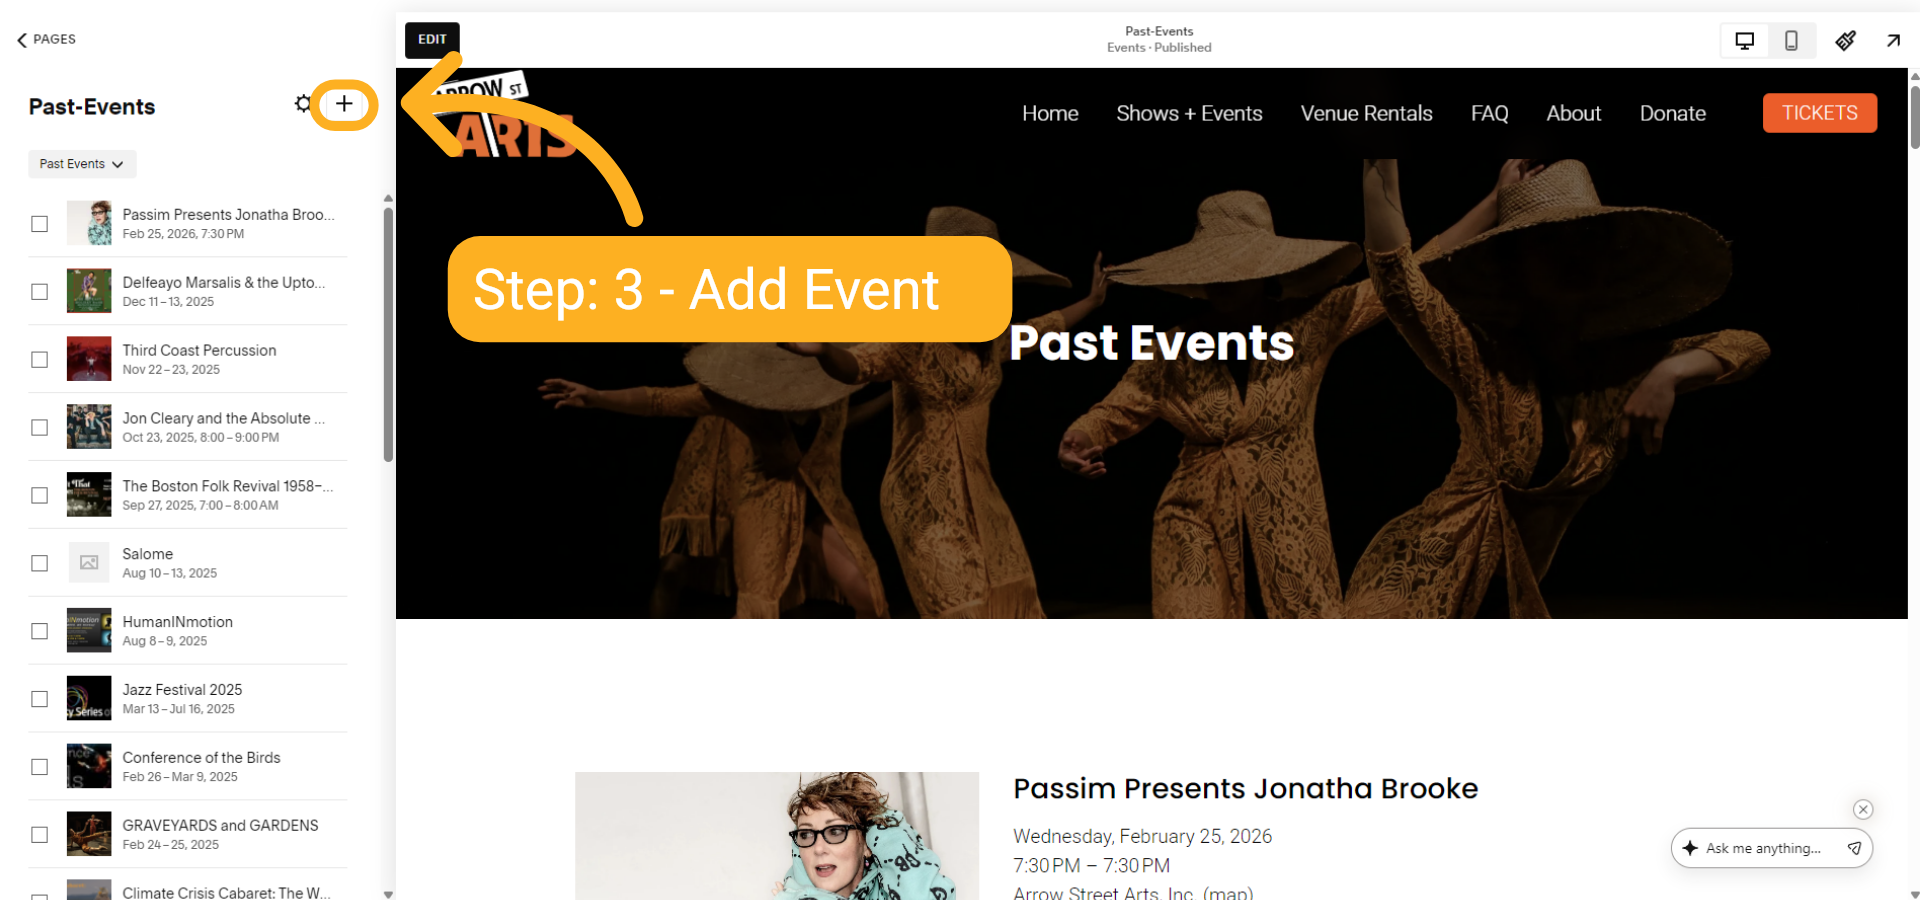
3 Add New Event
Click the “+” icon (Add New), and a new window will pop up.
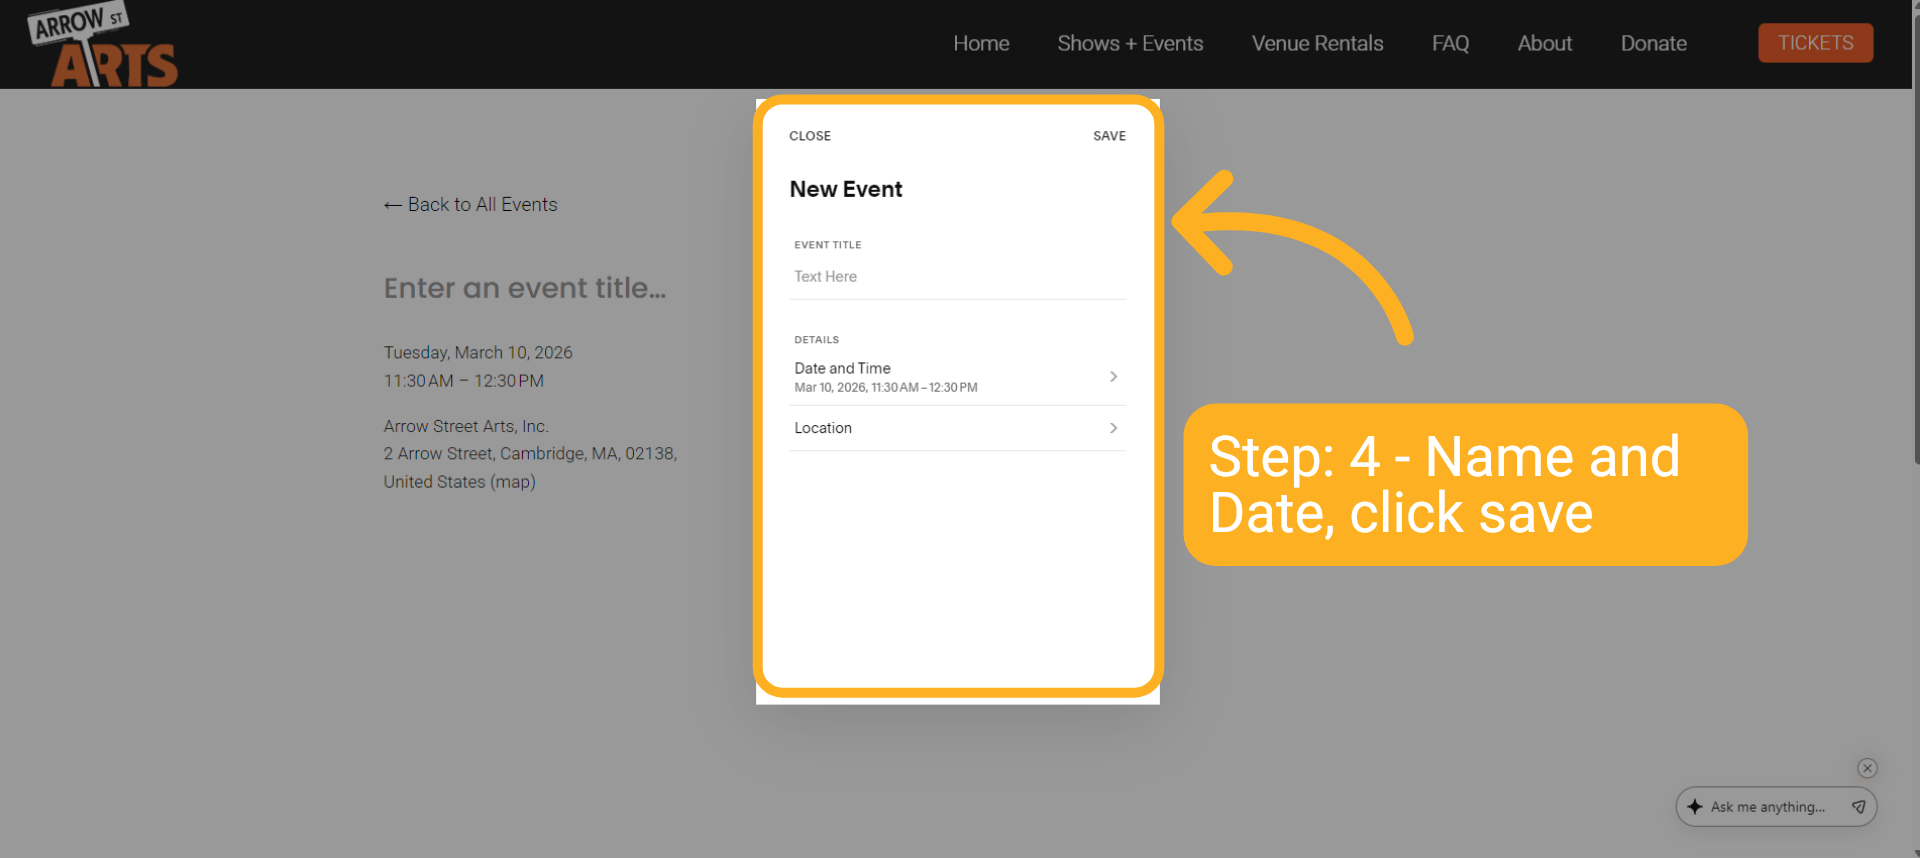
4 Enter Name and Date
Enter the essential event details, including the Event Title and Event Date. Click Save.
5 Add Code widget to Page
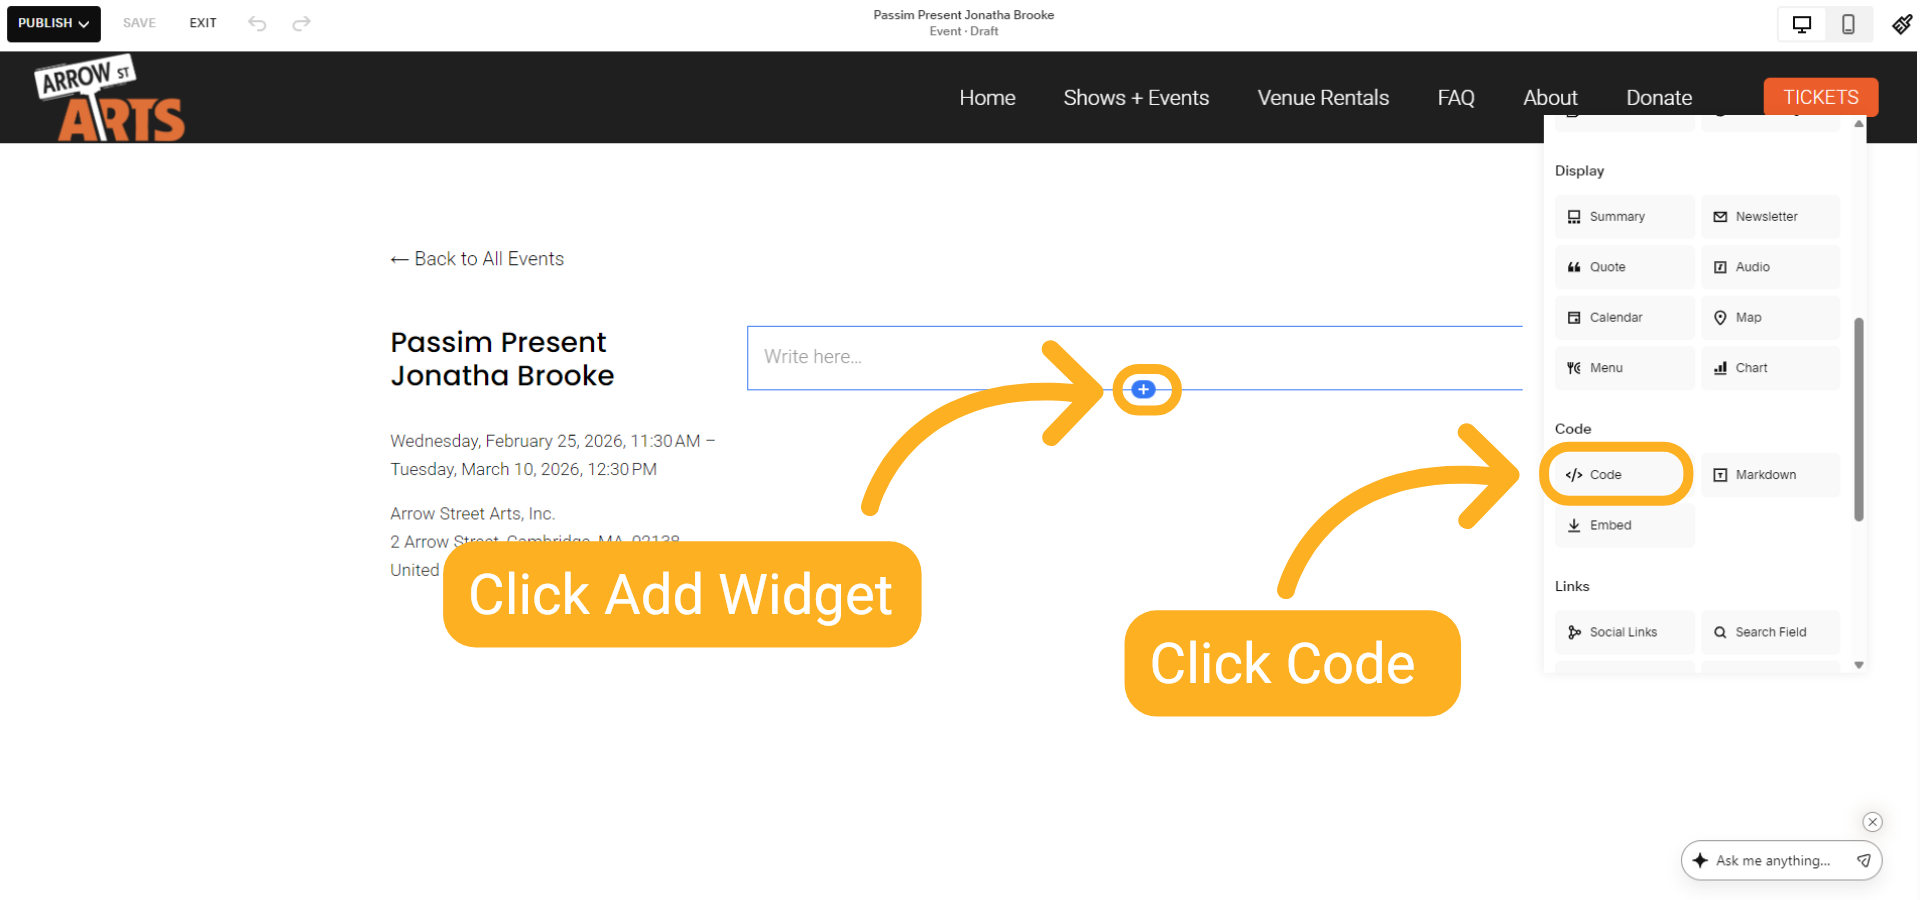
Click the plus icon to add a widget. Then, select "Code."
6 CSS link
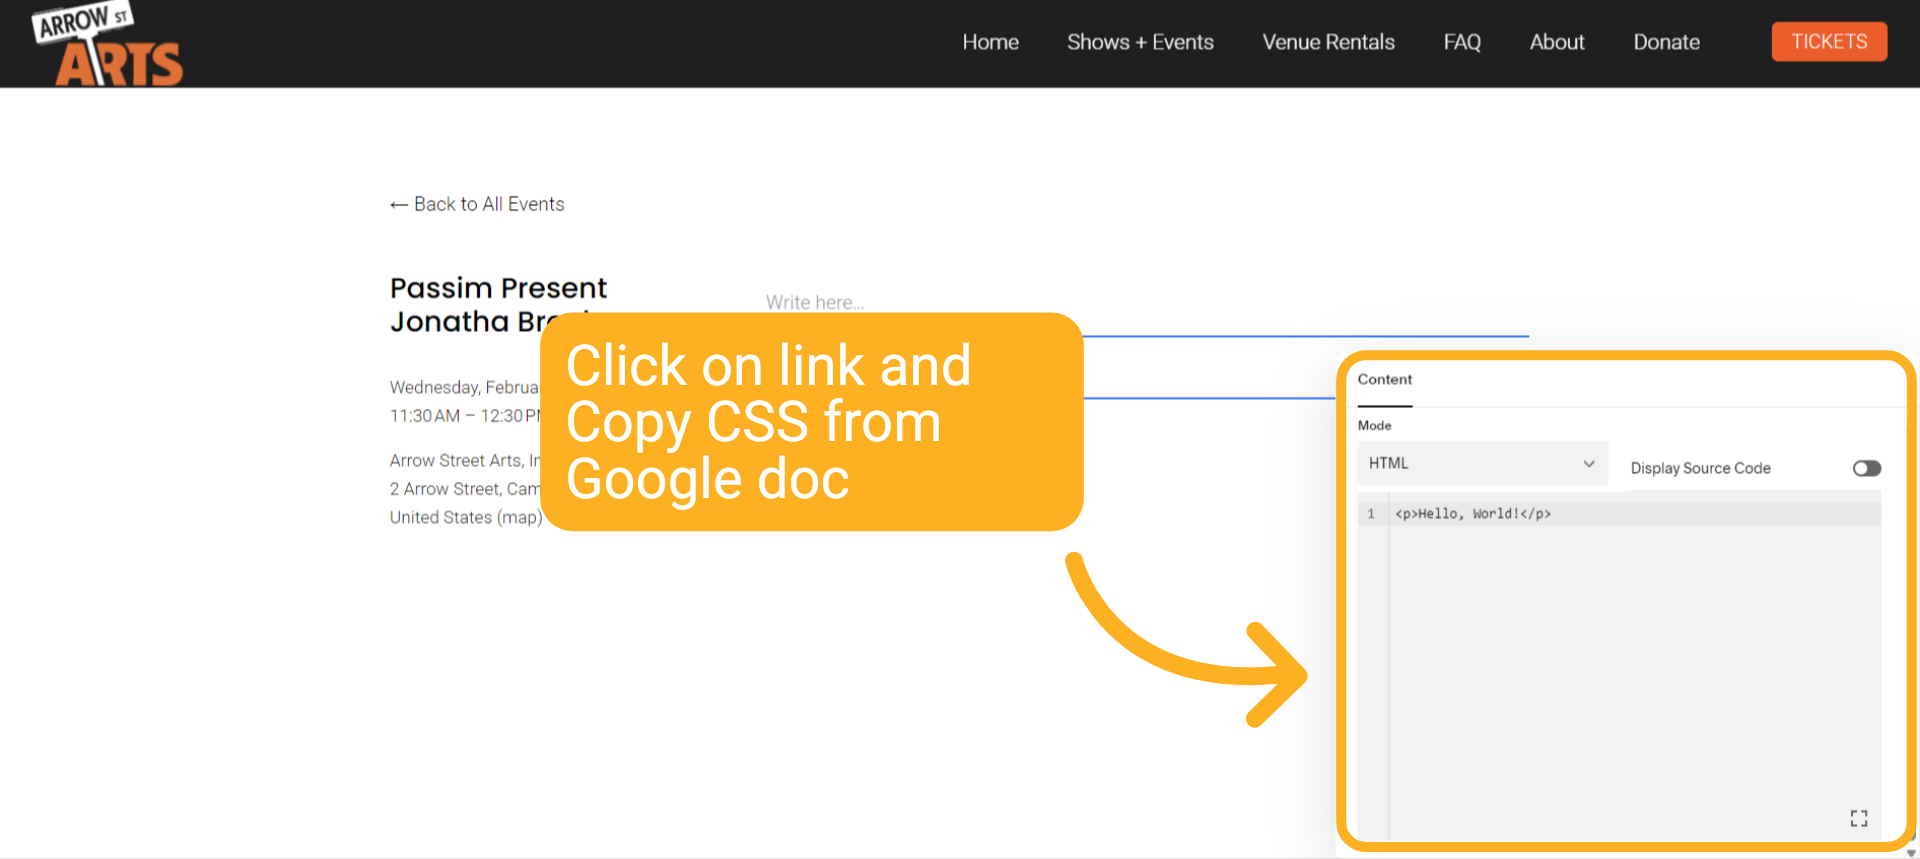
Click the link to copy the CSS code from Google Docs.
Click Here to Copy CSS.
Click Here to Copy CSS.
7 Paste CSS
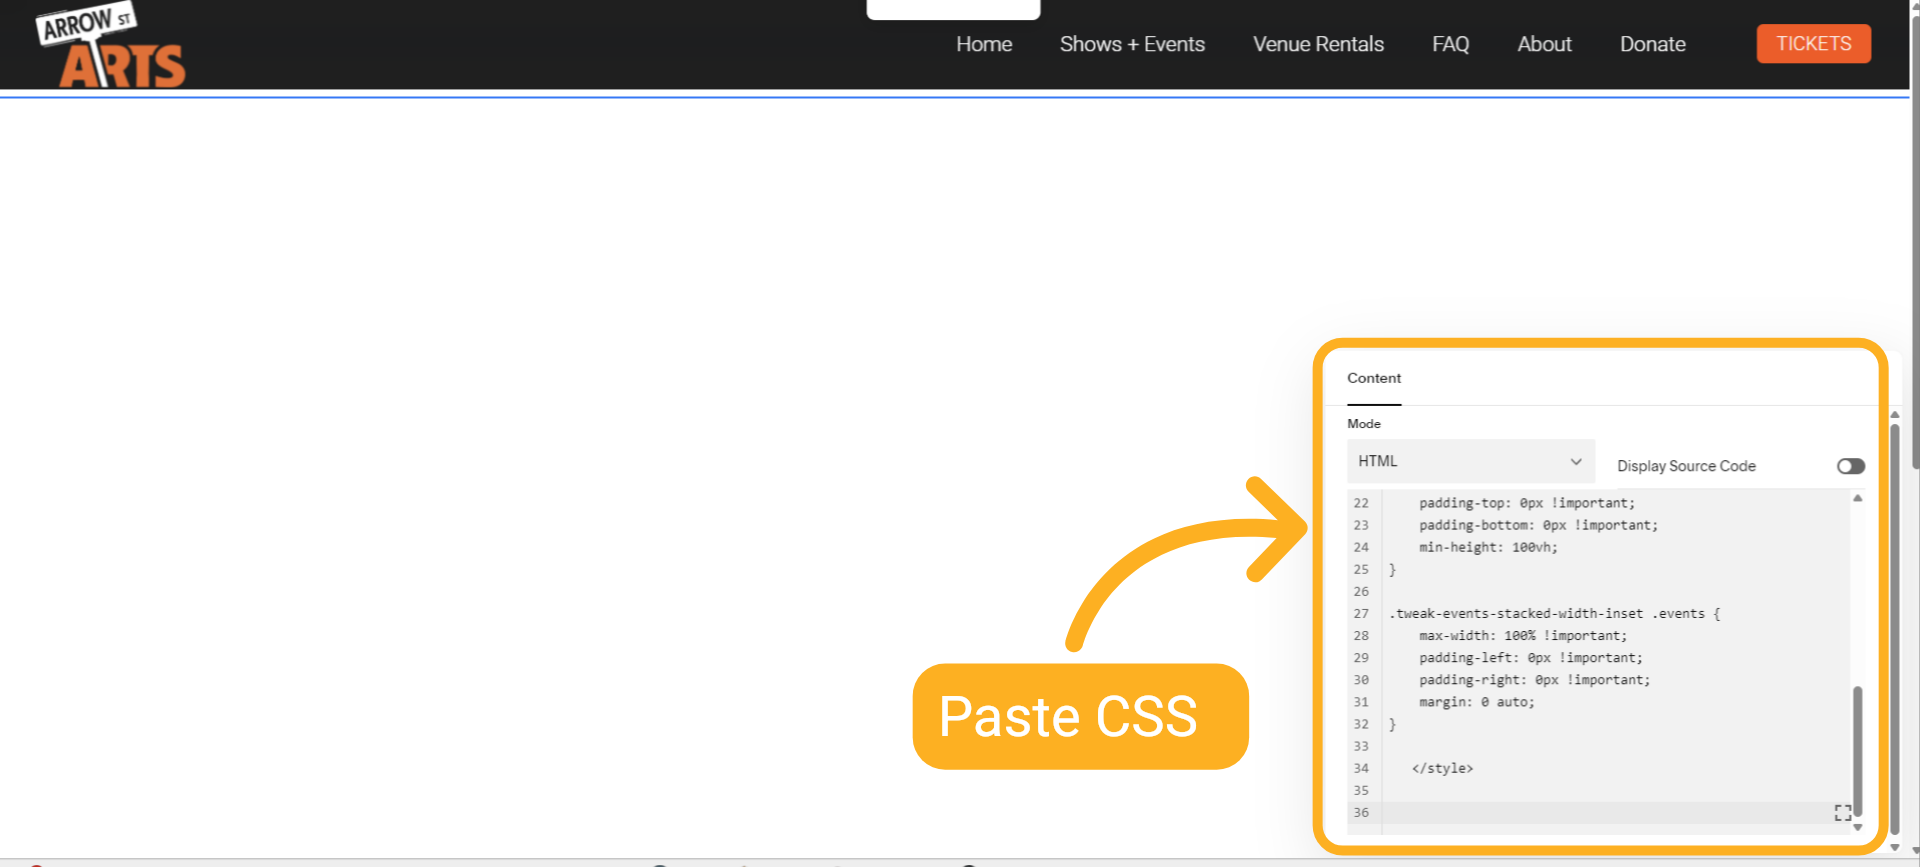
Return to Squarespace and paste the CSS into the widget.
8 Go to Existing Event page
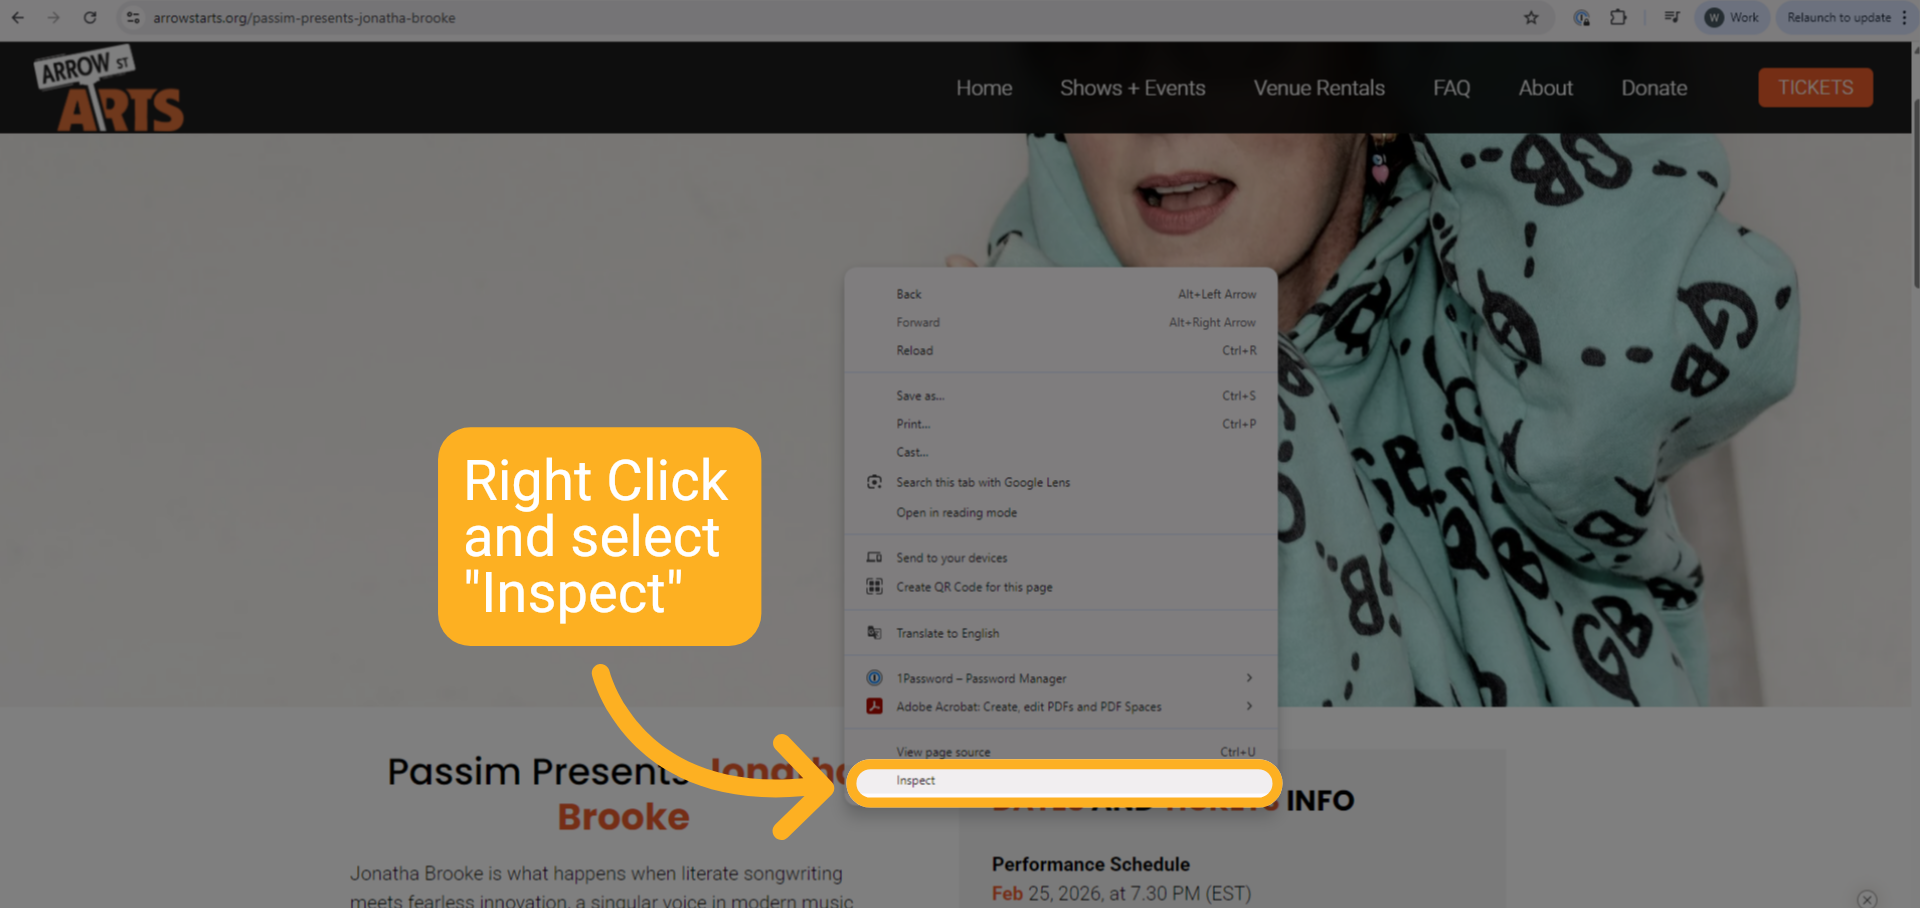
Open a new tab and navigate to the Existing Event page. Right-click and select "Inspect" on the event page.
9 Find and copy HTML
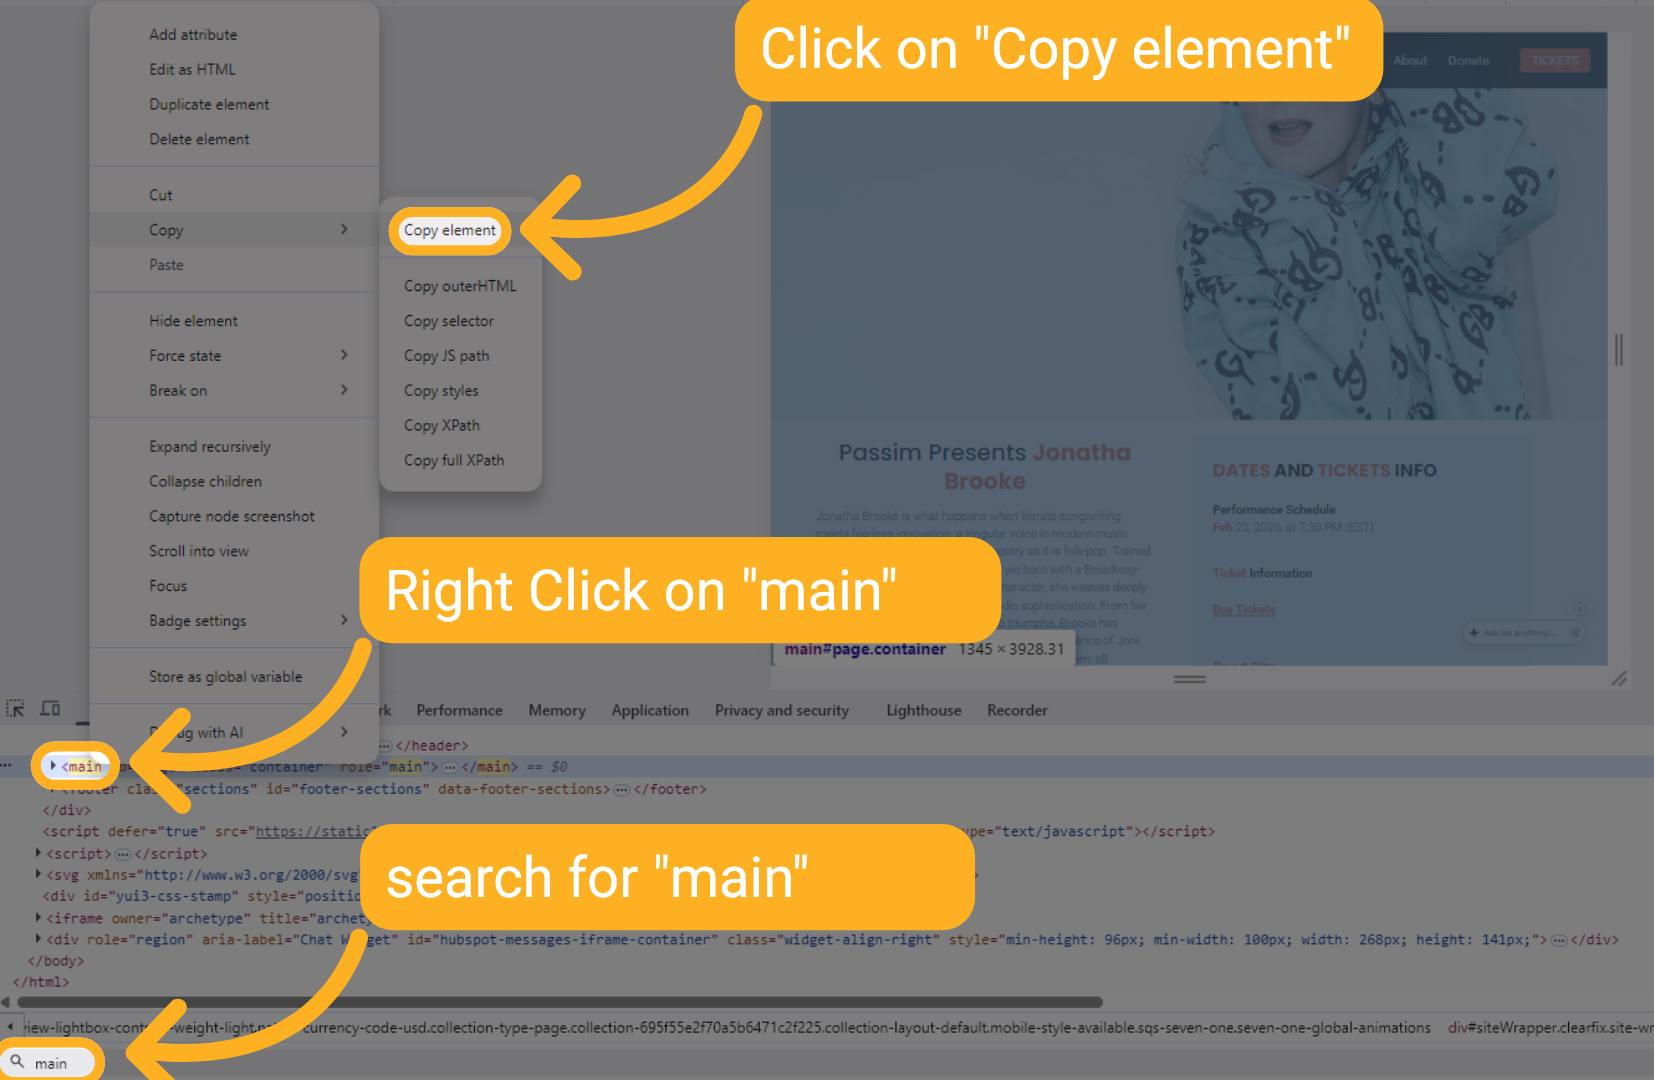
Press (Control or Command F) to search the page for "main," right-click on "main," and then click on "Copy element."
10 Paste HTML
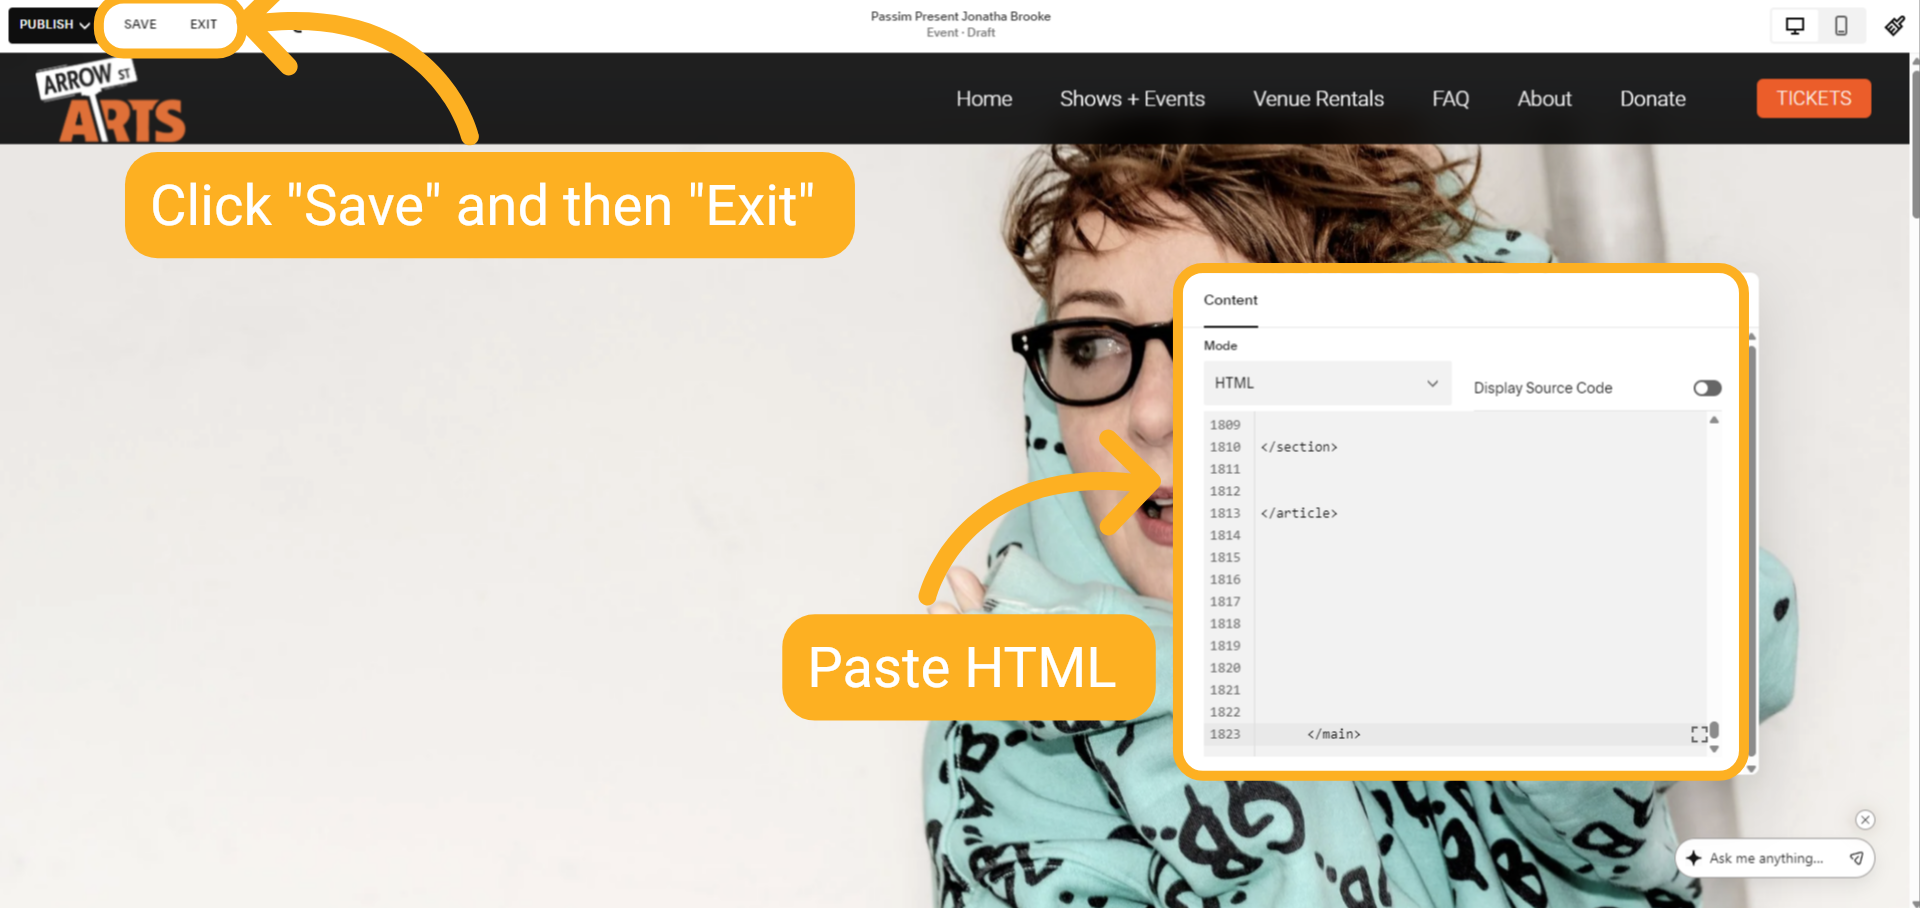
Now that you have retrieved the HTML from the Event Page, return to the Past Event tab and paste it into the Widget under the CSS you pasted earlier. Click "Save," then click "Exit."
11 Settings
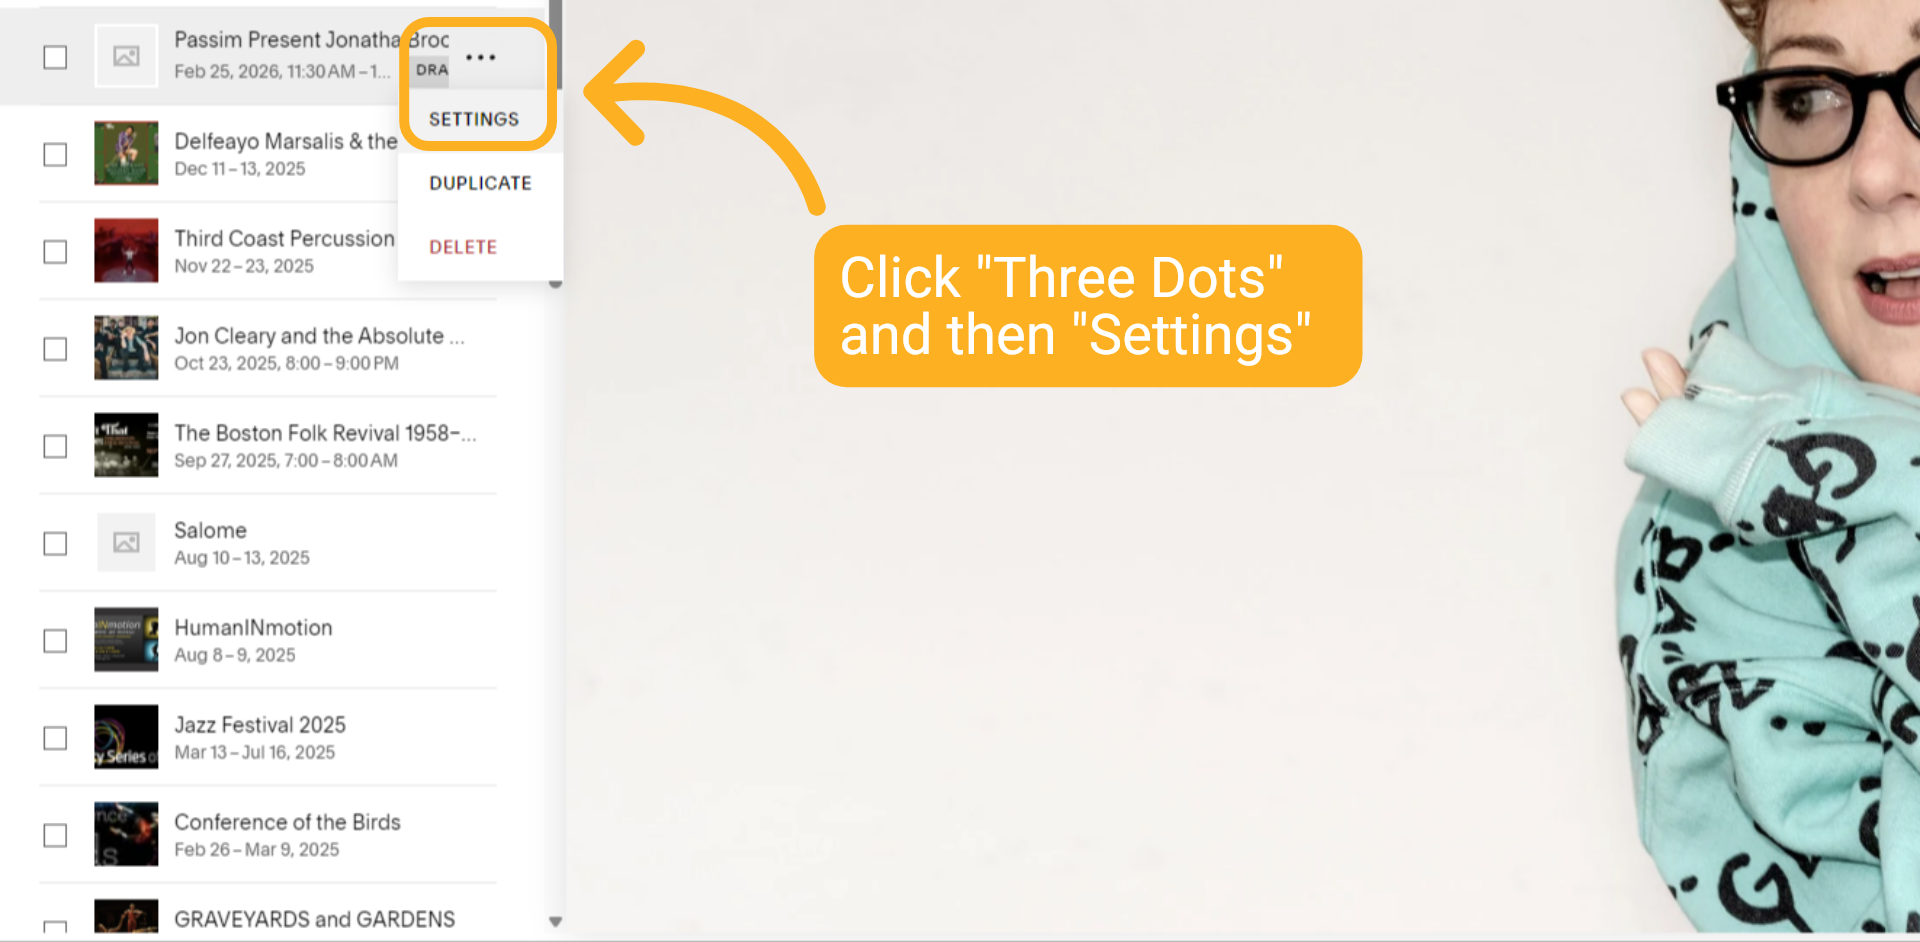
Click "Three Dots" and then "Settings".
12 Search or Upload Image
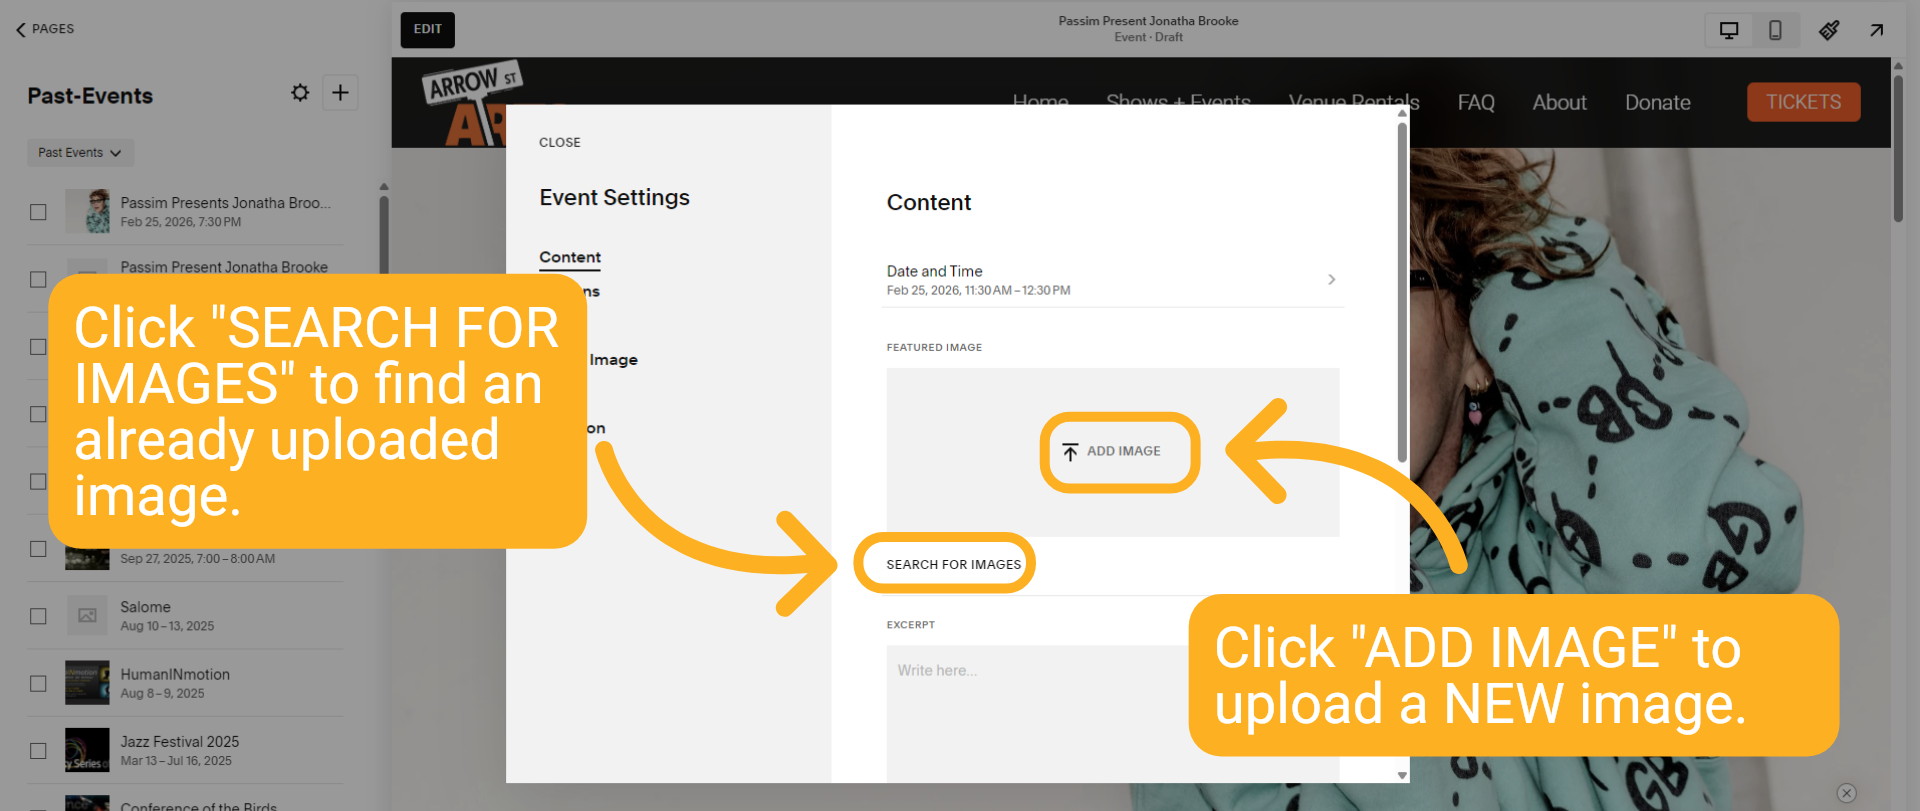
Click "SEARCH FOR IMAGES" to find an already uploaded image, or click "ADD IMAGE" to upload a NEW image.
13 Description and Options
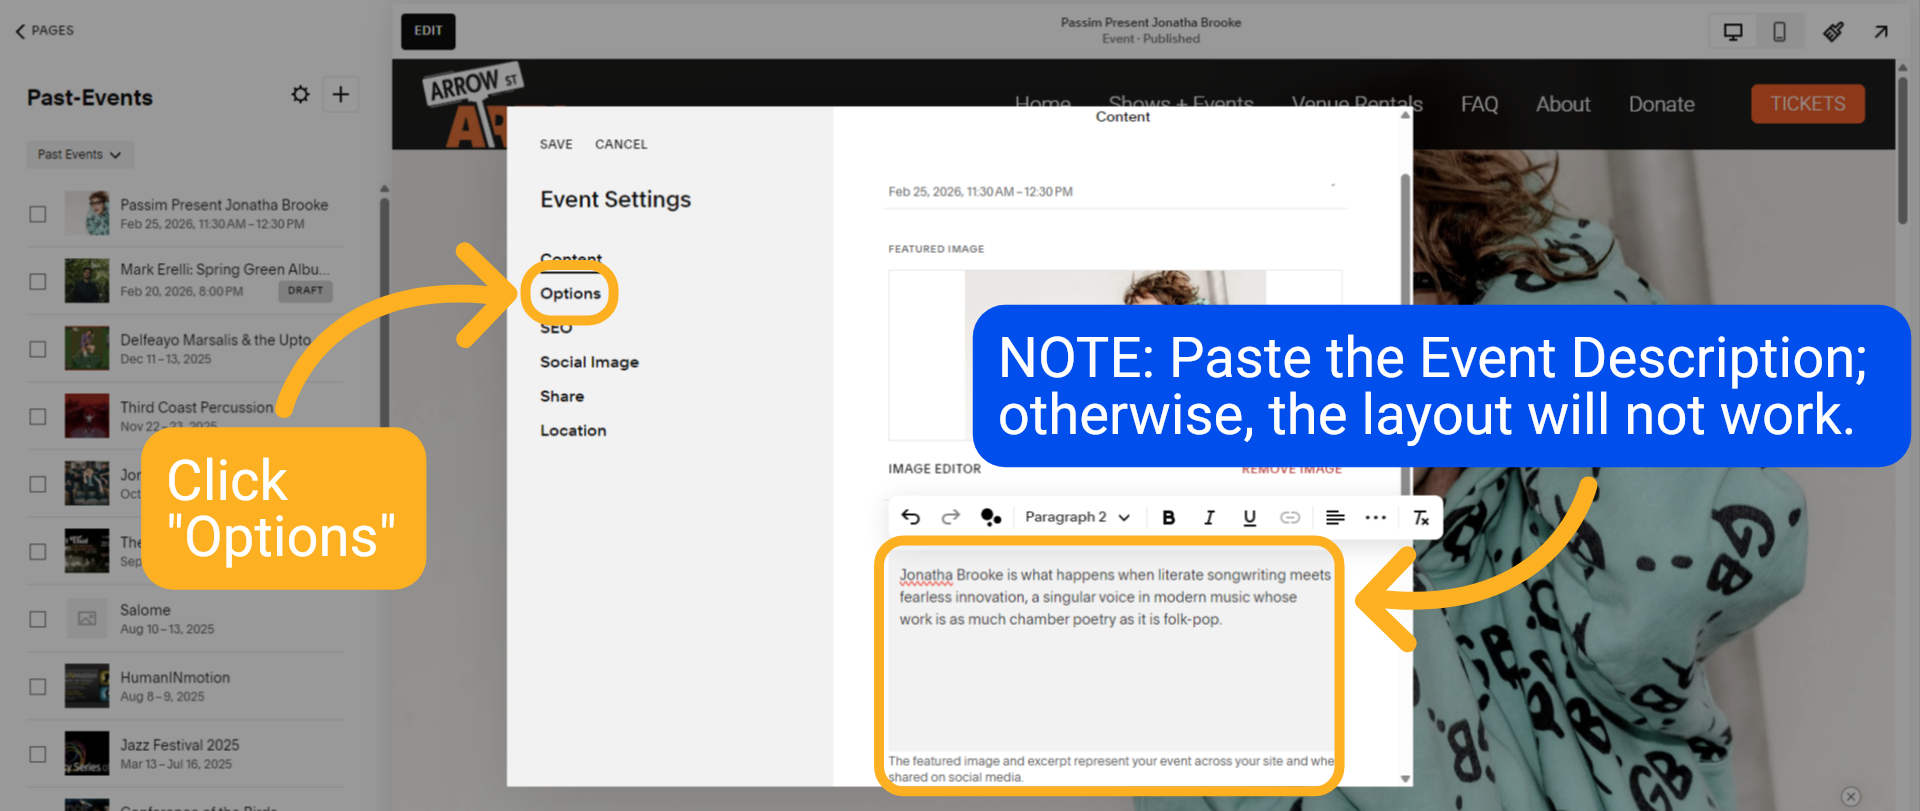
Please note: the Event Description must be entered; otherwise, the layout will not function correctly. Then, click "Options" to publish the event.
14 Draft Event
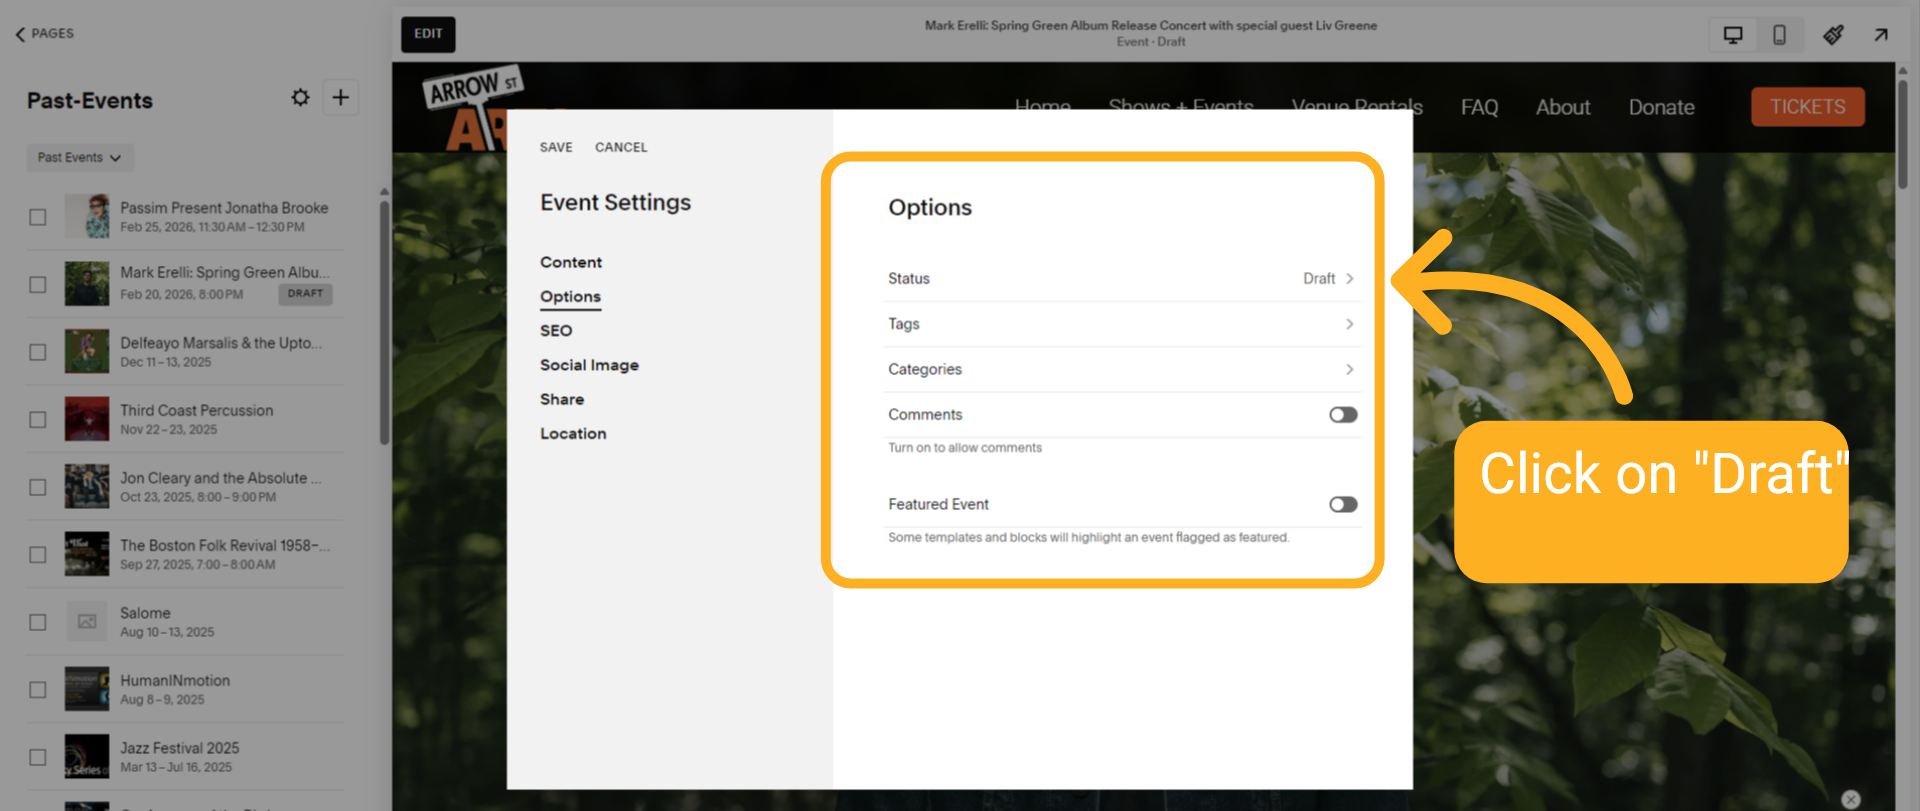
When a new event is created, it is automatically set to Draft. Click on "Draft".
15 Publish Event
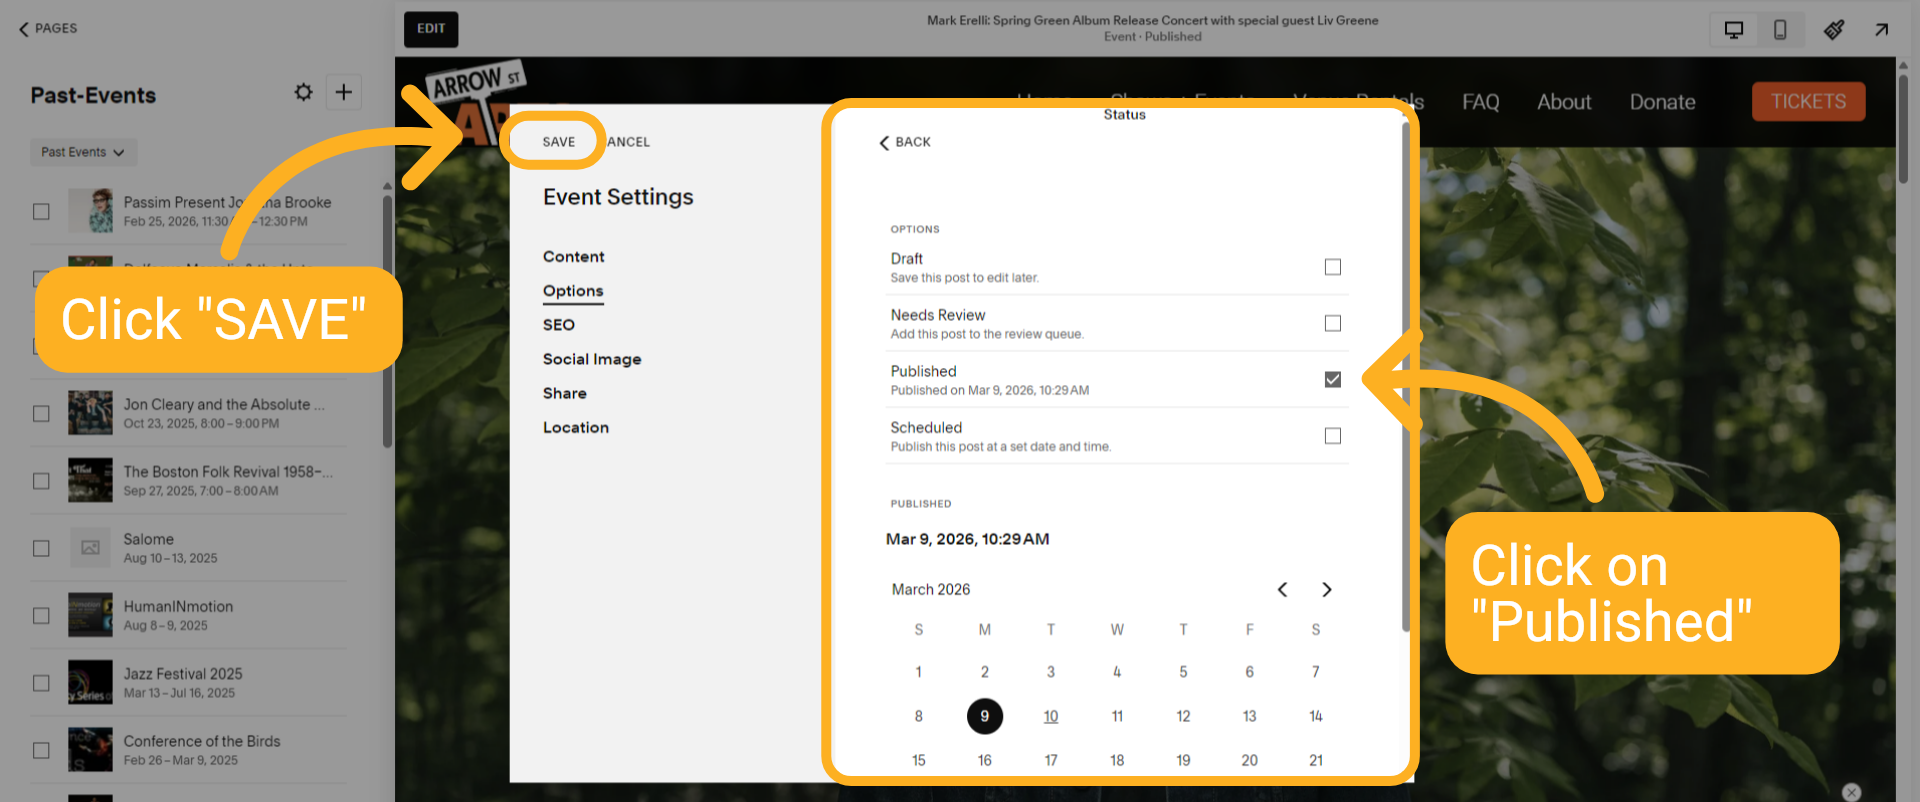
Click "Published," then click "SAVE".
16 Schedule Event
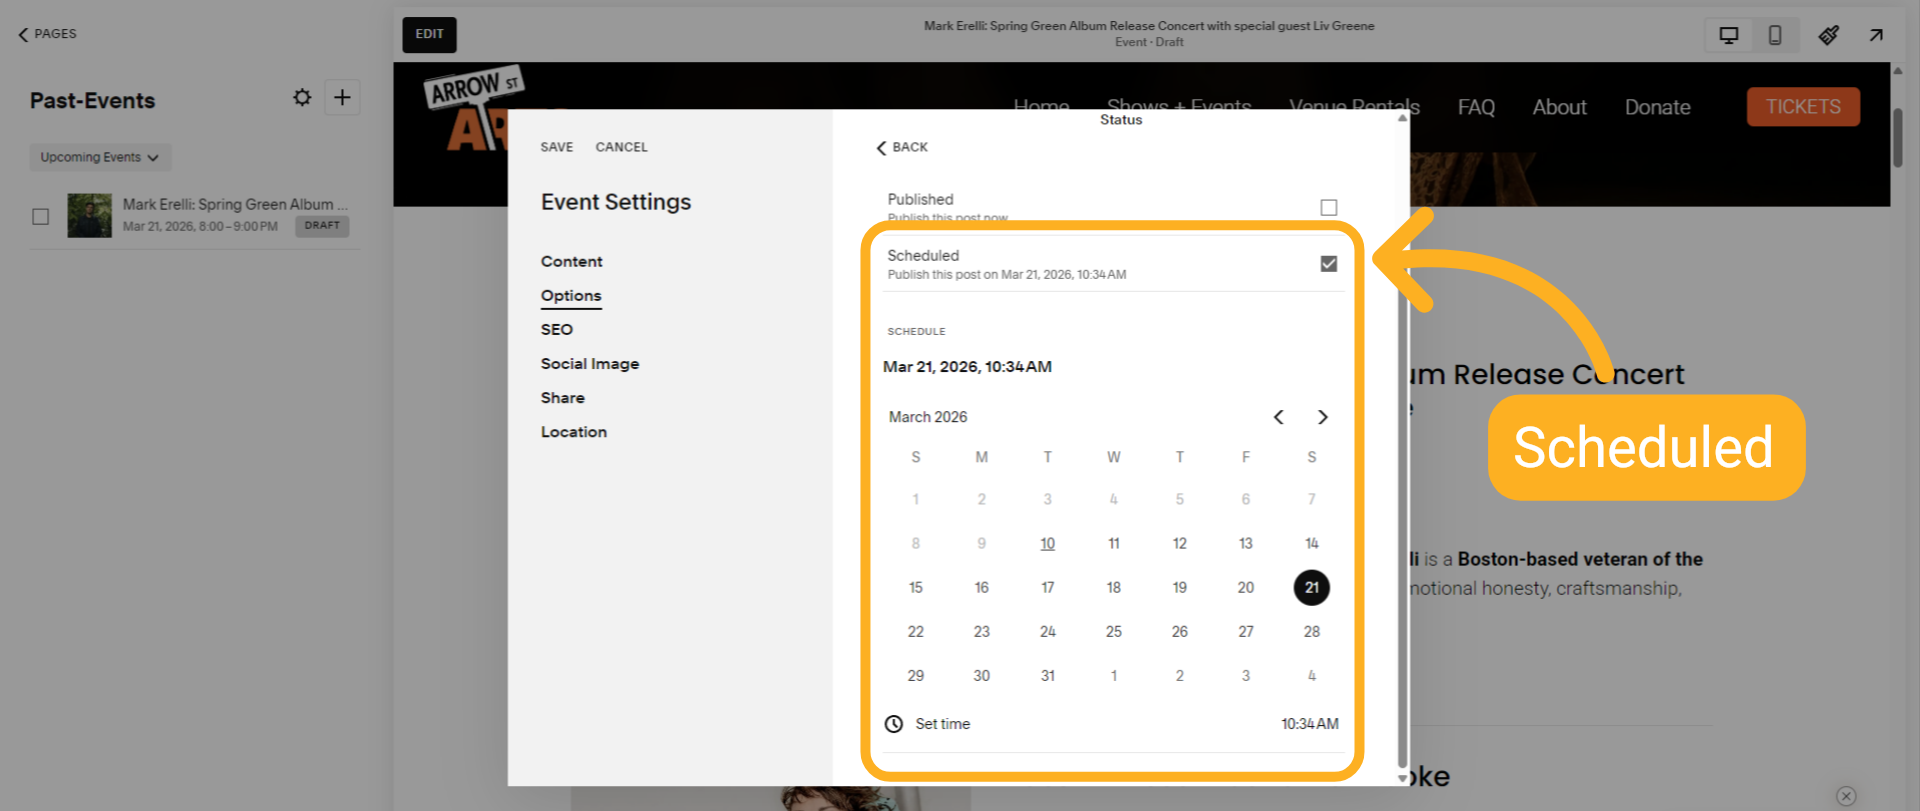
If the page is created prior to the event date, you can set a date and time to schedule its publication.
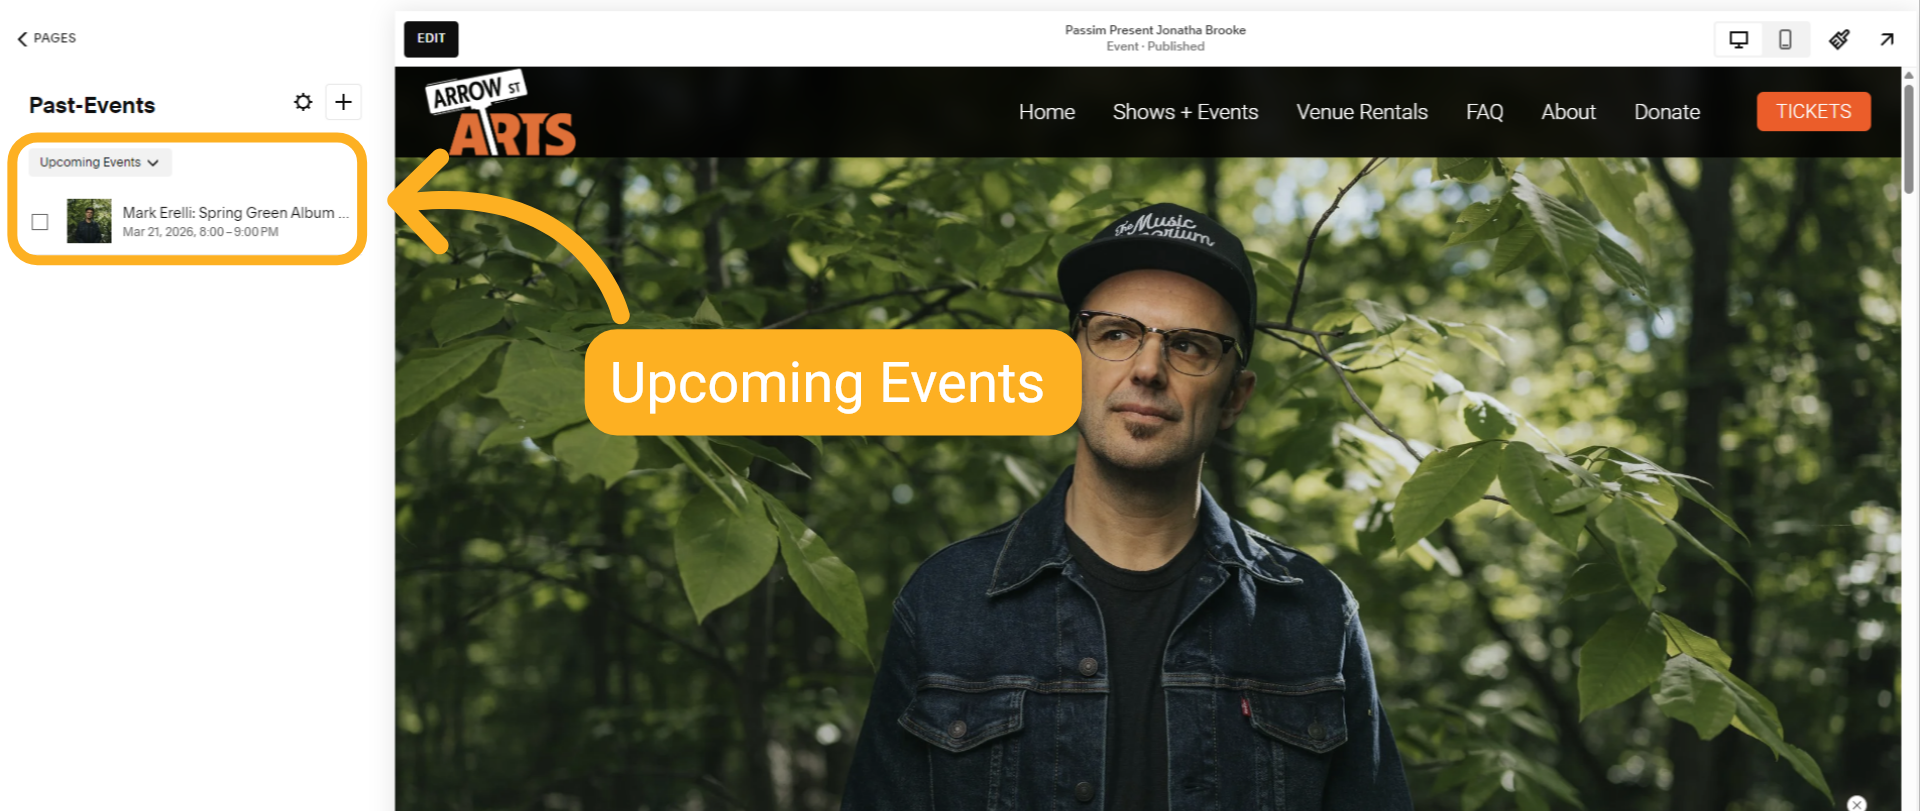
17 Upcoming Event
If the page is created before the event date, it will show up in "Upcoming Events."
This SOP outlined the process for creating a Past Event page. If you have any questions, please let us know. Thank you.