Create a Shipment Plan
1 Create a Shipment Plan and Associate with SNs-EQs
This guide walks you through associating serial numbers and equipment orders to ensure accurate shipment tracking and management.
2 New Shipment Plan
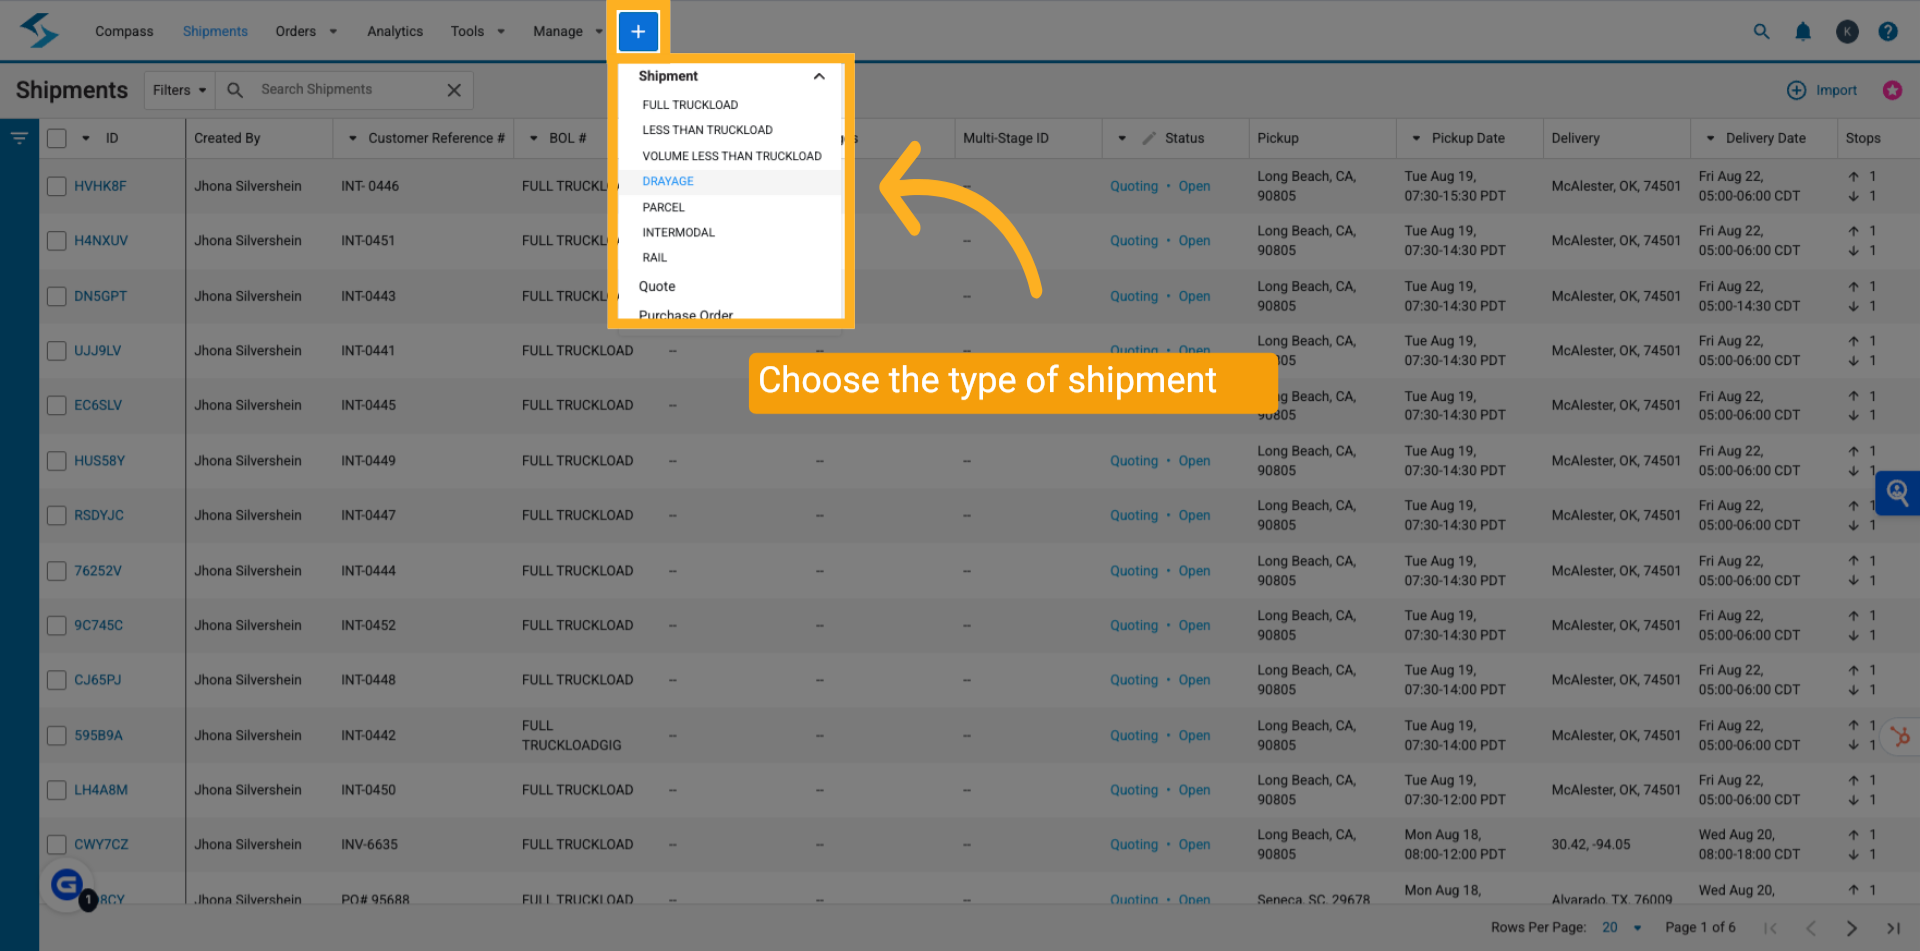
Open the Shipwell platform to begin creating a new shipment plan. Click the Blue Plus Sign in the top menu. A dropdown will appear. Click the "Drayage" menu item and click to start the process.
3 Enter Tags and Customer Reference
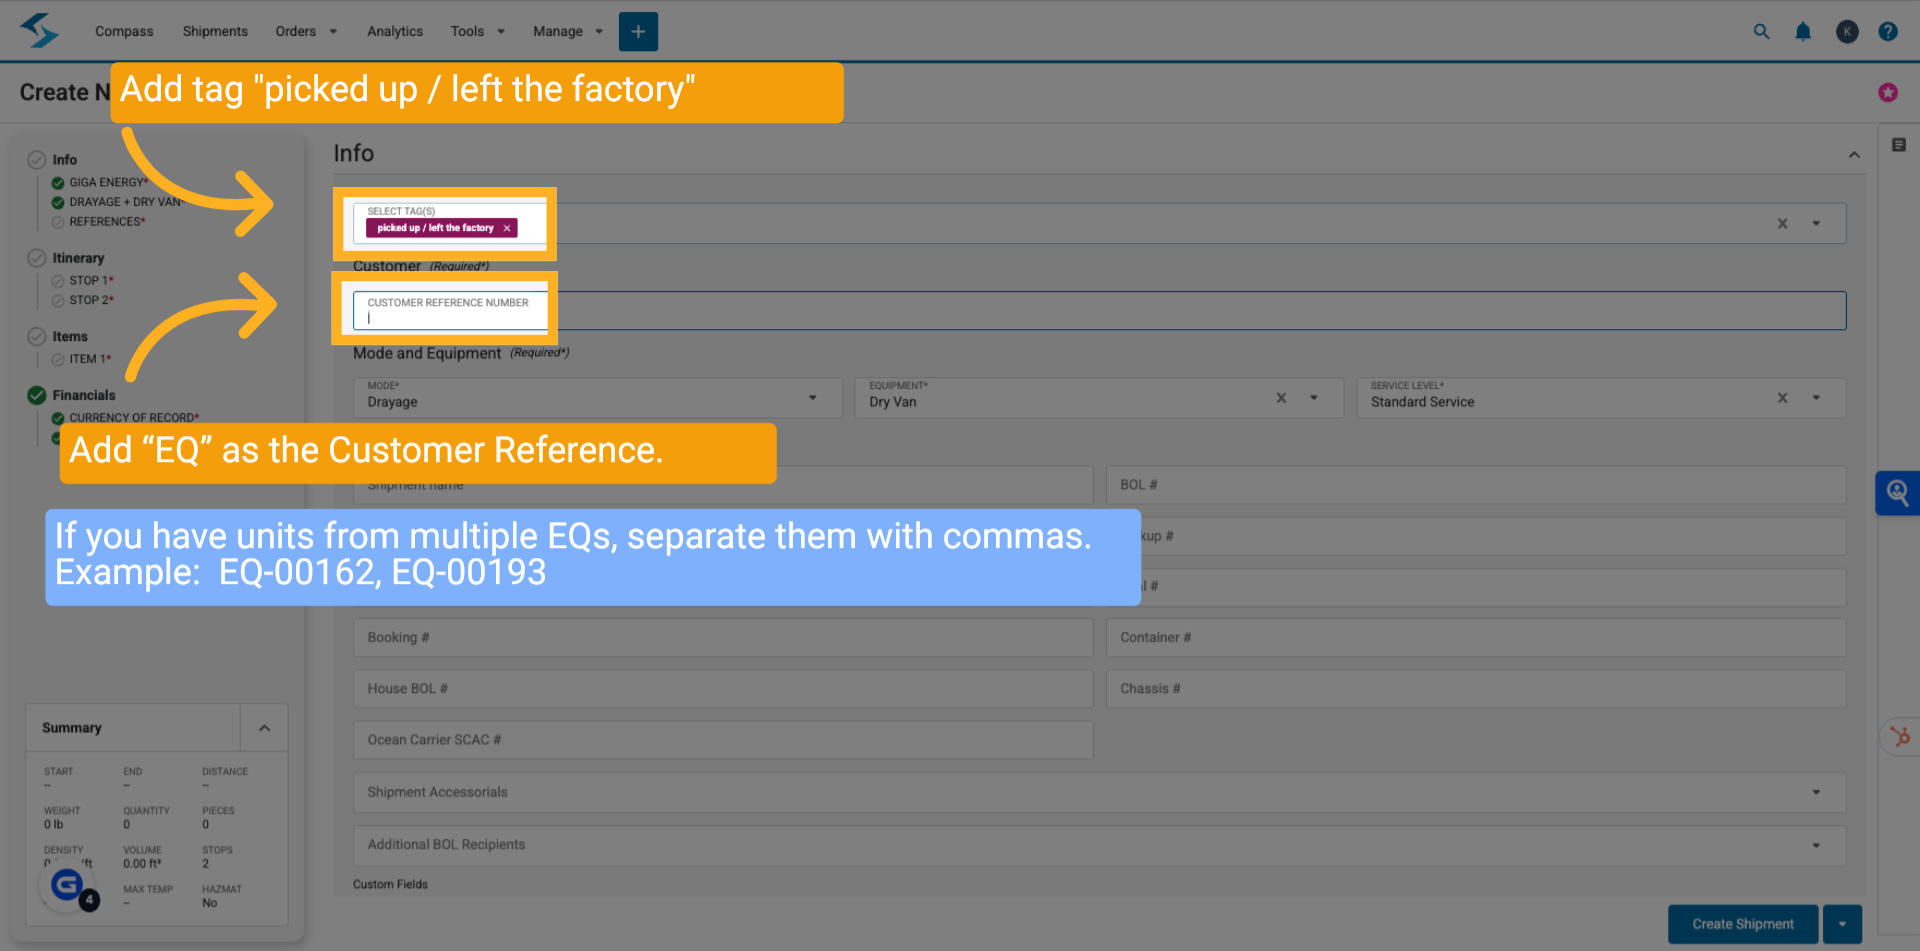
Enter the Tags and include a "Customer Reference Number"; use the EQ as the key identifier for this shipment.
If you have units from multiple EQs, separate them with commas.
Example: EQ-00162, EQ-00193
4 Mandatory Fields to Enter
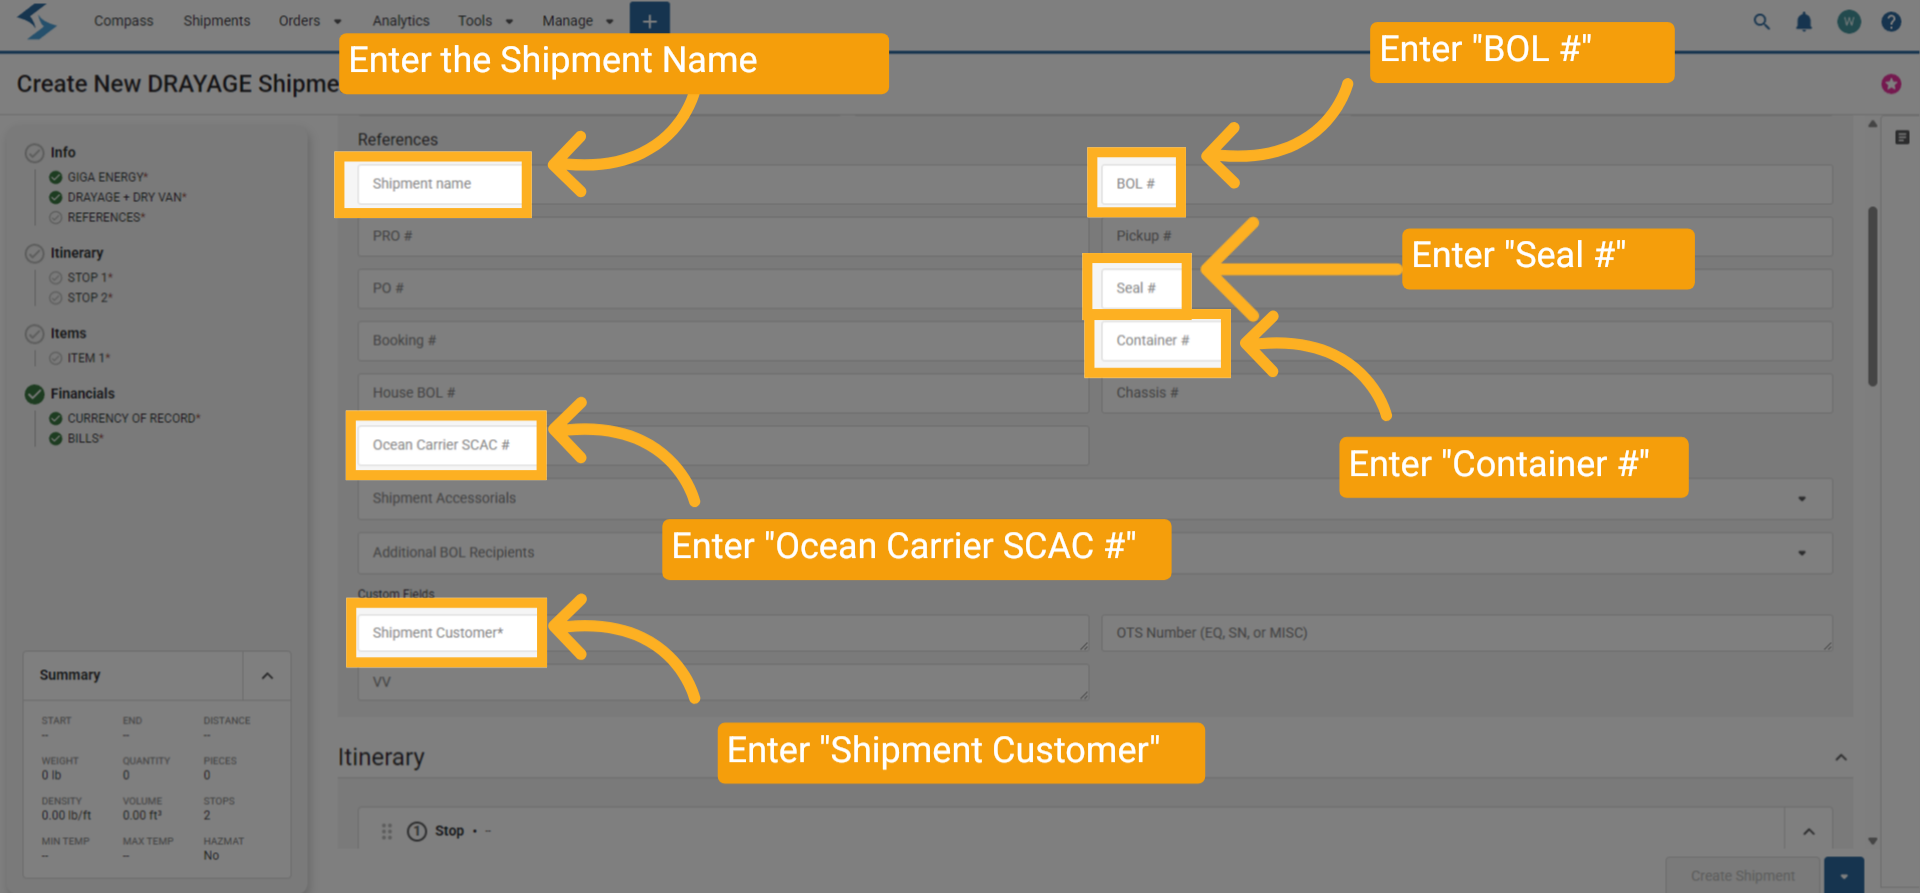
Enter the Deal Name as "Shipment name", enter the "B O L Number", enter "Seal Number", enter "Container Number", enter "Ocean Carrier SCAC Number"
5 Enter Itinerary
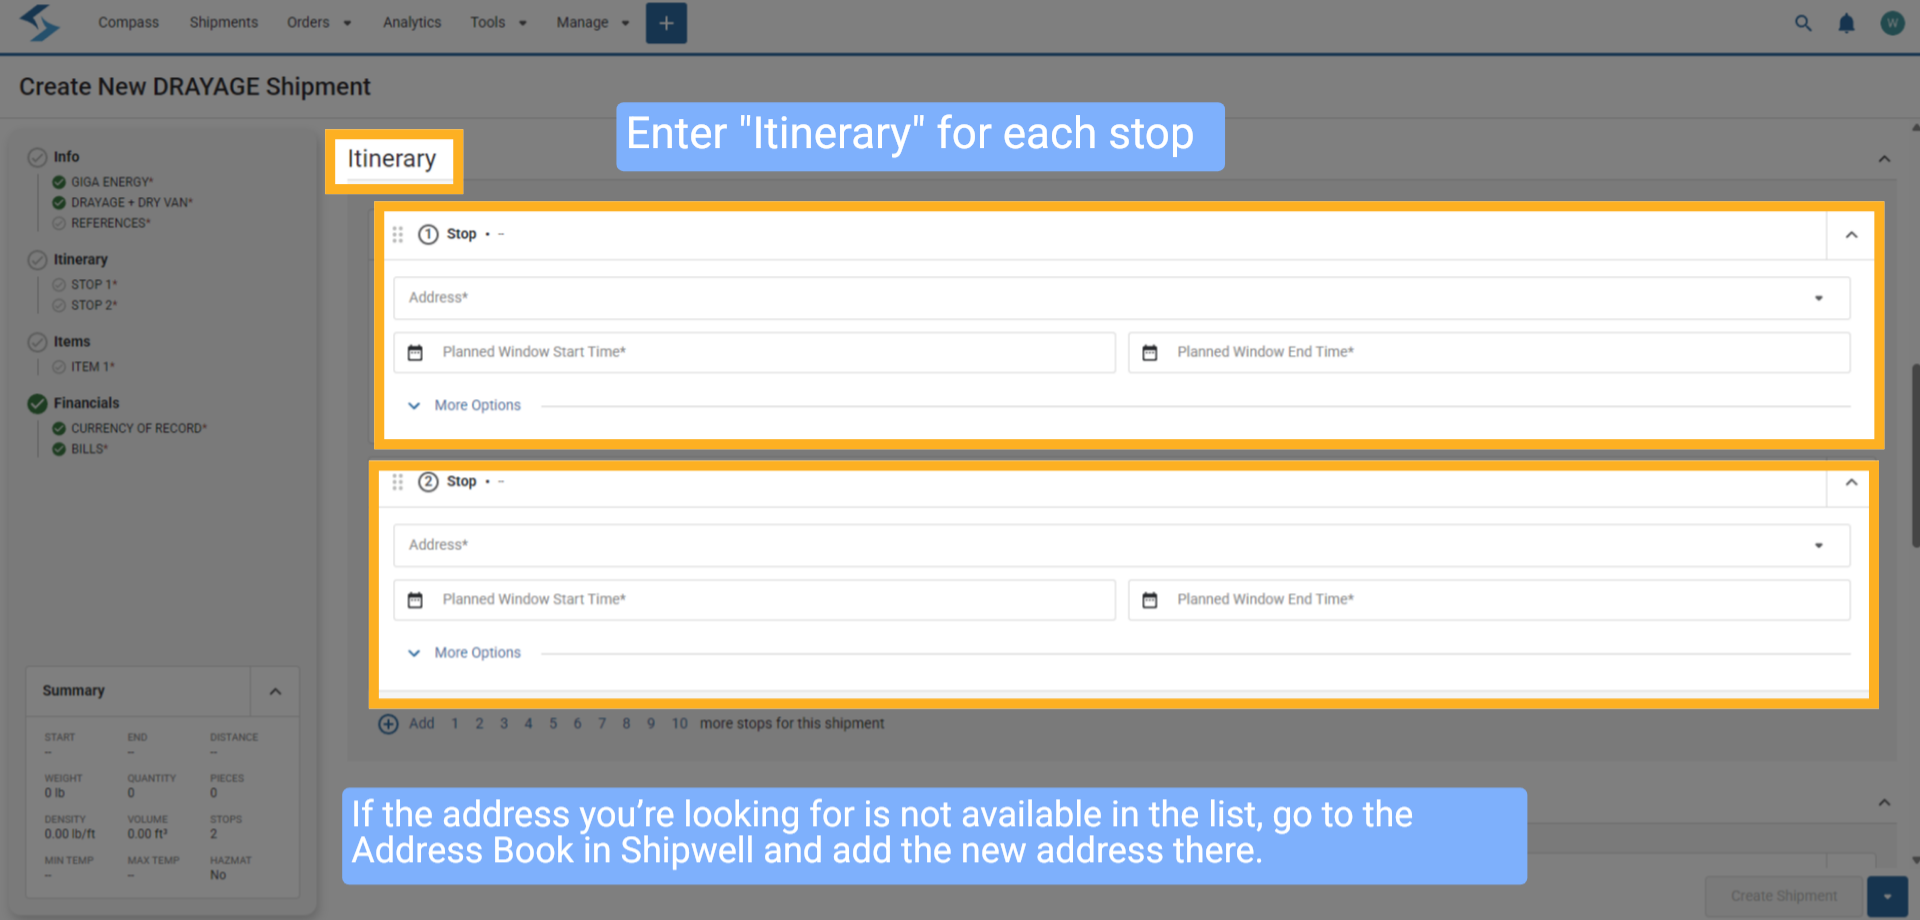
Please enter the "Itinerary" information along with dates, address of each port for each shipping stop originating from China or India to Long Beach. If the address you’re looking for is not available in the list, go to the Address Book in Shipwell and add the new address there.
6 Enter Product / Item Shipping
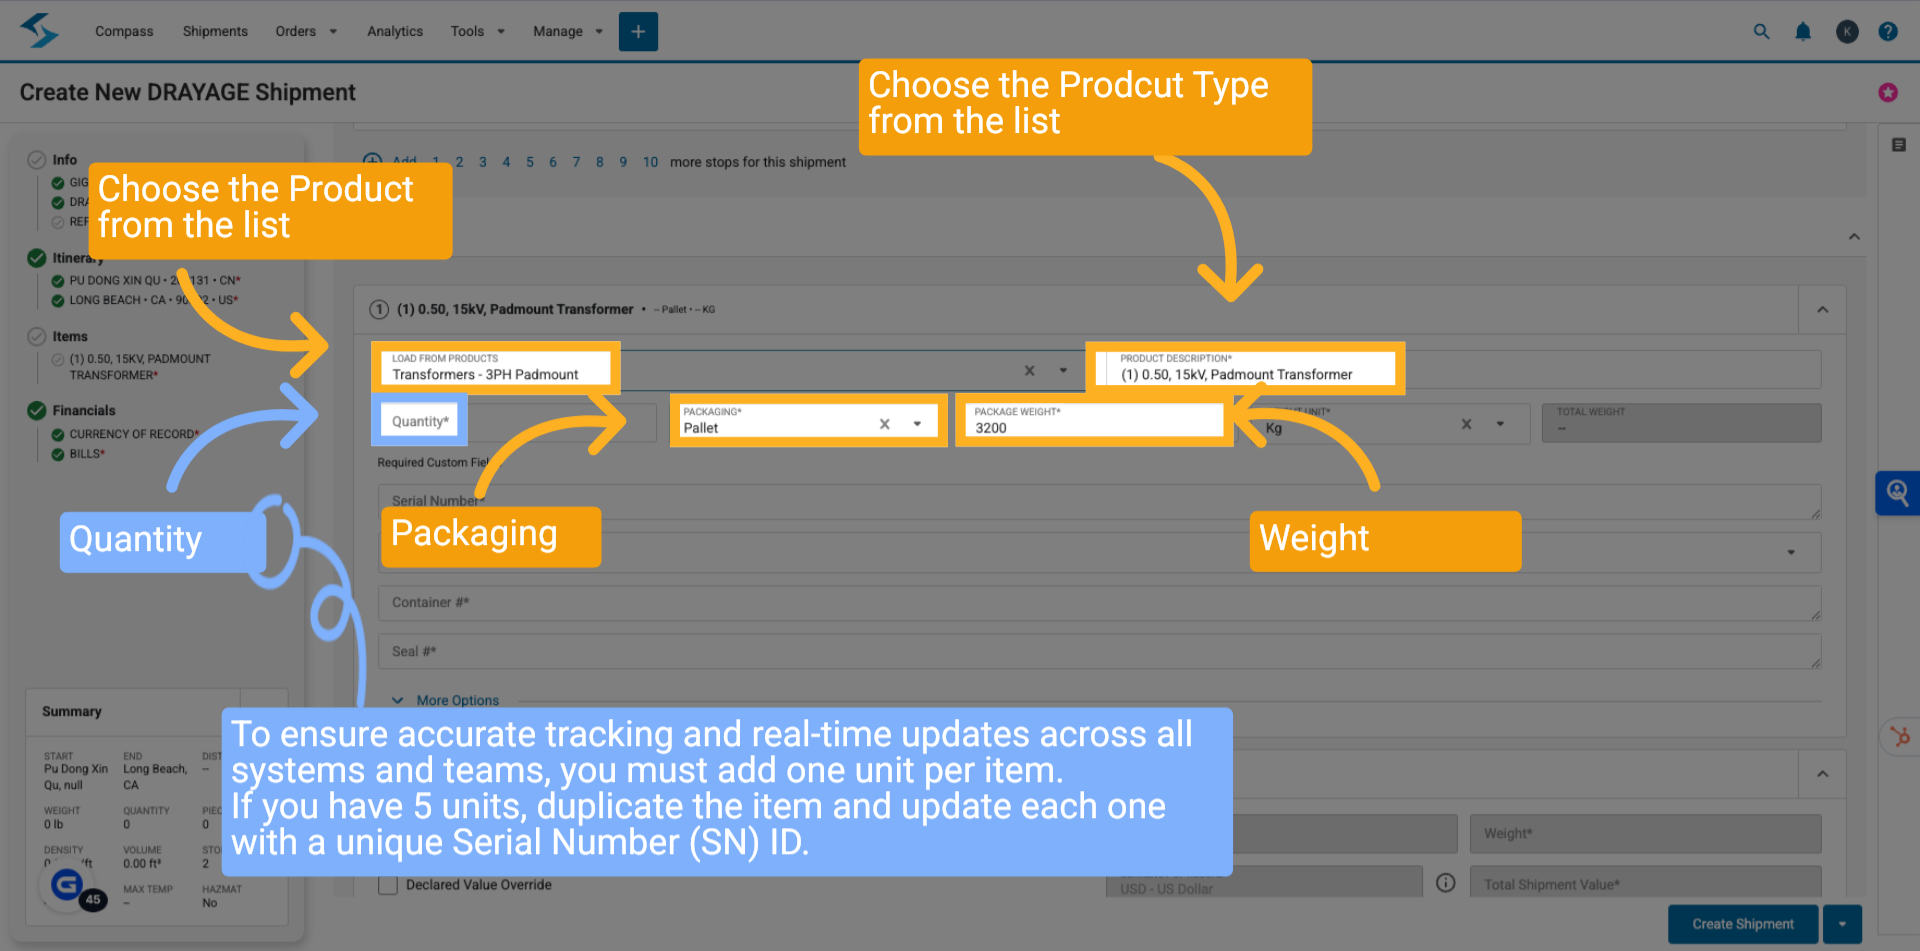
Enter the Product and Description, Quantity, Packaging, and Weight. To ensure accurate tracking and real-time updates across all systems and teams, you must add one unit per item.
If you have 5 units, duplicate the item and update each one with a unique Serial Number (SN) ID.
7 Enter Dimensions
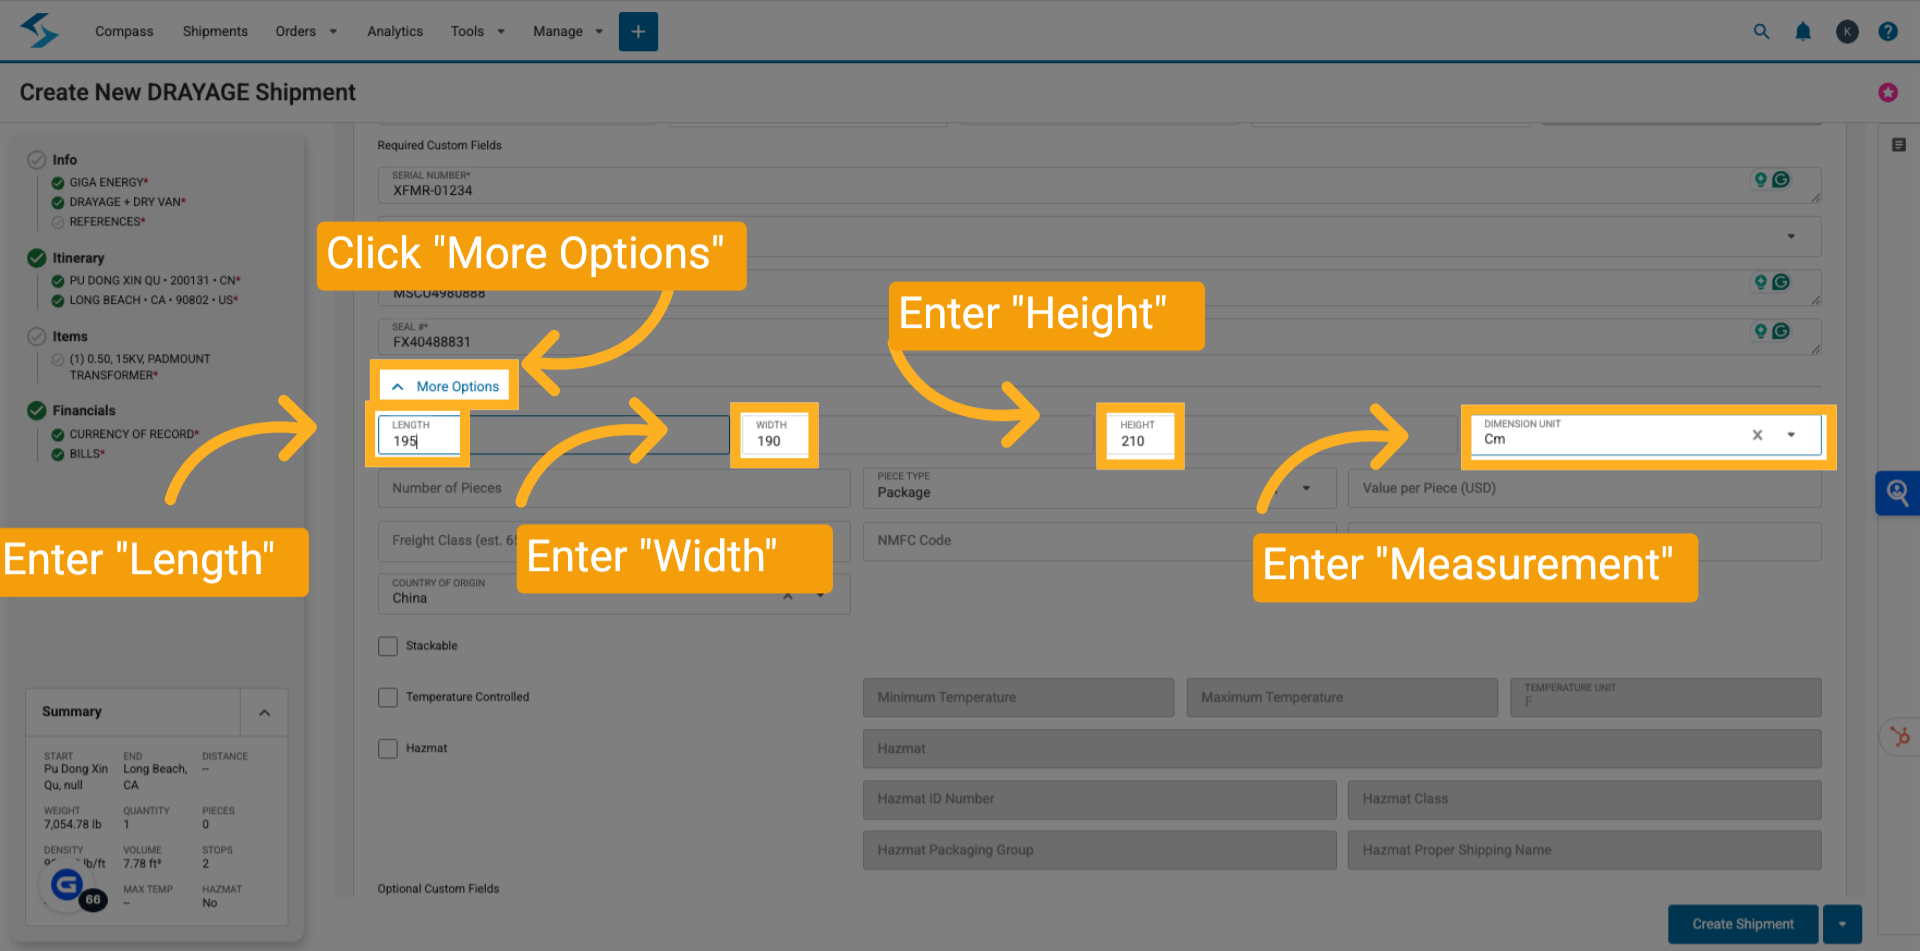
First Click "More Options", and then enter in Length, Width, Height, and make sure the measurement is "Cm"
8 Serial from Monday
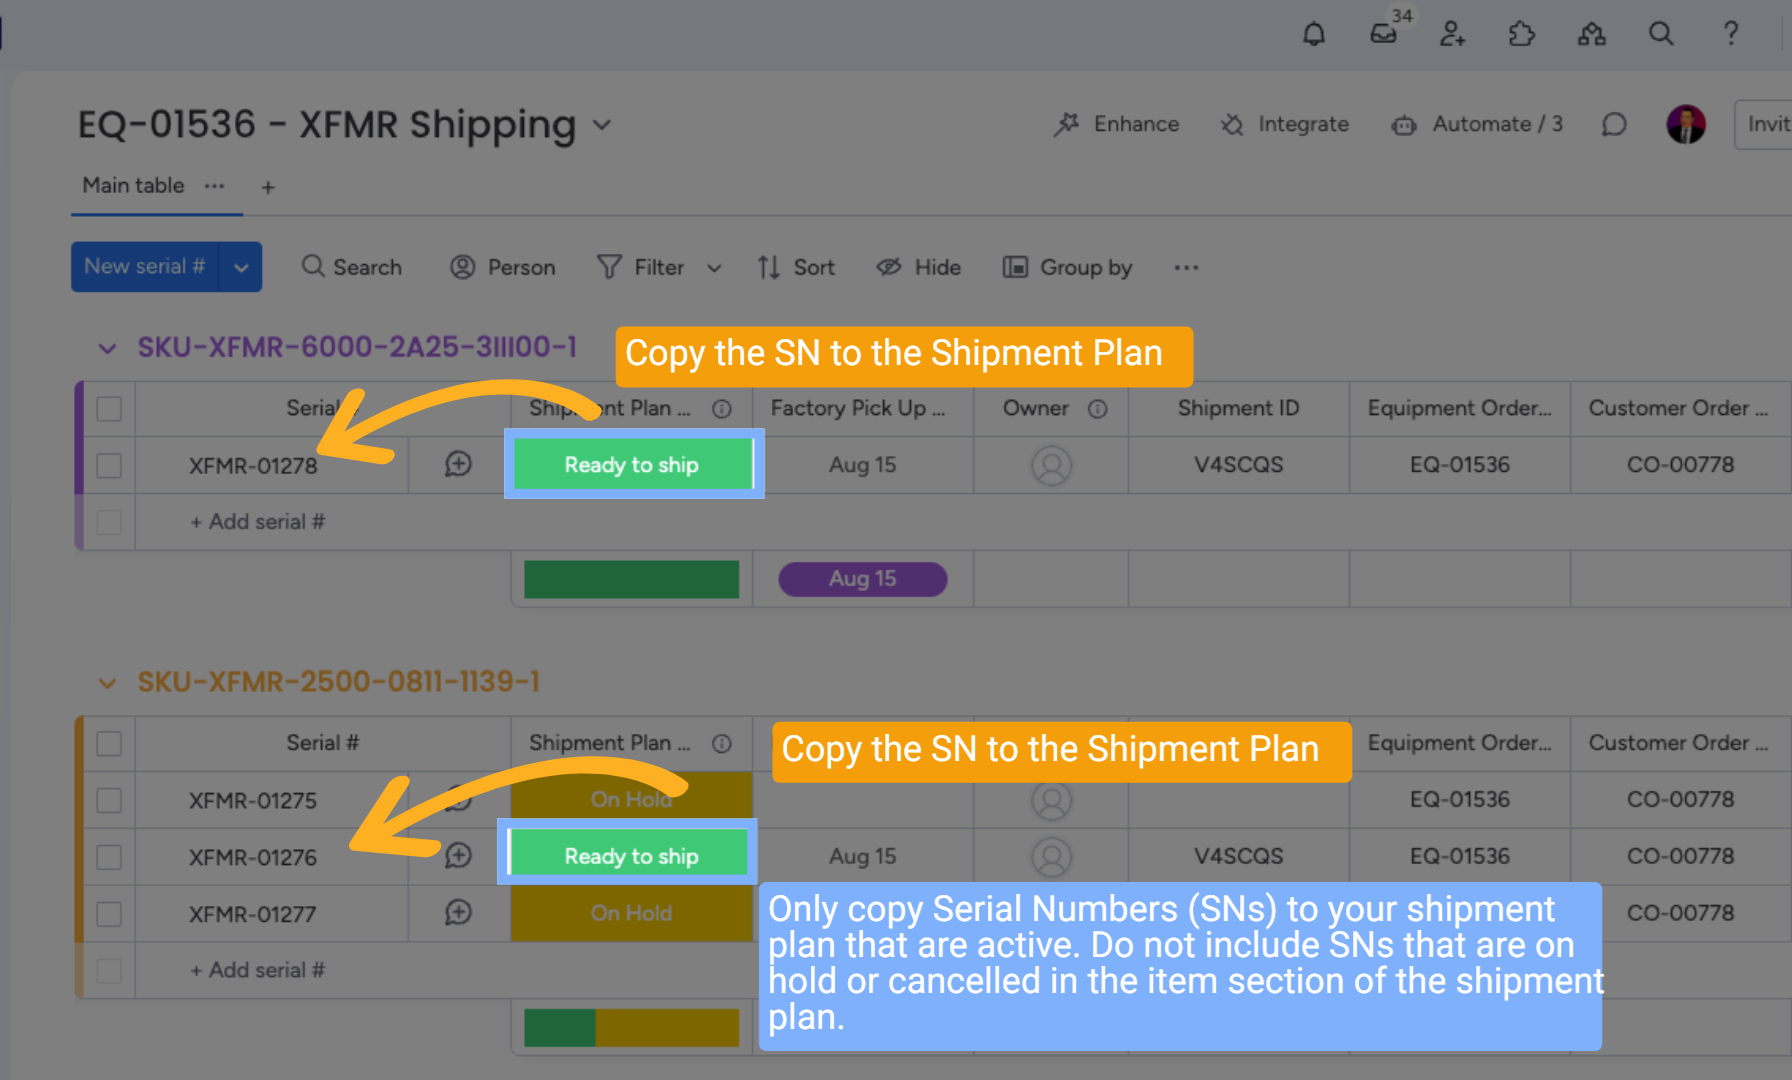
Enter in Serial Number, Container Number, and Seal Number. All mandatory fields must be completed. Only copy Serial Numbers (SNs) to your shipment plan that are active. Do not include SNs that are on hold or cancelled in the item section of the shipment plan.
9 Mandatory Fields
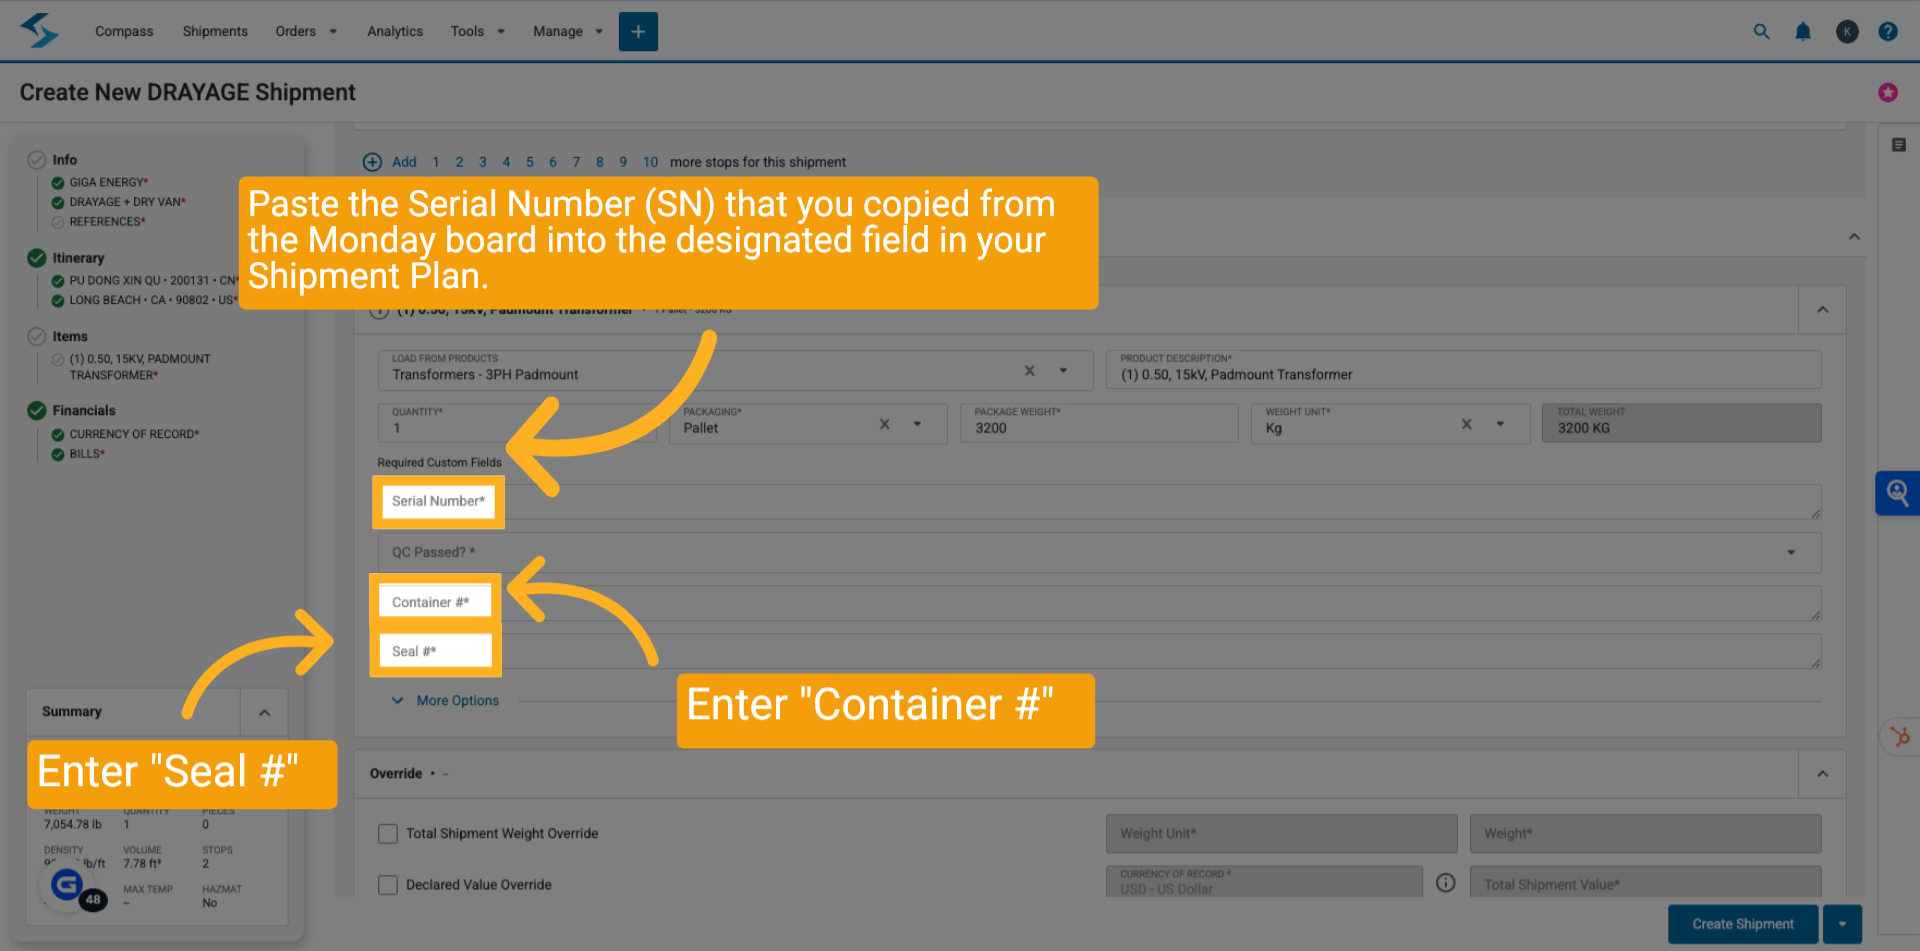
Enter in Serial Number, Container Number, and Seal Number. All mandatory fields must be completed. Paste the Serial Number (SN) that you copied from the Monday board into the designated field in your Shipment Plan.
10 SKU from Monday.com
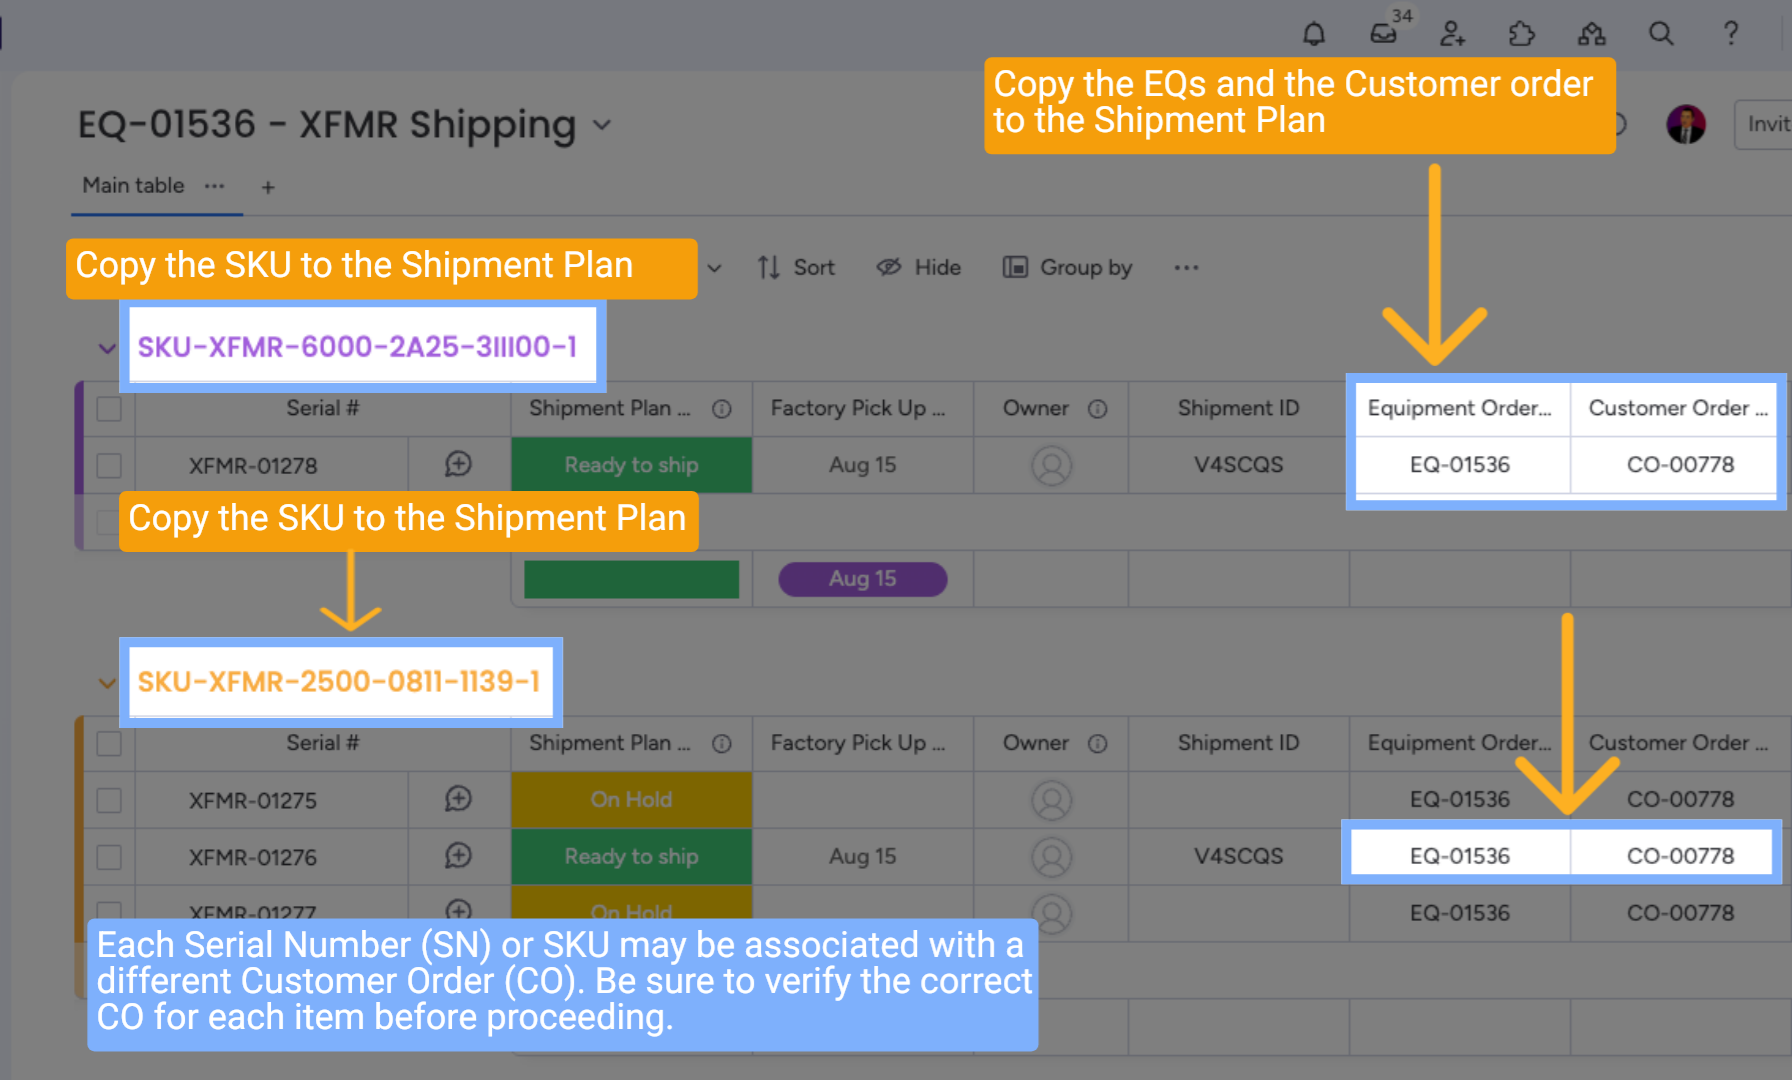
Each Serial Number (SN) or SKU may be associated with a different Customer Order (CO). Be sure to verify the correct CO for each item before proceeding.
11 Enter Production, QC, and Product info
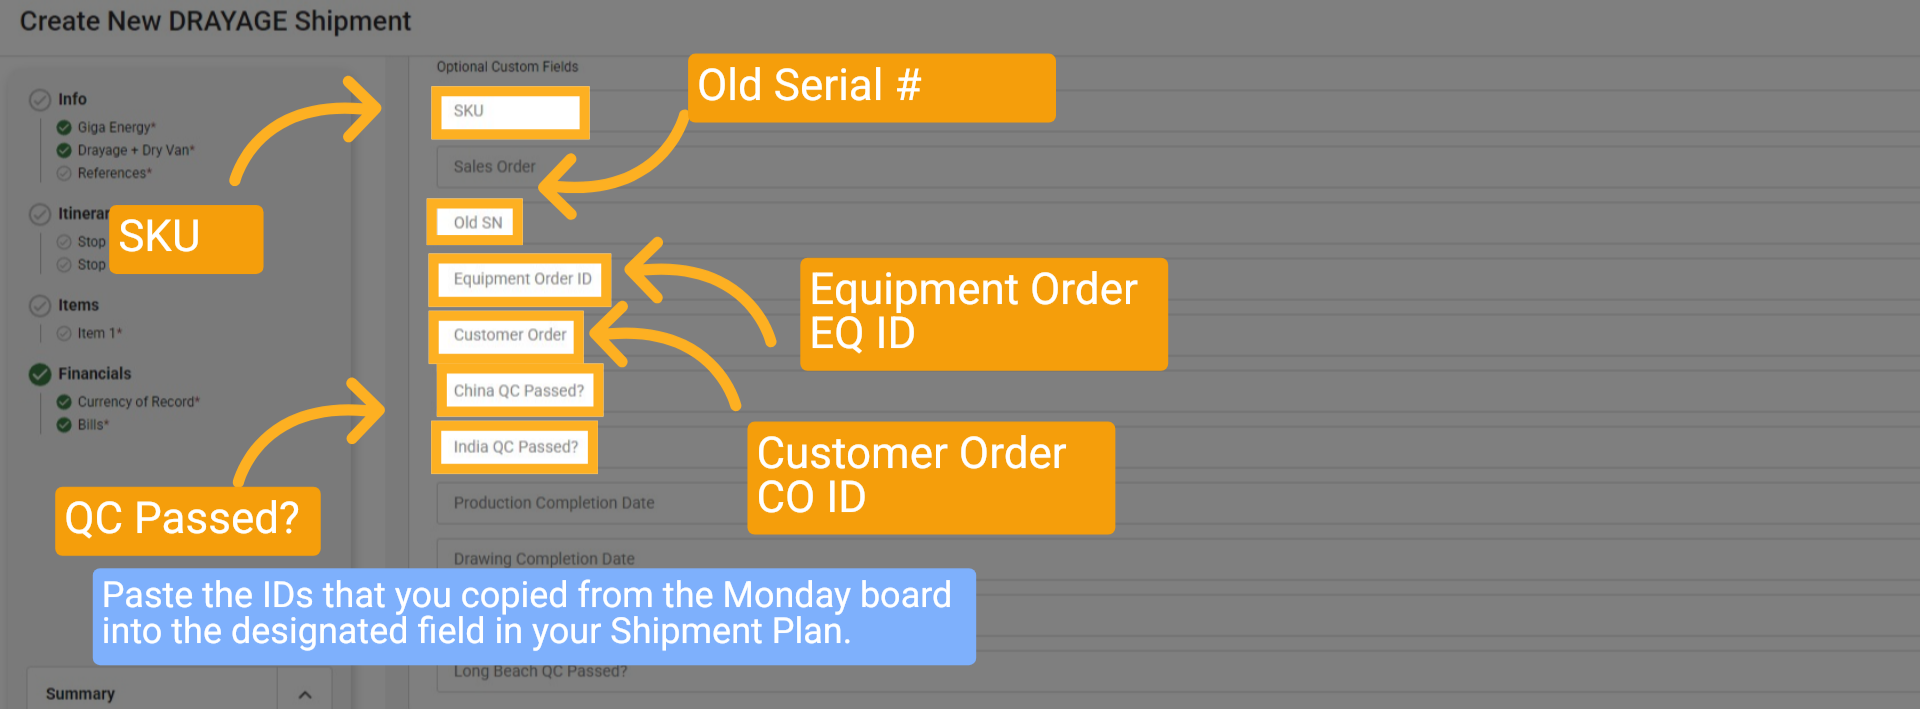
Enter production, QC, and product info, including SKU, Old Serial, Equipment Order ID, Customer Order ID, if China QC Passed, and if India QC Passed.
12 Create Shipment
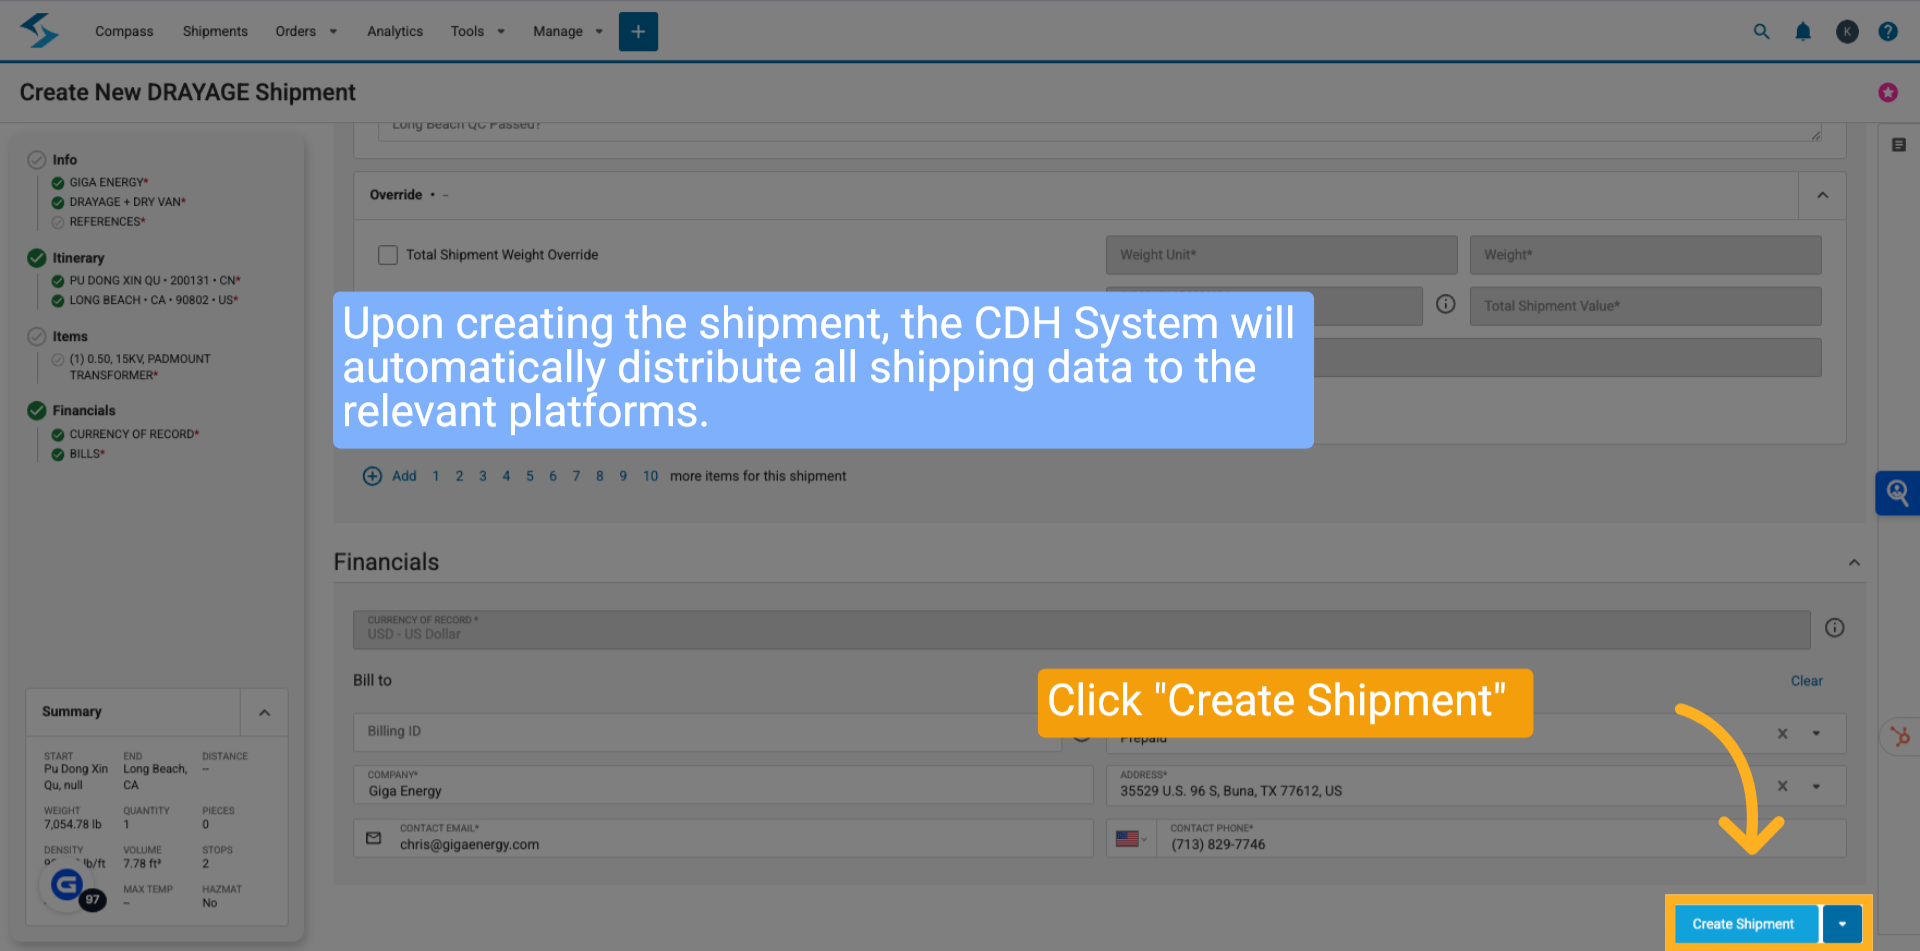
After entering your shipping information, please click the 'Create Shipment' button. It is important to note that all fields are mandatory. The CDH System will automatically distribute all shipping data to the relevant platforms that require it.
13 Real-Time Updates Across All Platforms
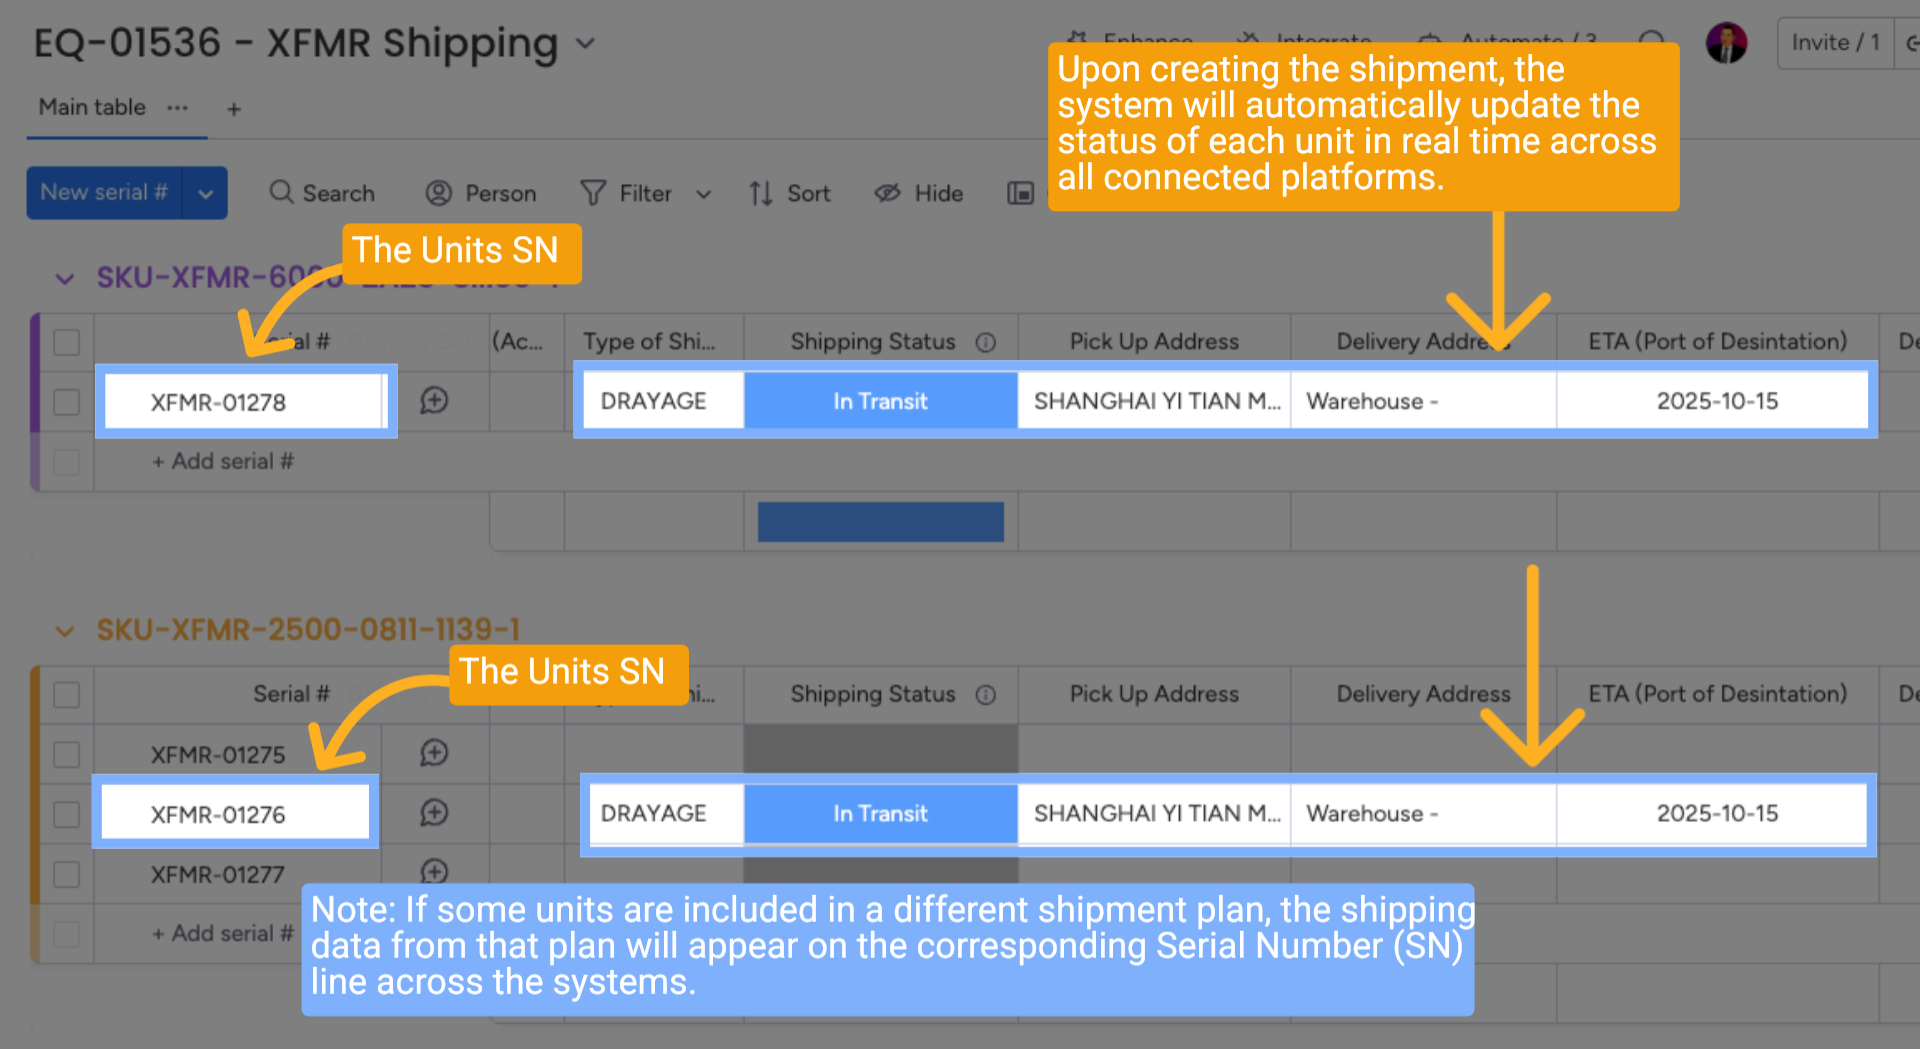
Upon creating the shipment, the system will automatically update the status of each unit in real time across all connected platforms.
Note: If some units are included in a different shipment plan, the shipping data from that plan will appear on the corresponding Serial Number (SN) line across the systems.
14 Move EQ from Shipping to Delivery
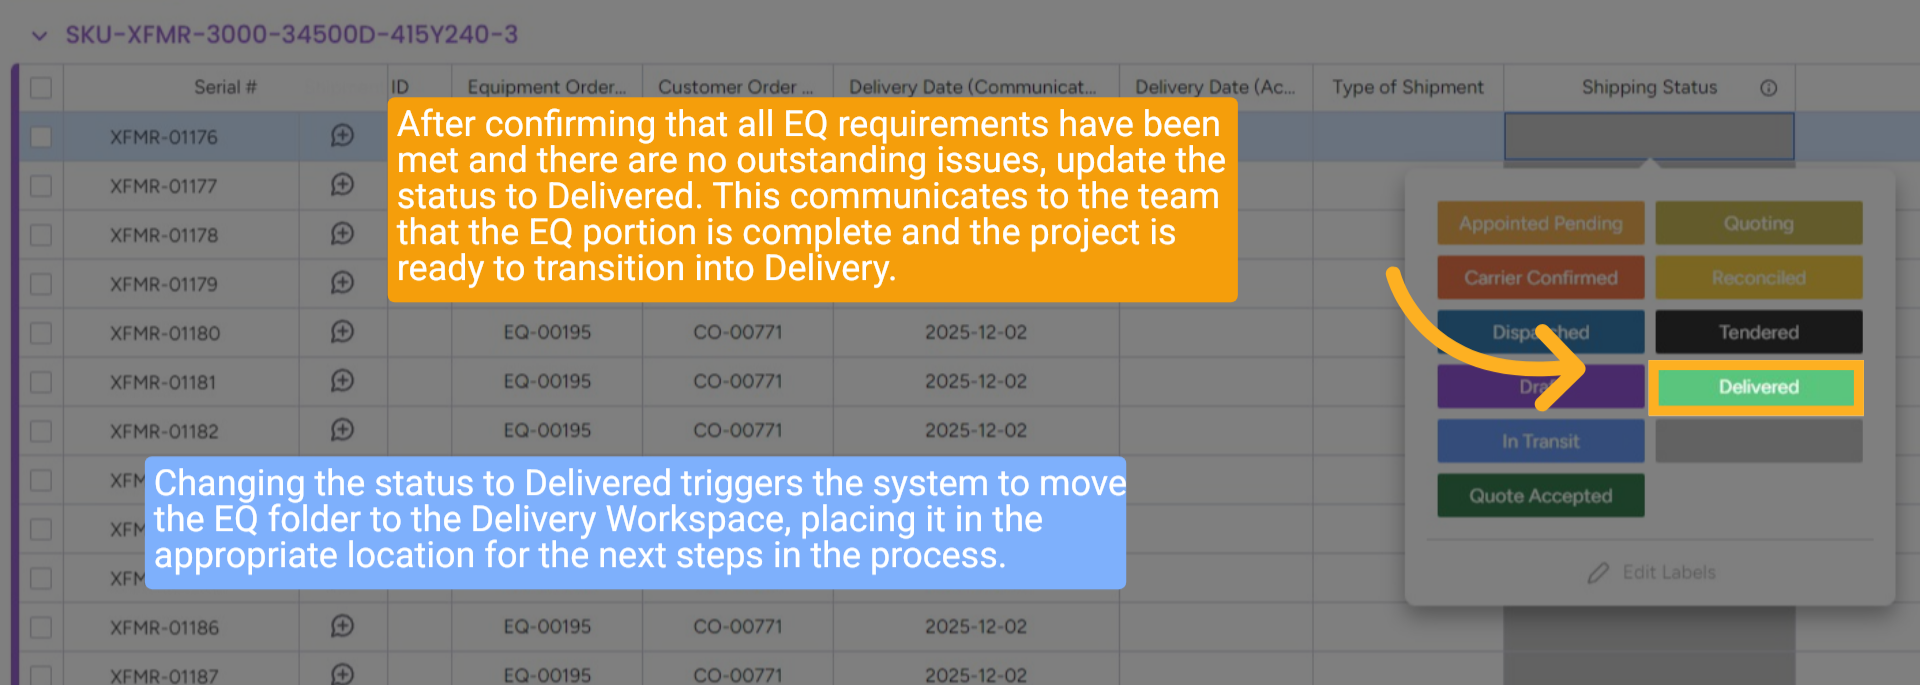
After confirming that all EQ requirements have been met and there are no outstanding issues, update the status to Delivered. This communicates to the team that the EQ portion is complete and the project is ready to transition into Delivery.
Changing the status to Delivered triggers the system to move the EQ folder to the Delivery Workspace, placing it in the appropriate location for the next steps in the process.
15 Wrap up
This guide covered creating a shipment plan in Shipwell, including selecting transport mode, entering shipment and equipment details, specifying ports and dates, adding product and SKU information, verifying customer data, and finalizing quality control and shipment creation for comprehensive shipment management.
16 Thank You!
Thank You for Watching!