
Creating a SKU in HubSpot
1 Introduction
In this guide, you will learn how to create a SKU in HubSpot. The process involves entering detailed product information and associating the SKU with customer orders to streamline inventory management. Let's get started.

2 Two ways to Create a SKU
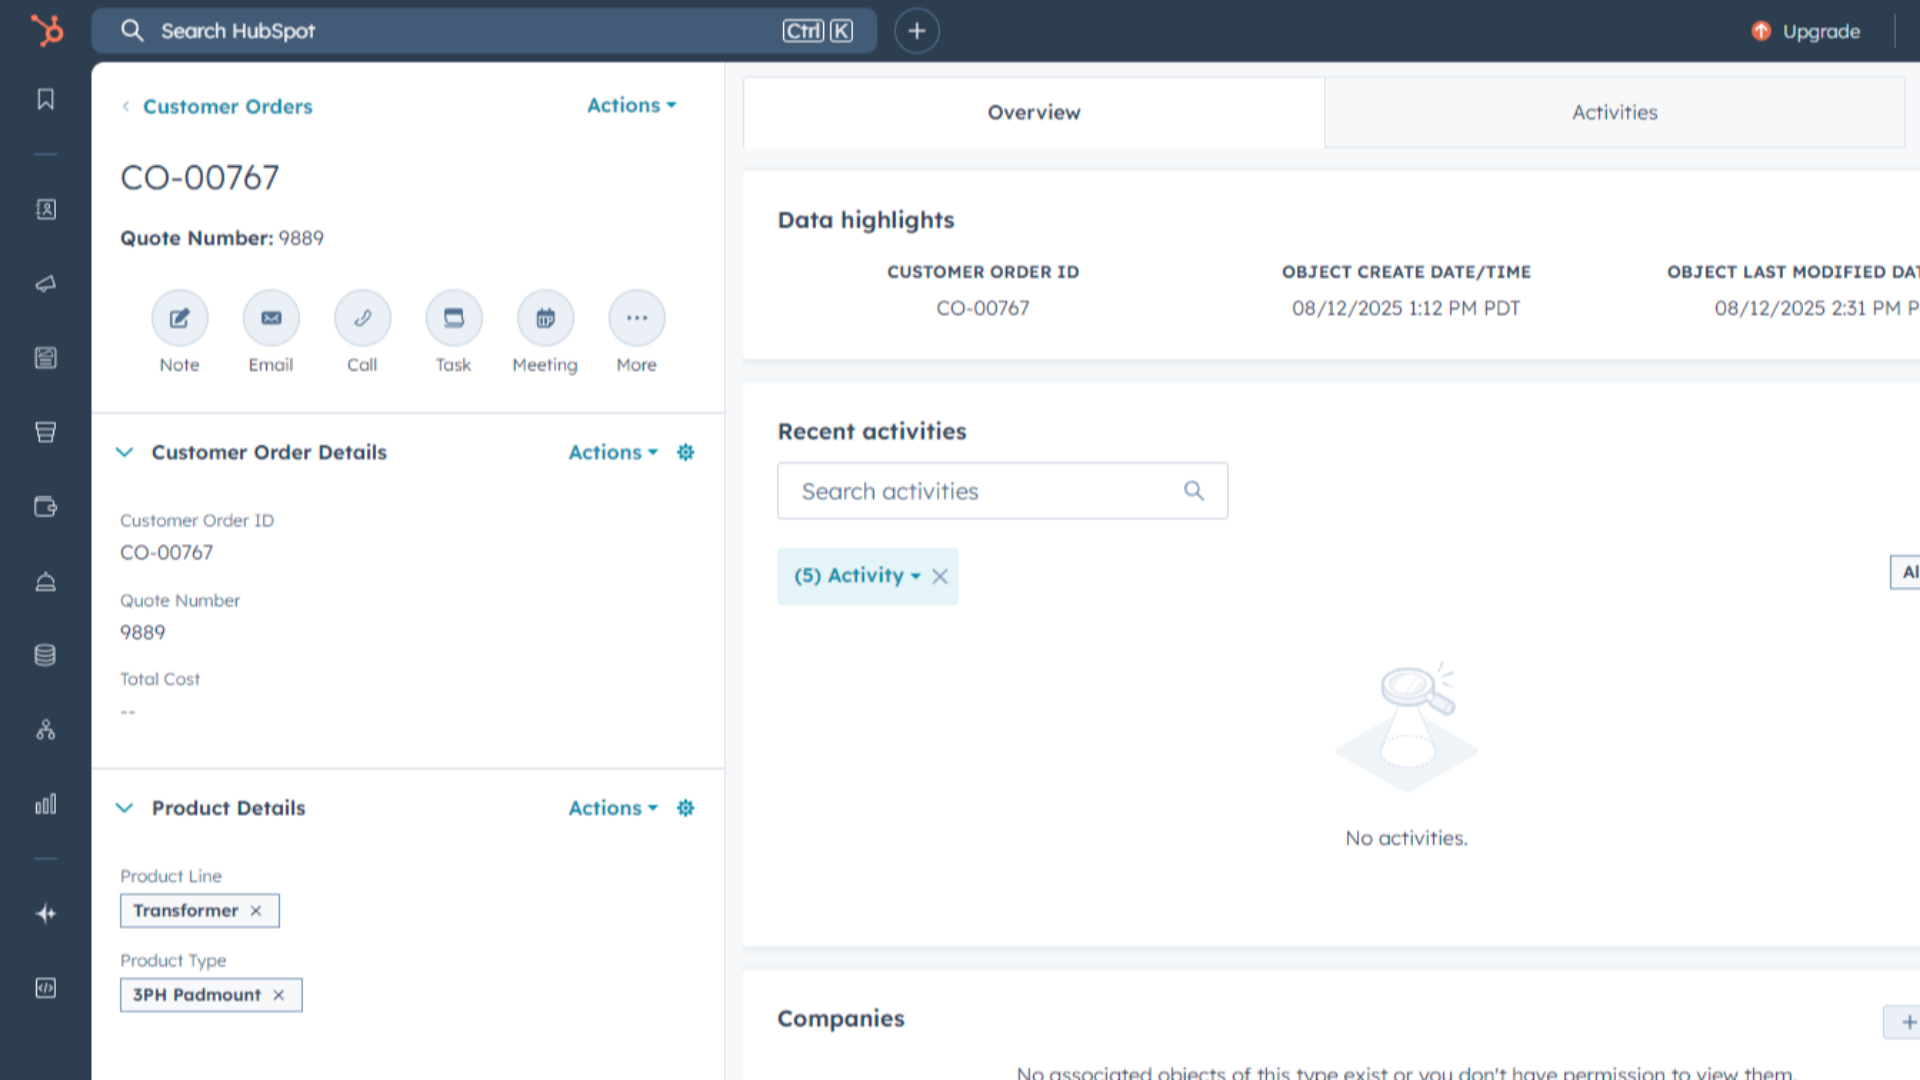
There are two ways to create a SKU in HubSpot. You can create a SKU from a Customer Order or individually. If you missed how to create a Customer Order, please click the link below.
3 Create a SKU on Customer Order
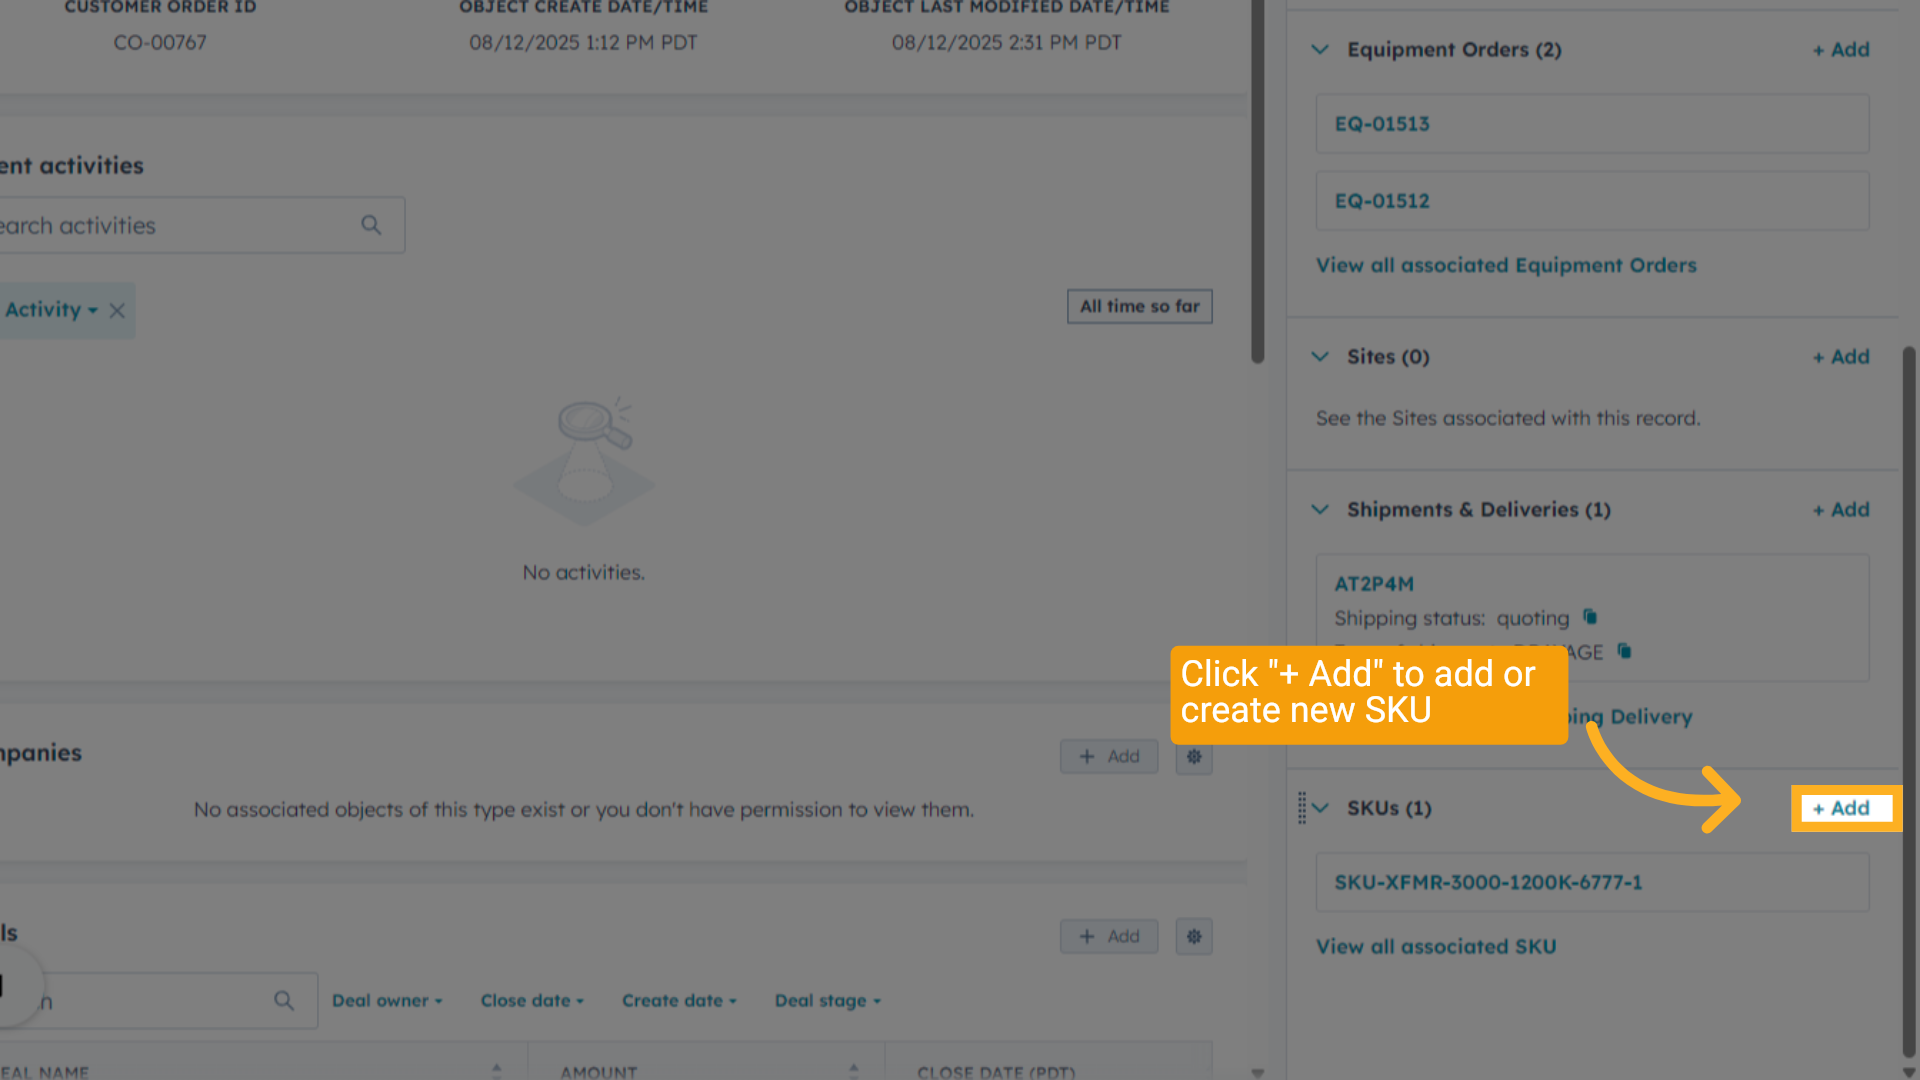
In a Customer Order, go to the SKU Section on the bottom Right and click "Add". This method automatically associated the new SKU with the Customer Order.
4 Customer Order Create a SKU
After clicking Add, a panel will slide in from the right, allowing you to begin entering the SKU details.
5 Individually Create SKUs
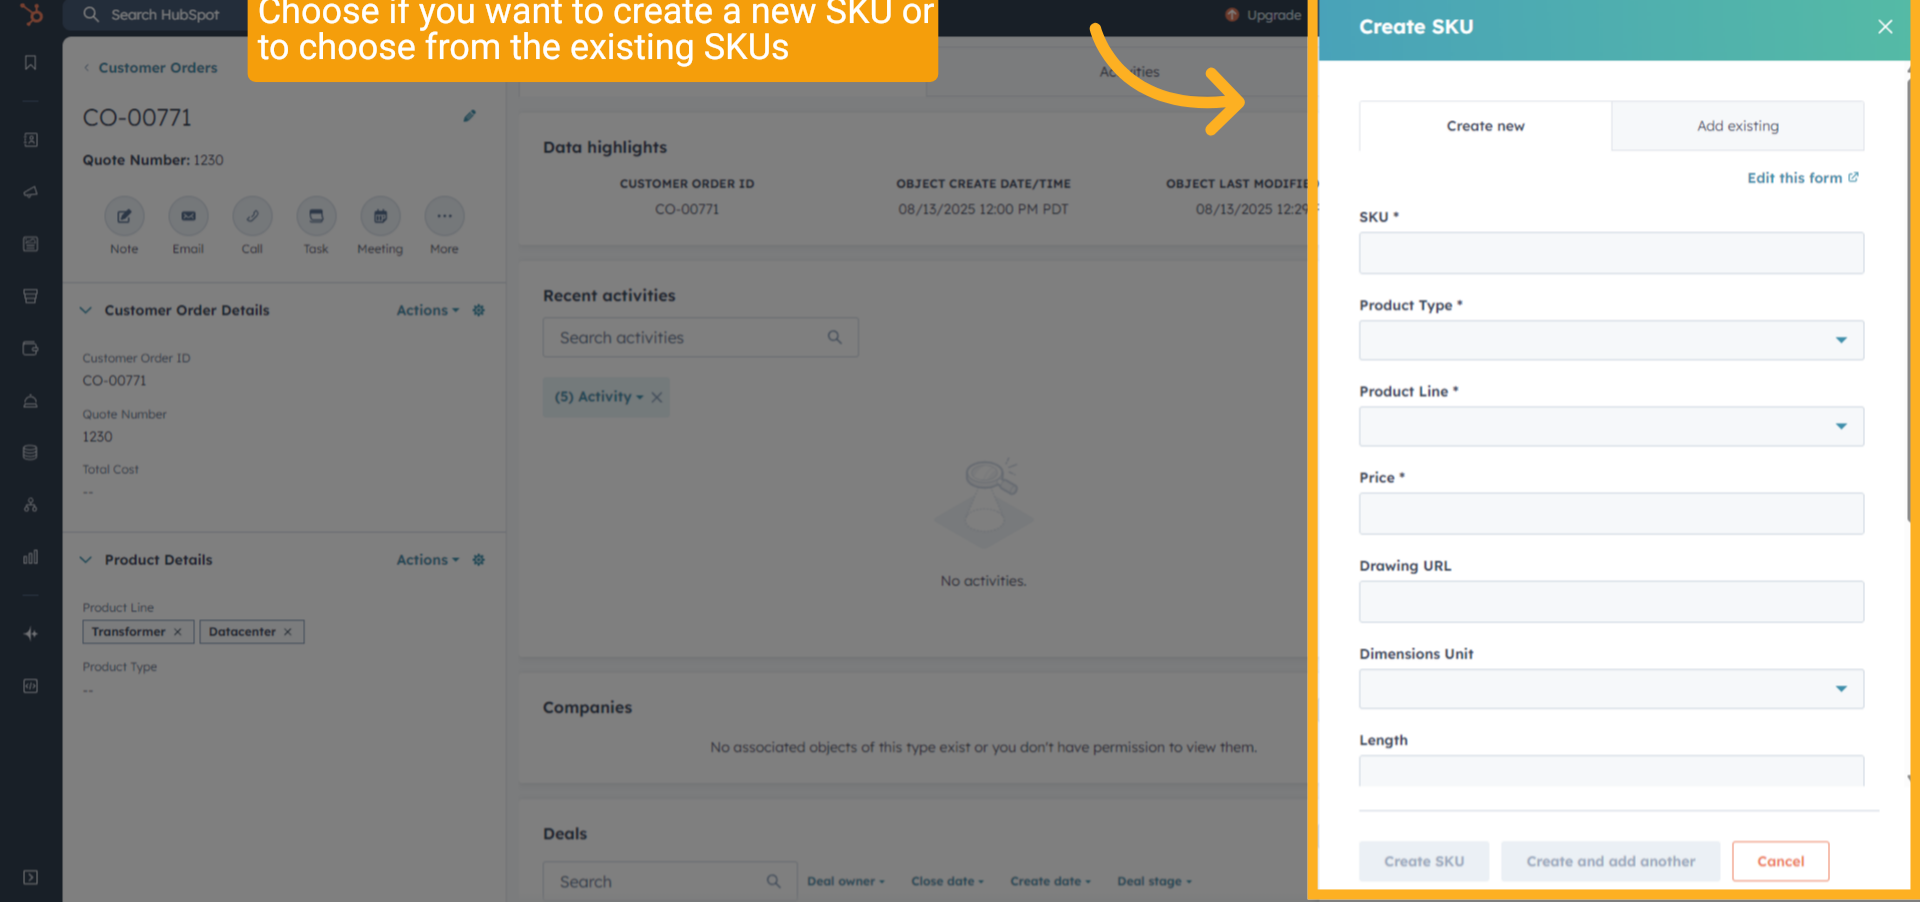
Alternatively, you can create a SKU independently. This approach is not tied to any specific order but uses the same creation steps as the Customer Order-based method.
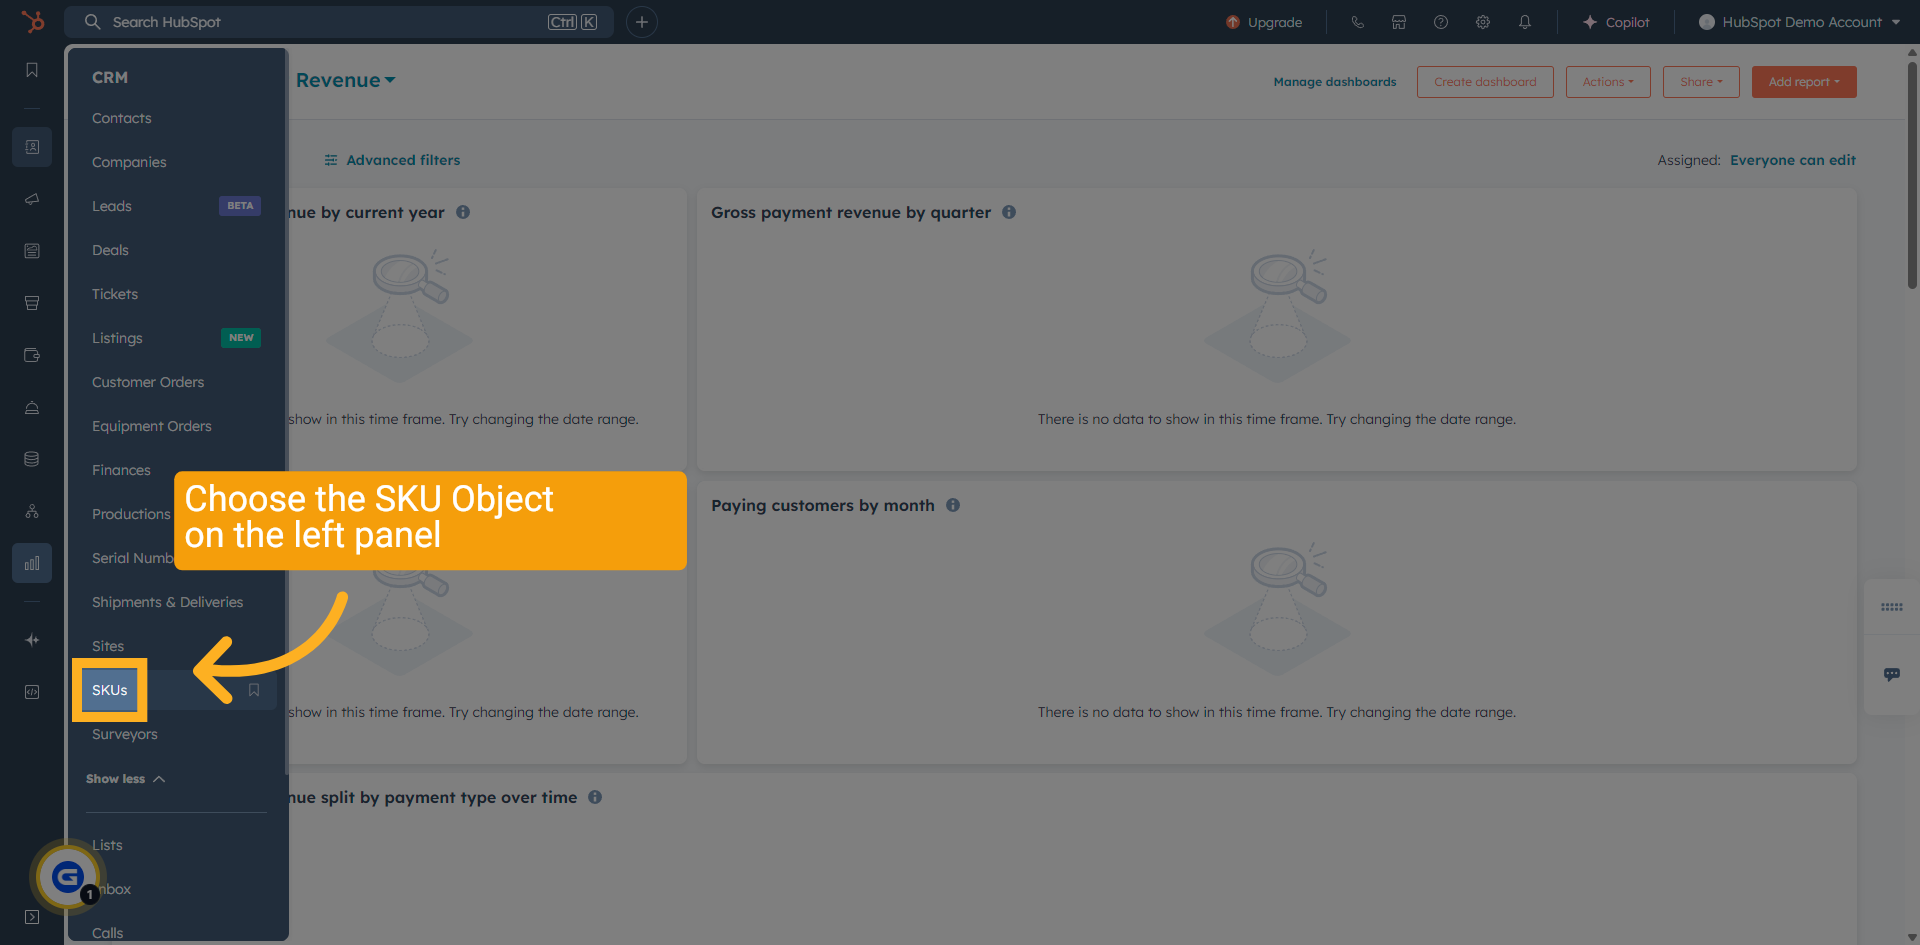
6 Find and Click "SKUs" in the menu
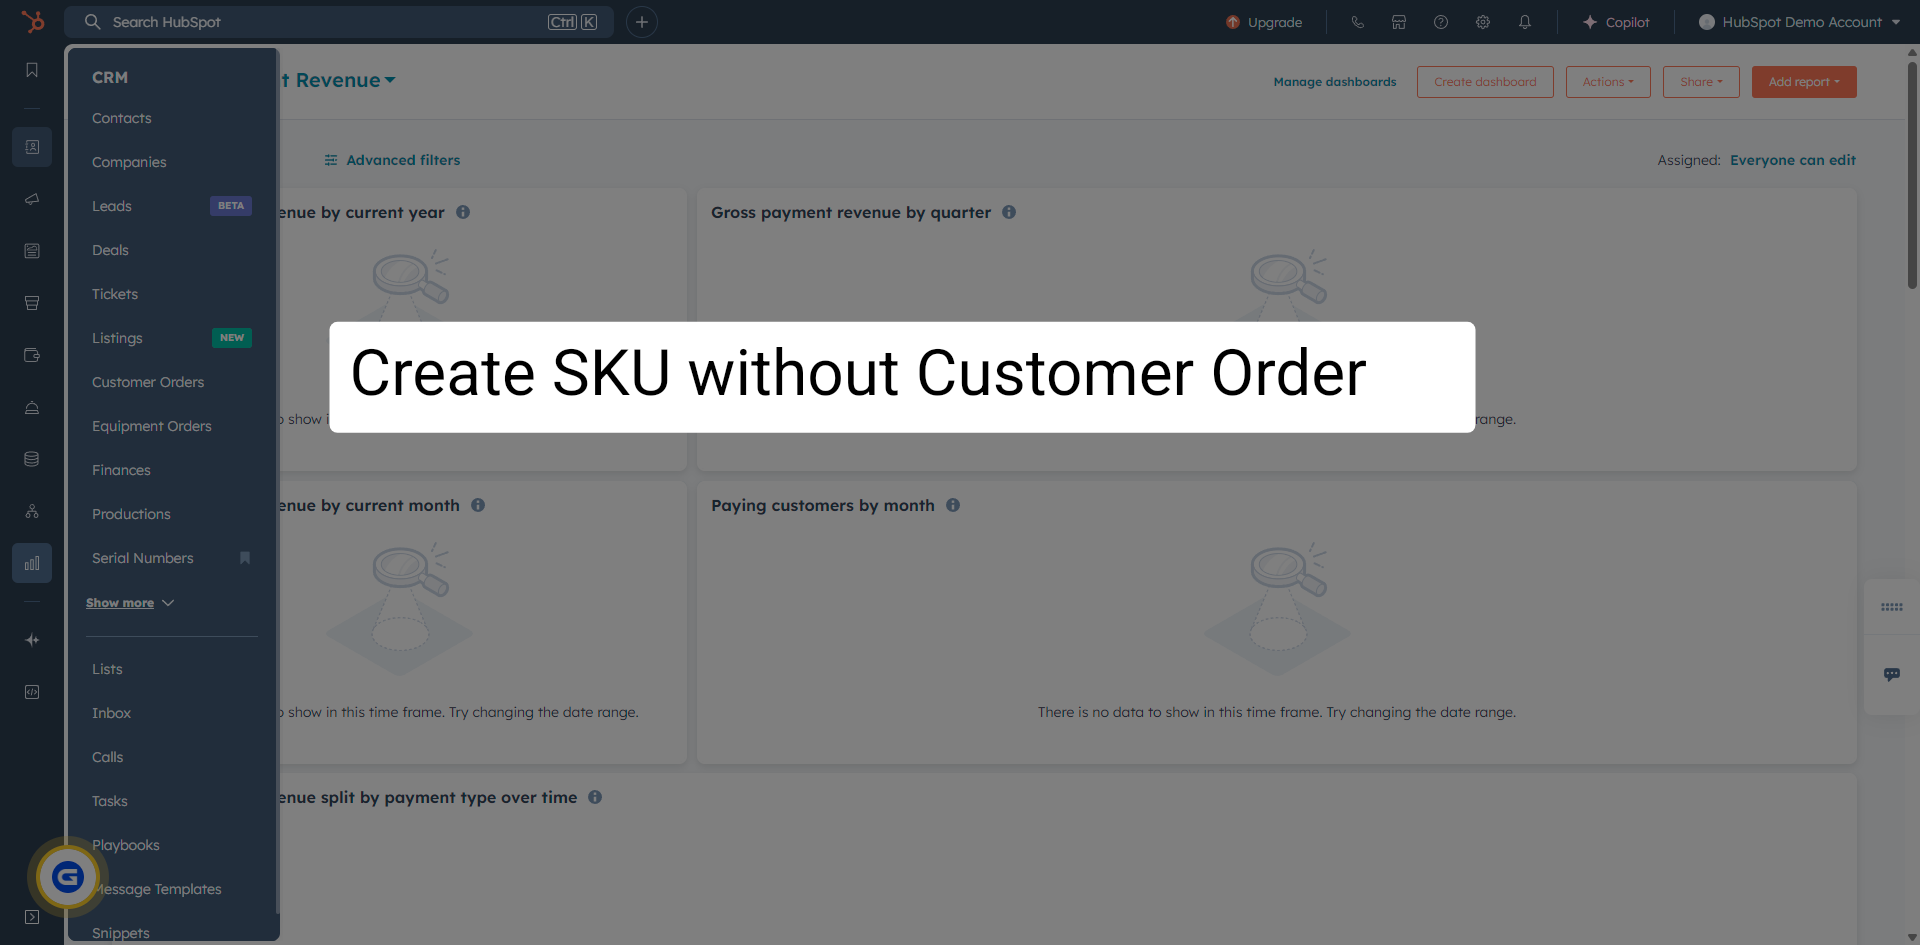
Click on "SKUs" in the menu to access the SKU section.
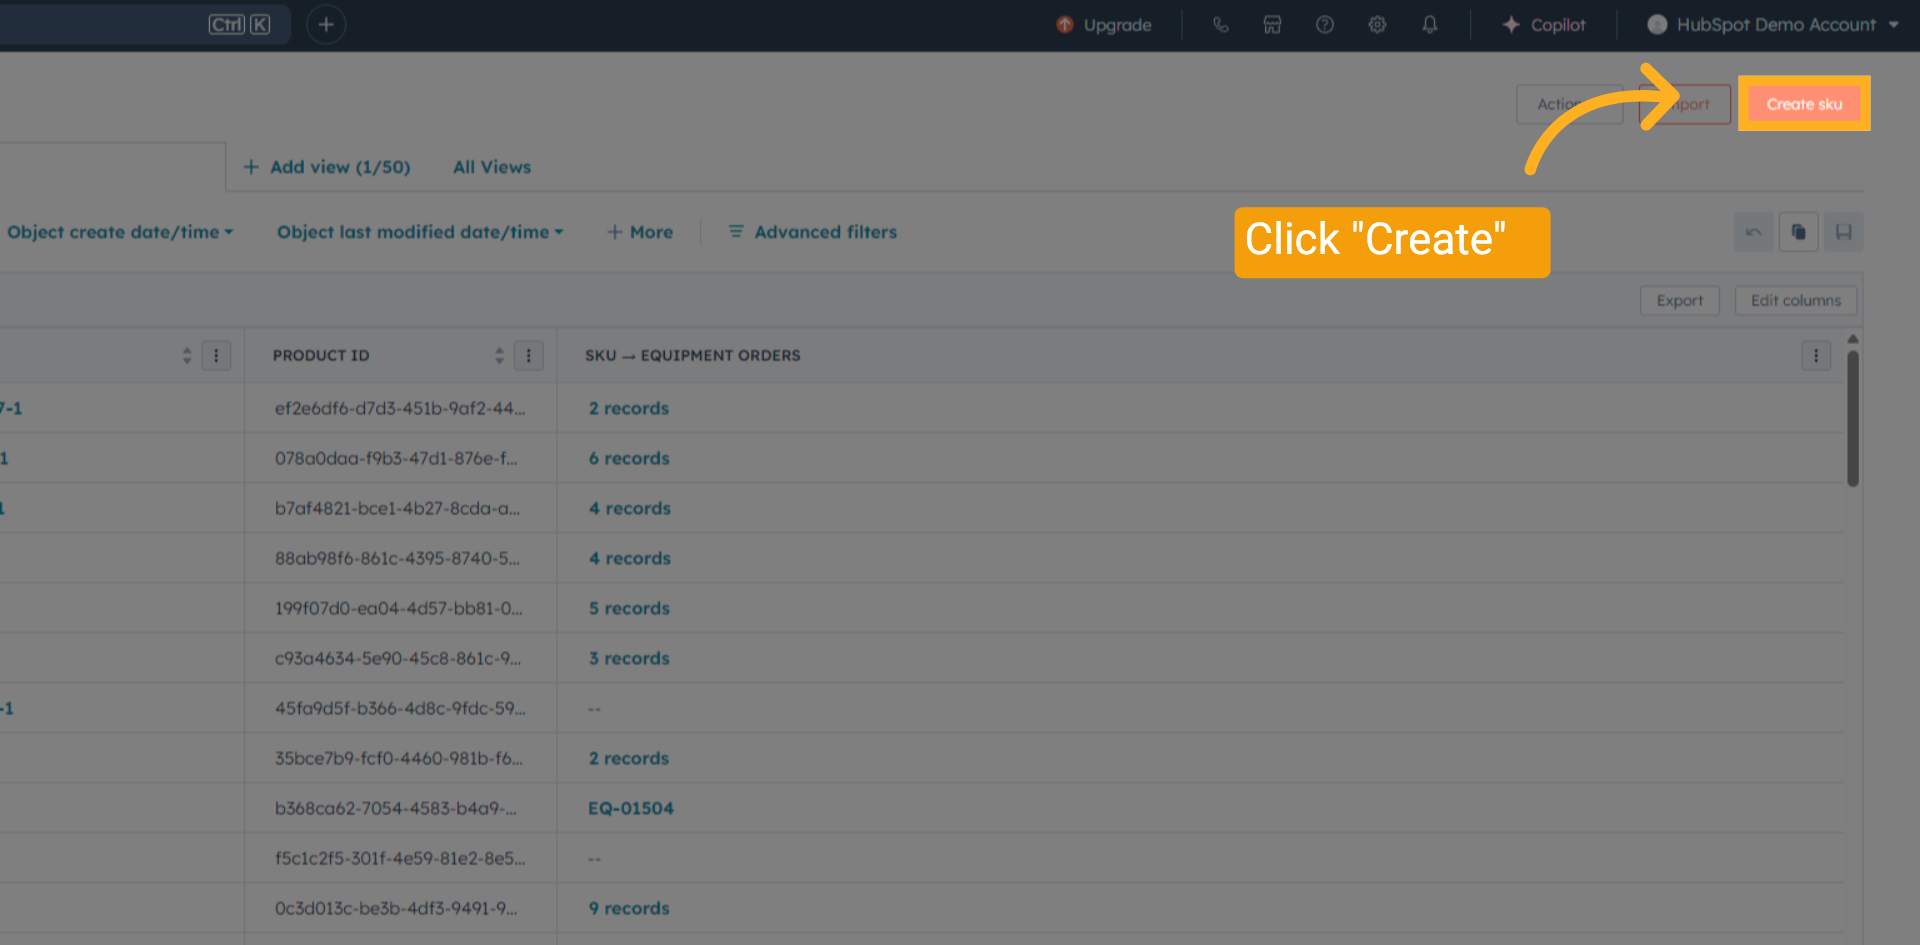
7 Top Right Corner Click "Create sku"
Click the "Create sku" button in the top right corner to start creating a new SKU.
8 Create a SKU ID
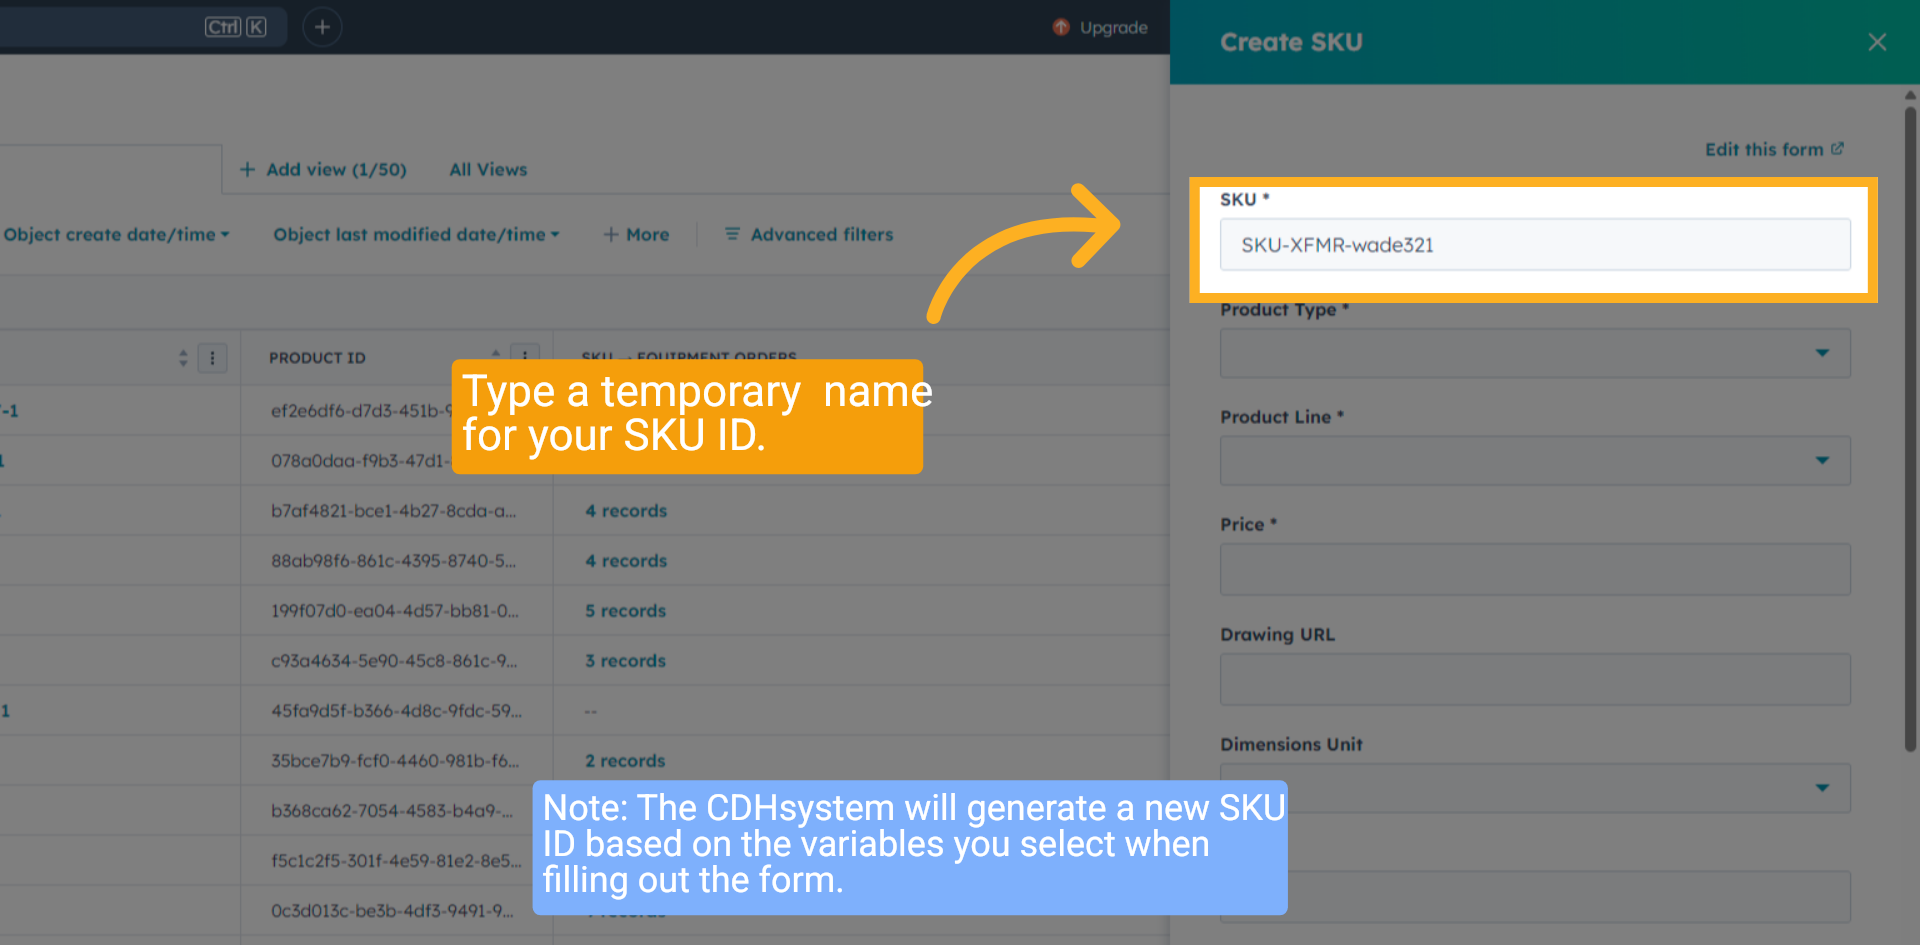
Fill in the SKU name field with a SKU-XFMR-[your name]-[random number].
The CDHsystem will automatically generate a new SKU ID when the "Create SKU" button is clicked, based on the variables you select in the new SKU form.
The CDHsystem will automatically generate a new SKU ID when the "Create SKU" button is clicked, based on the variables you select in the new SKU form.
9 Select "Product Type"
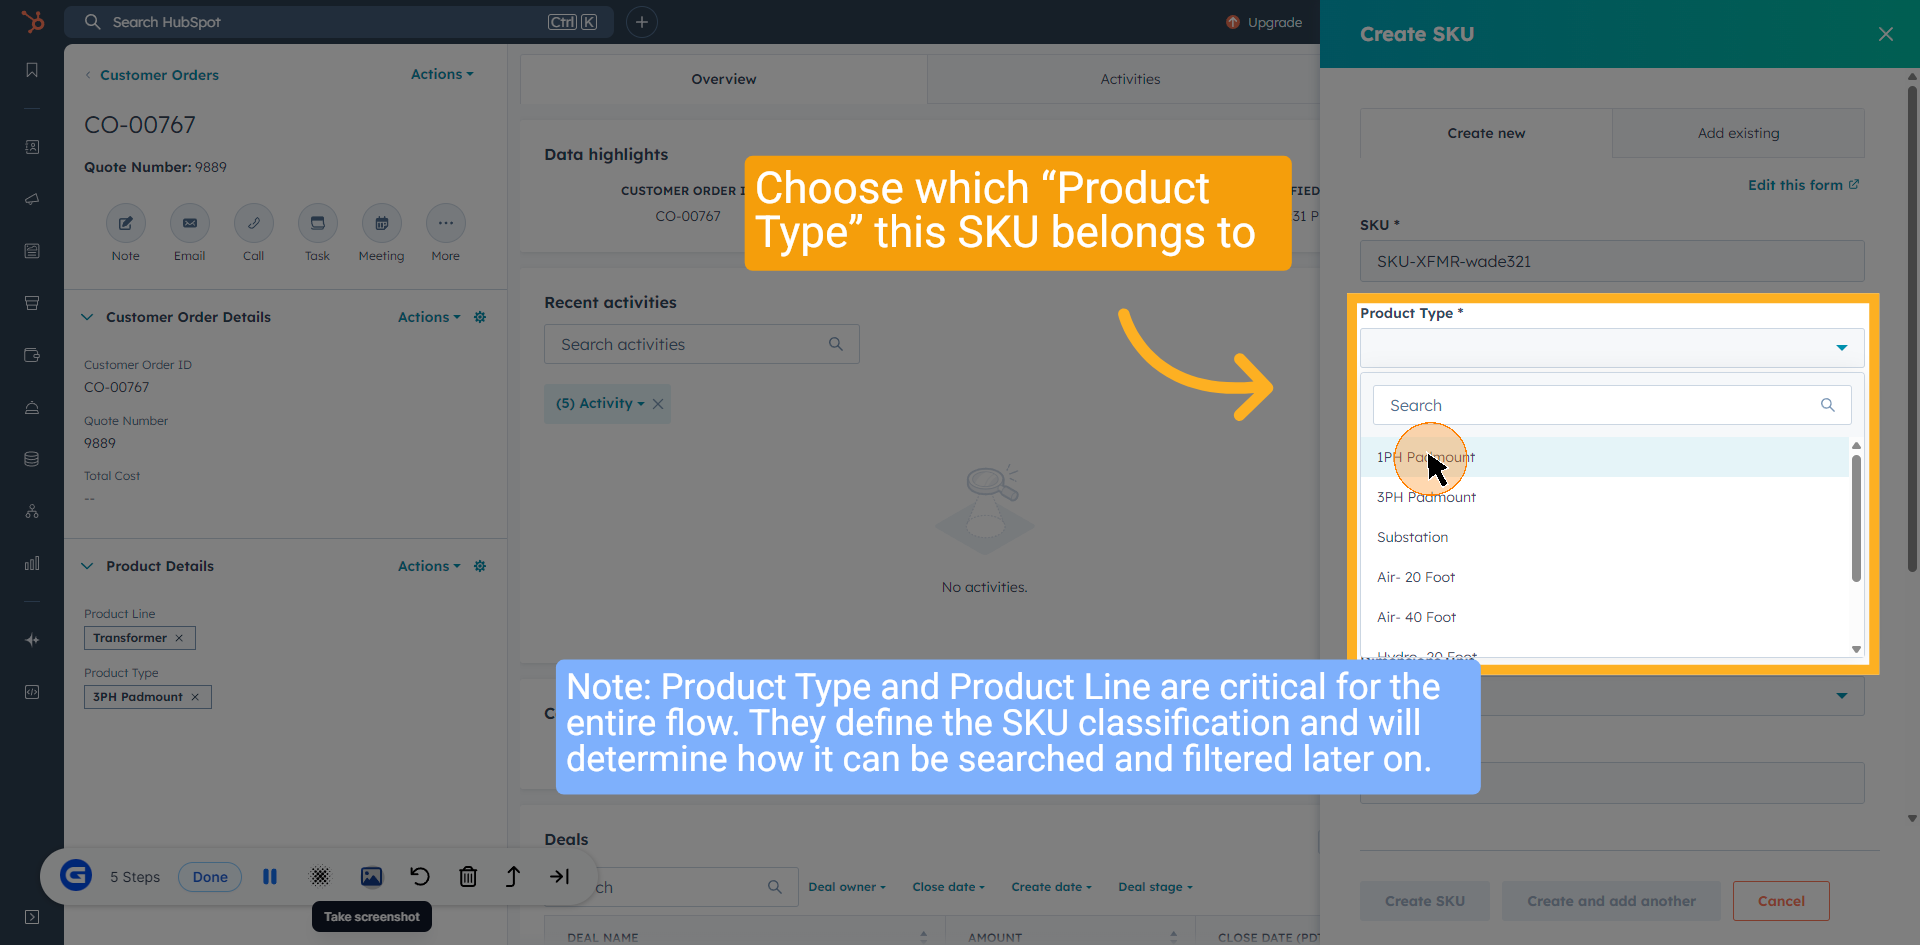
Choose which “Product Type” this SKU belongs to.
Note: Product Type and Product Line are critical for the entire flow. They define the SKU classification and will determine how it can be searched and filtered later on.
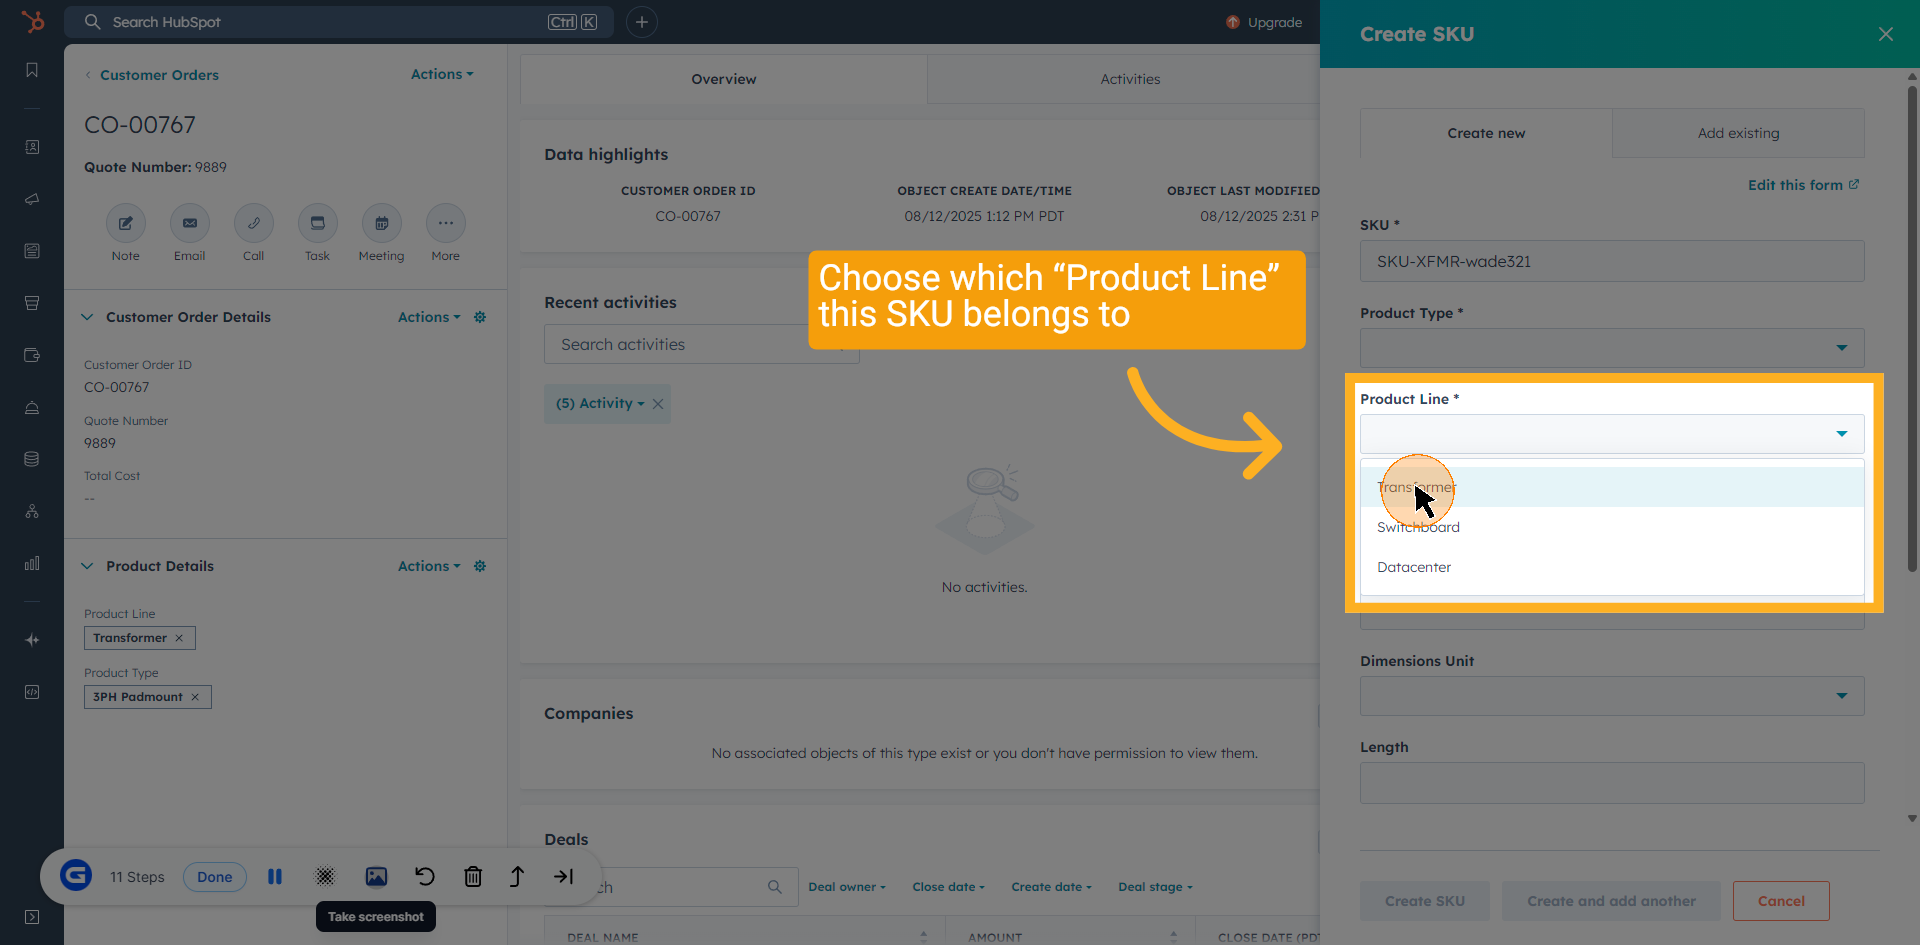
10 Select "Product line"
From the options, select the "Product Line" needed for the SKU.
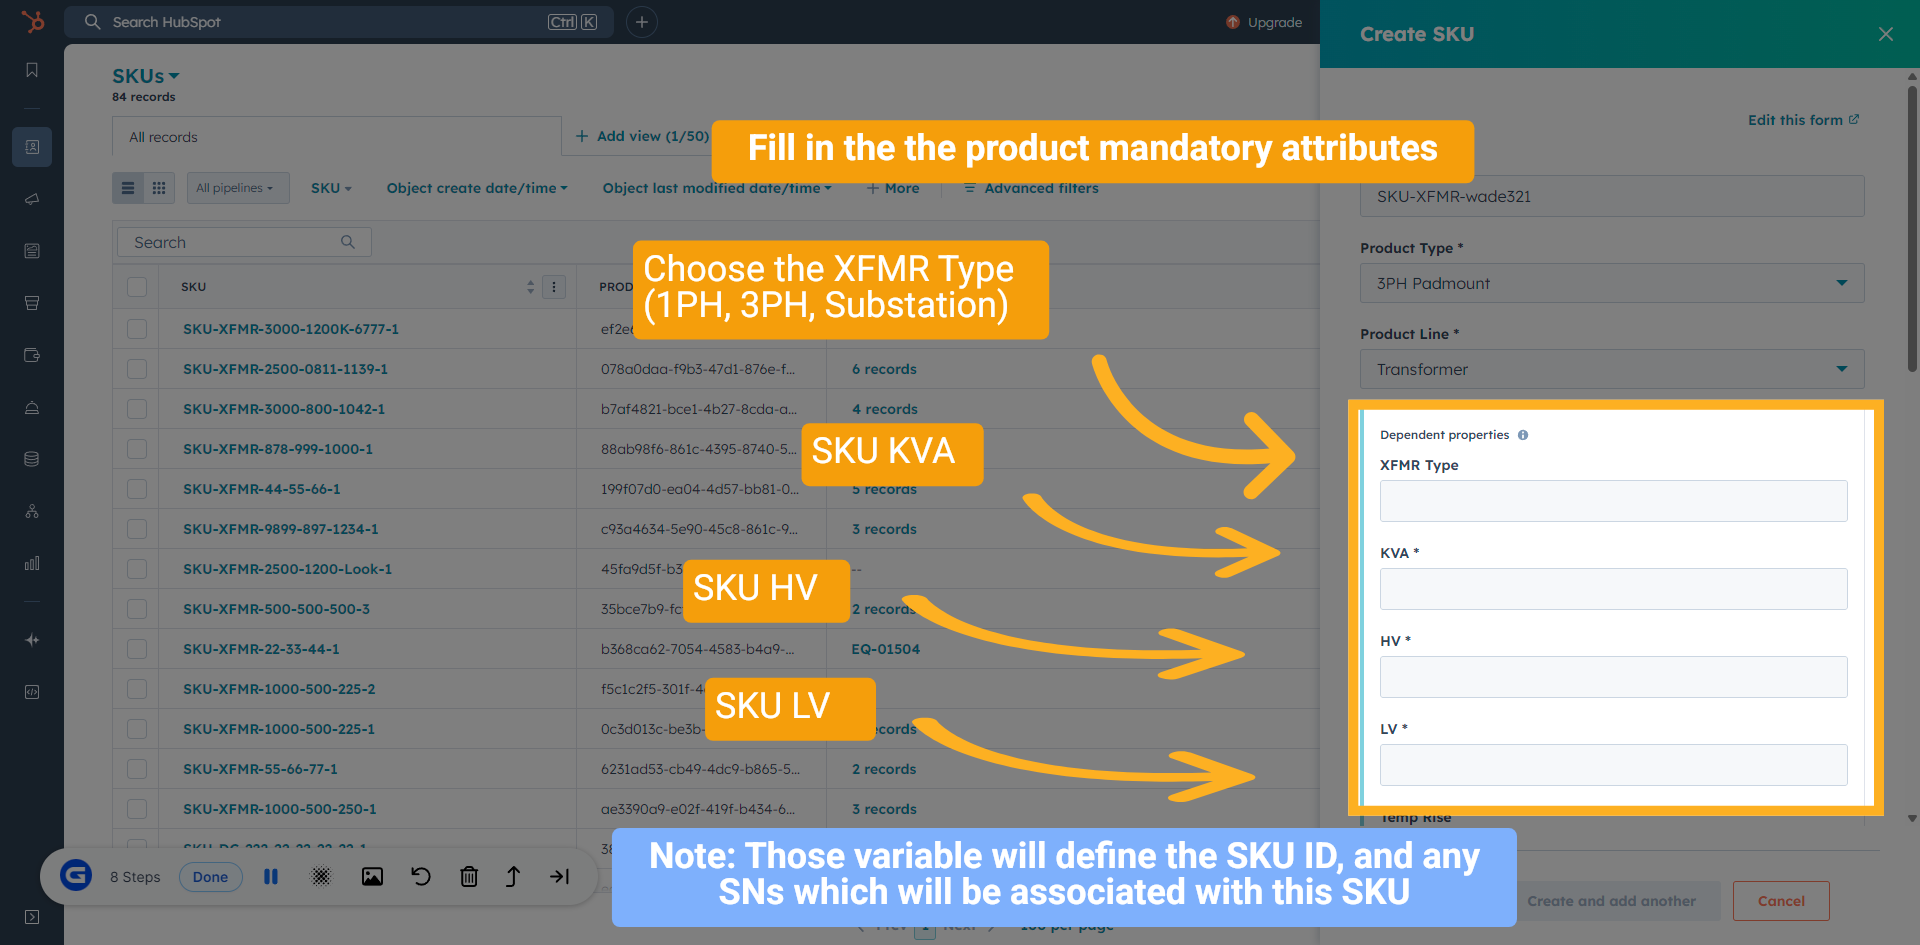
11 Fill in the attributes based on the product selected
Next, based on your selection, you need to fill in the attributes based on the product selected. In this example, we will show the transformer attributes.
Note: Those variable will define the SKU ID, and any SNs which will be associated with this SKU
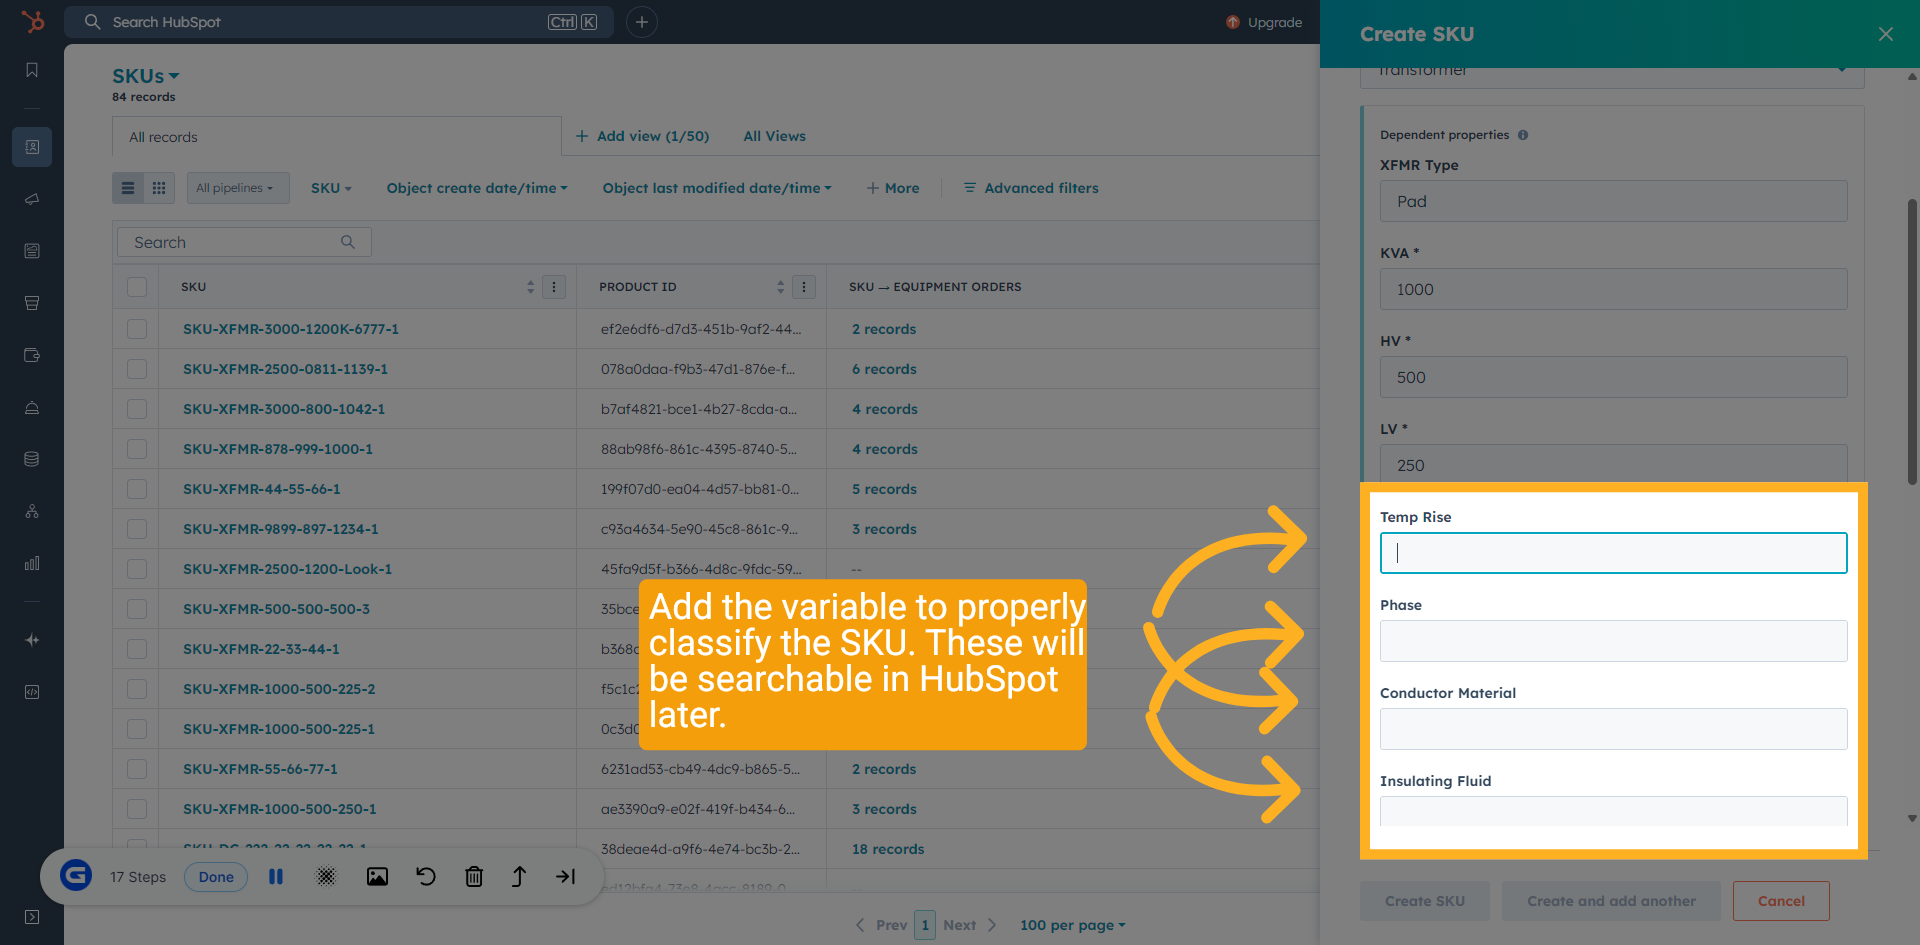
12 Enter SKU Attributes
Add the variable to properly classify the SKU. These will be searchable in HubSpot later.
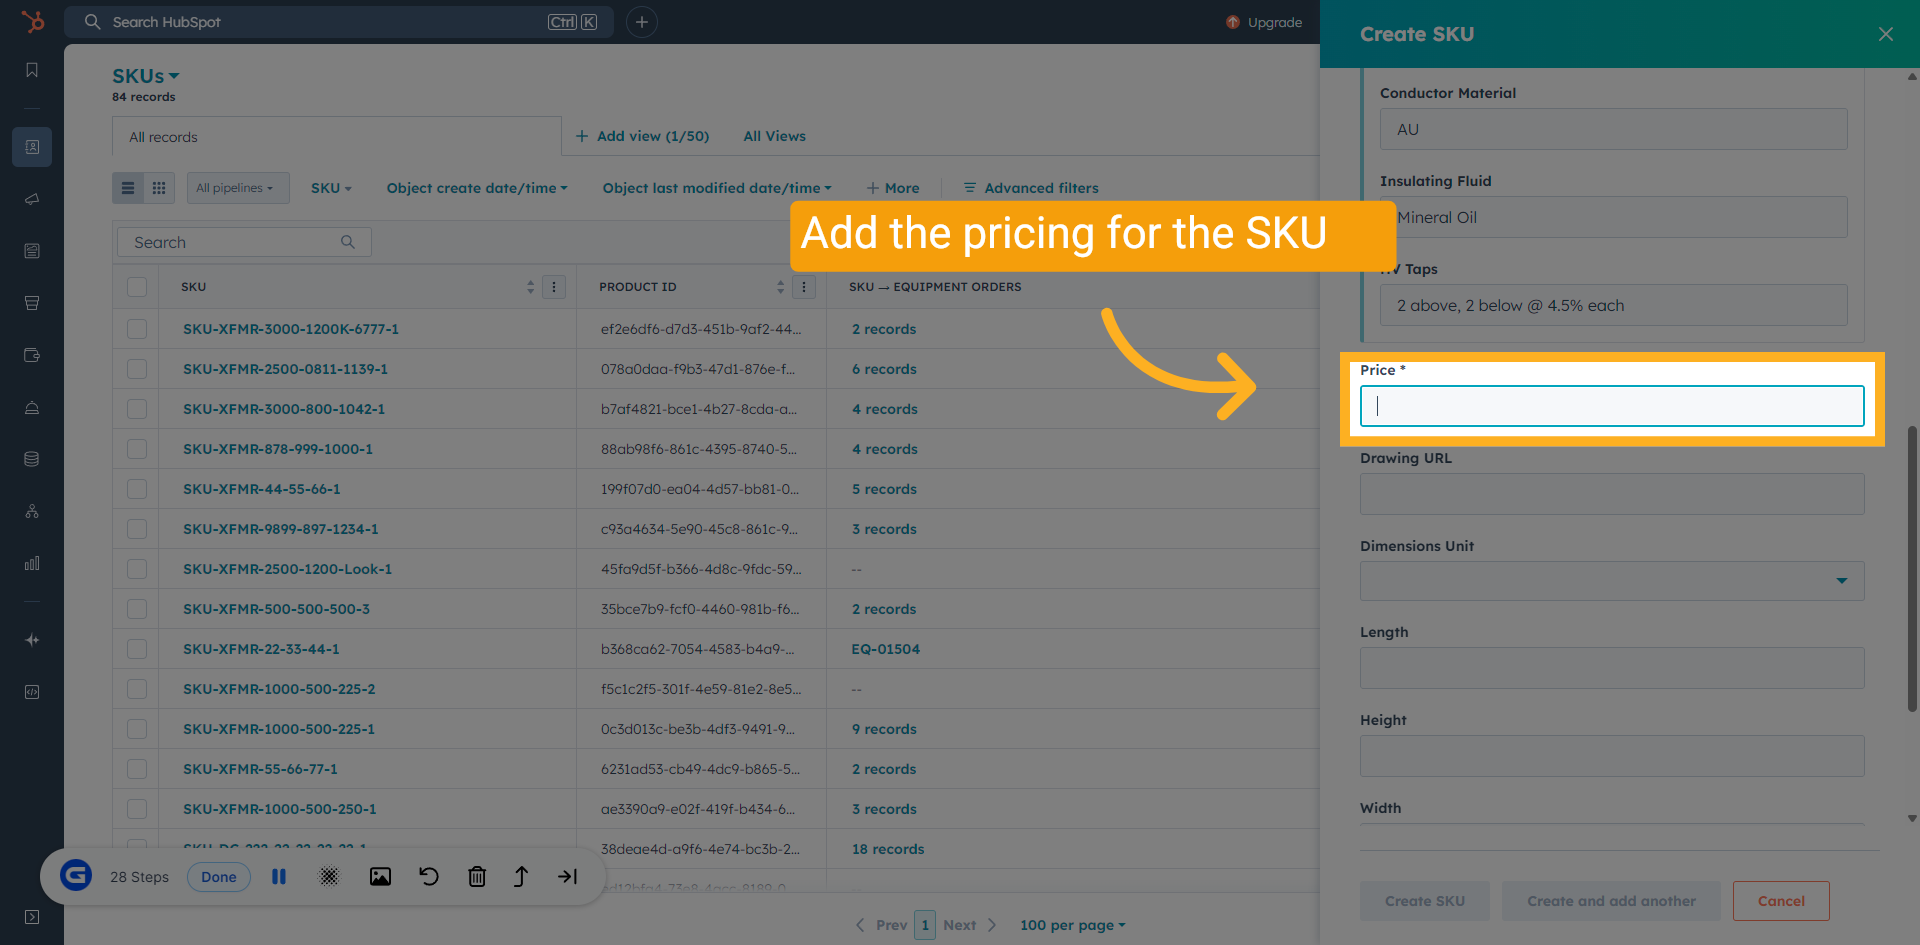
13 Add Pricing
Click on the "Price" field to enter the SKU price based on the deal.
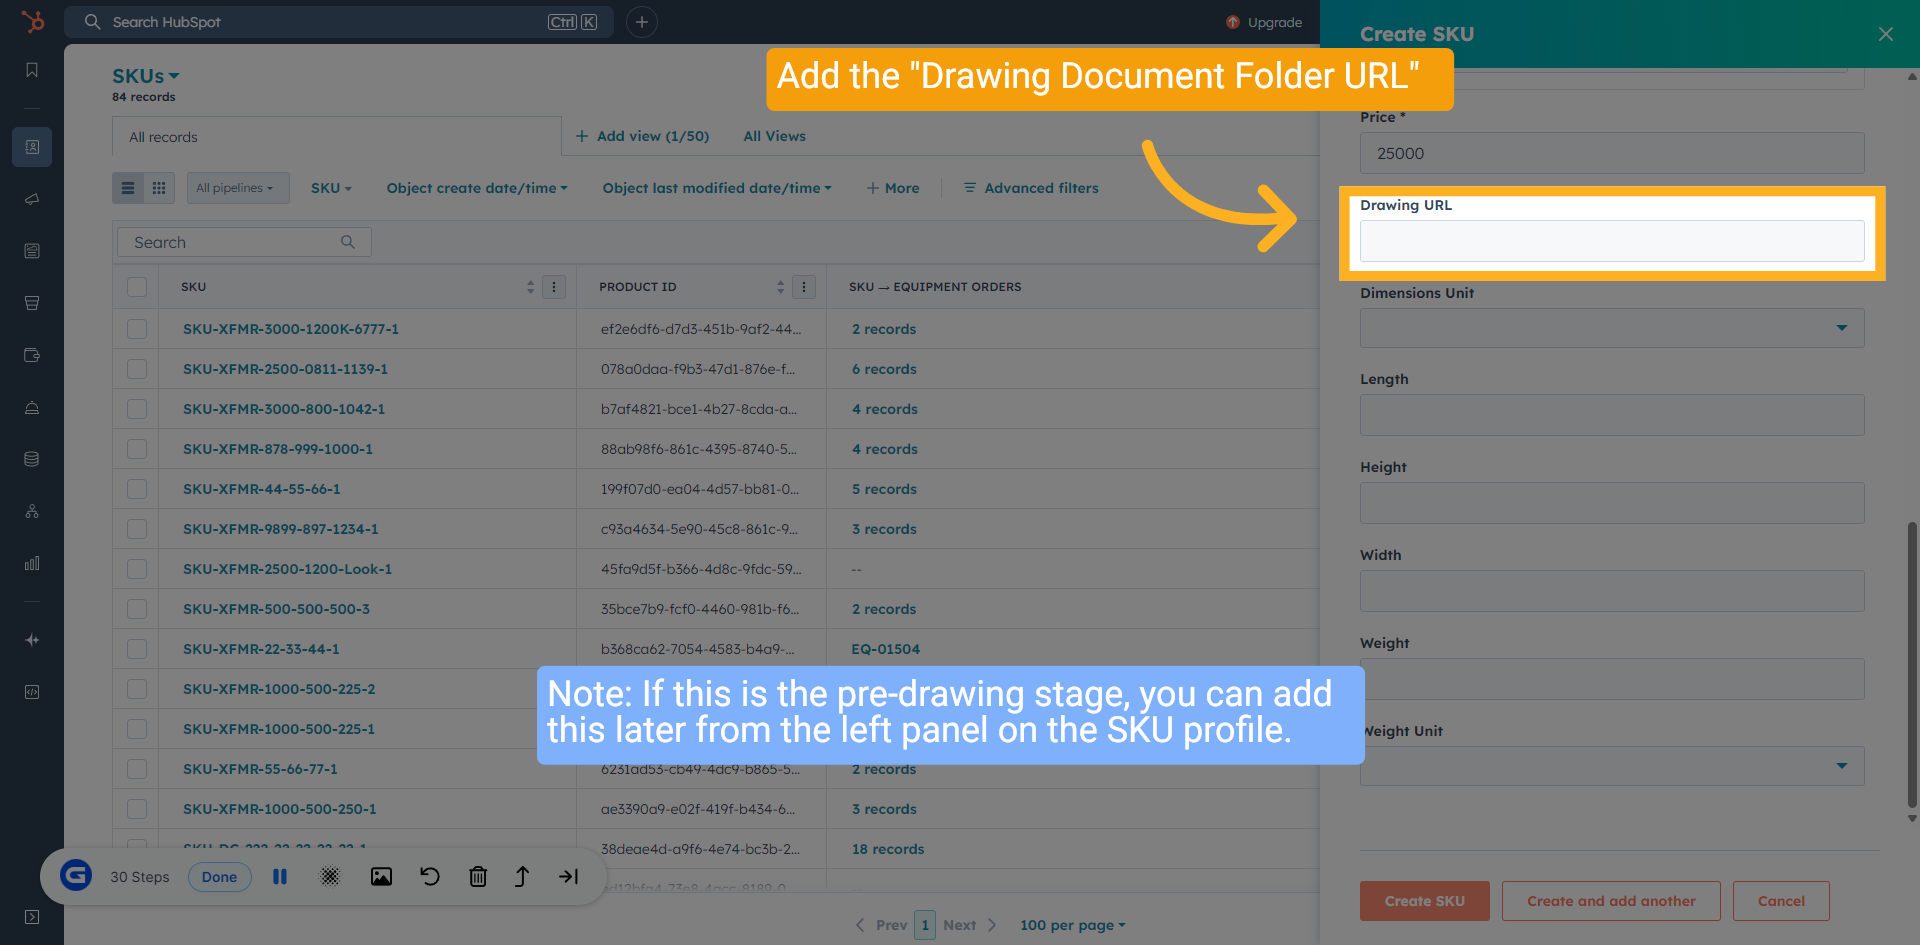
14 Add Drawing URL
Click on the "Drawing URL" field and enter the link to the factory drawing used to create the product.
Note: If this is the pre-drawing stage, you can add this later from the left panel on the SKU profile.
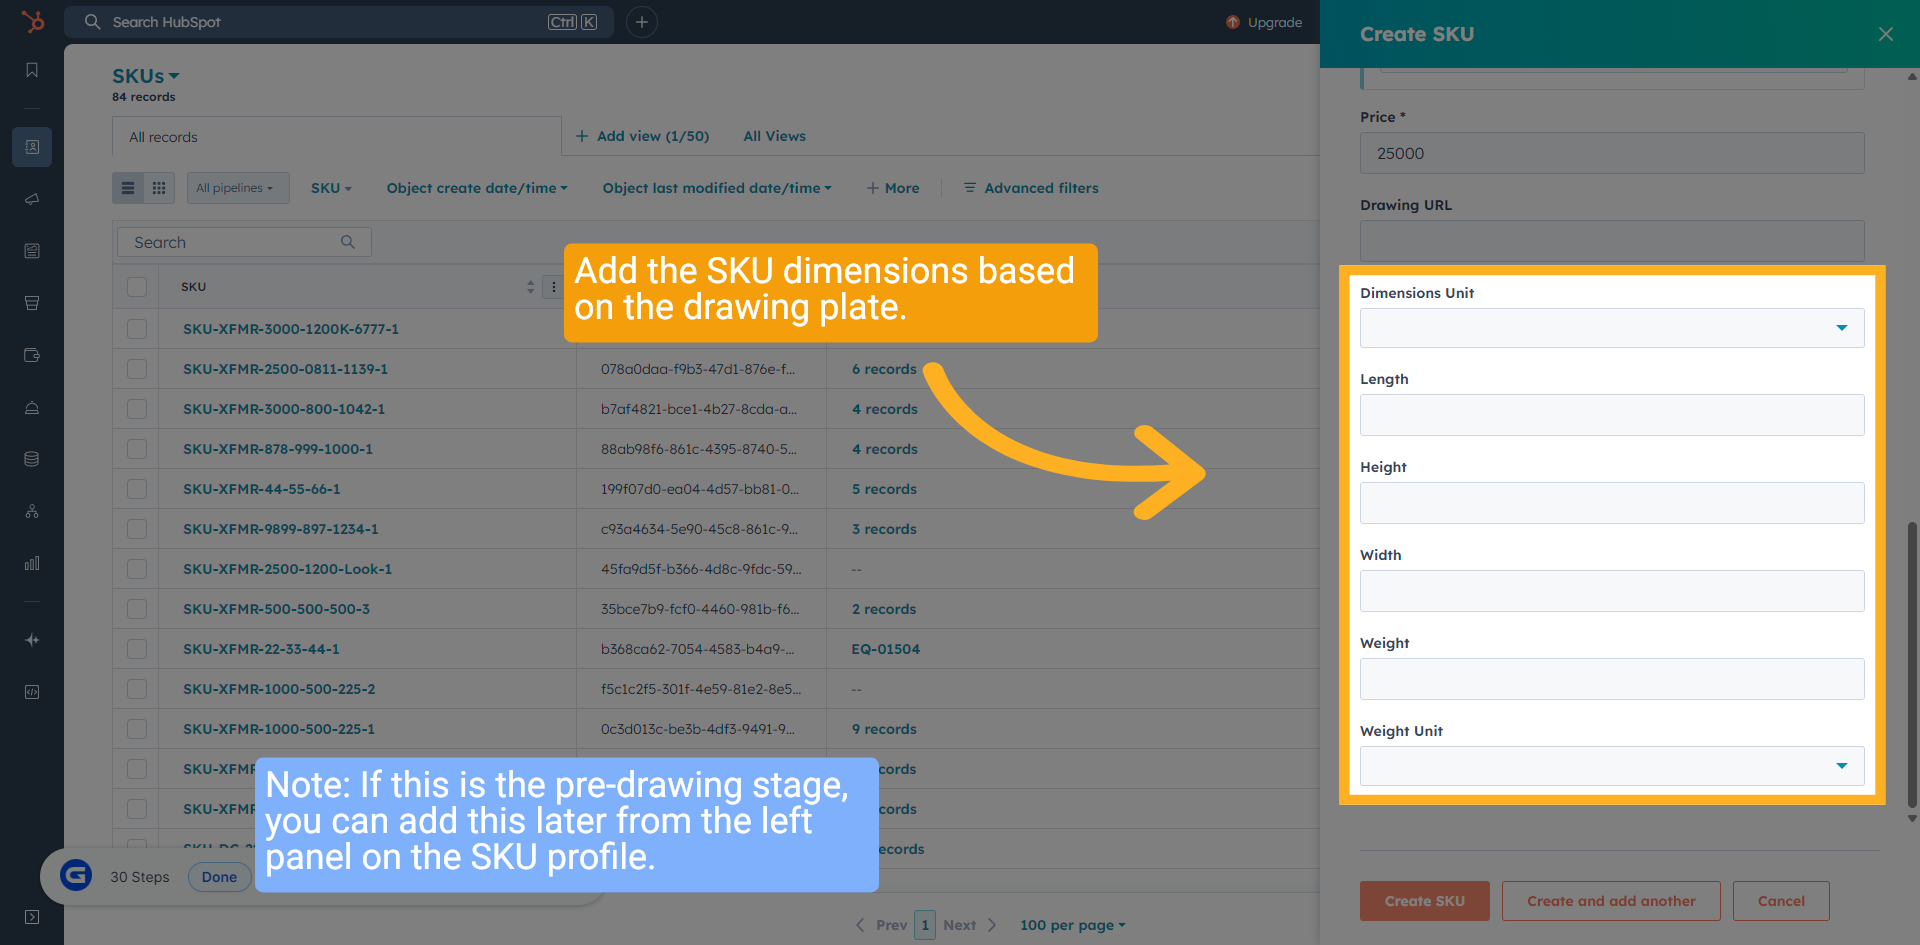
15 Enter "Dimensions"
Add the SKU dimensions based on the drawing.
Note: If this is the pre-drawing stage, you can add this later from the left panel on the SKU profile.
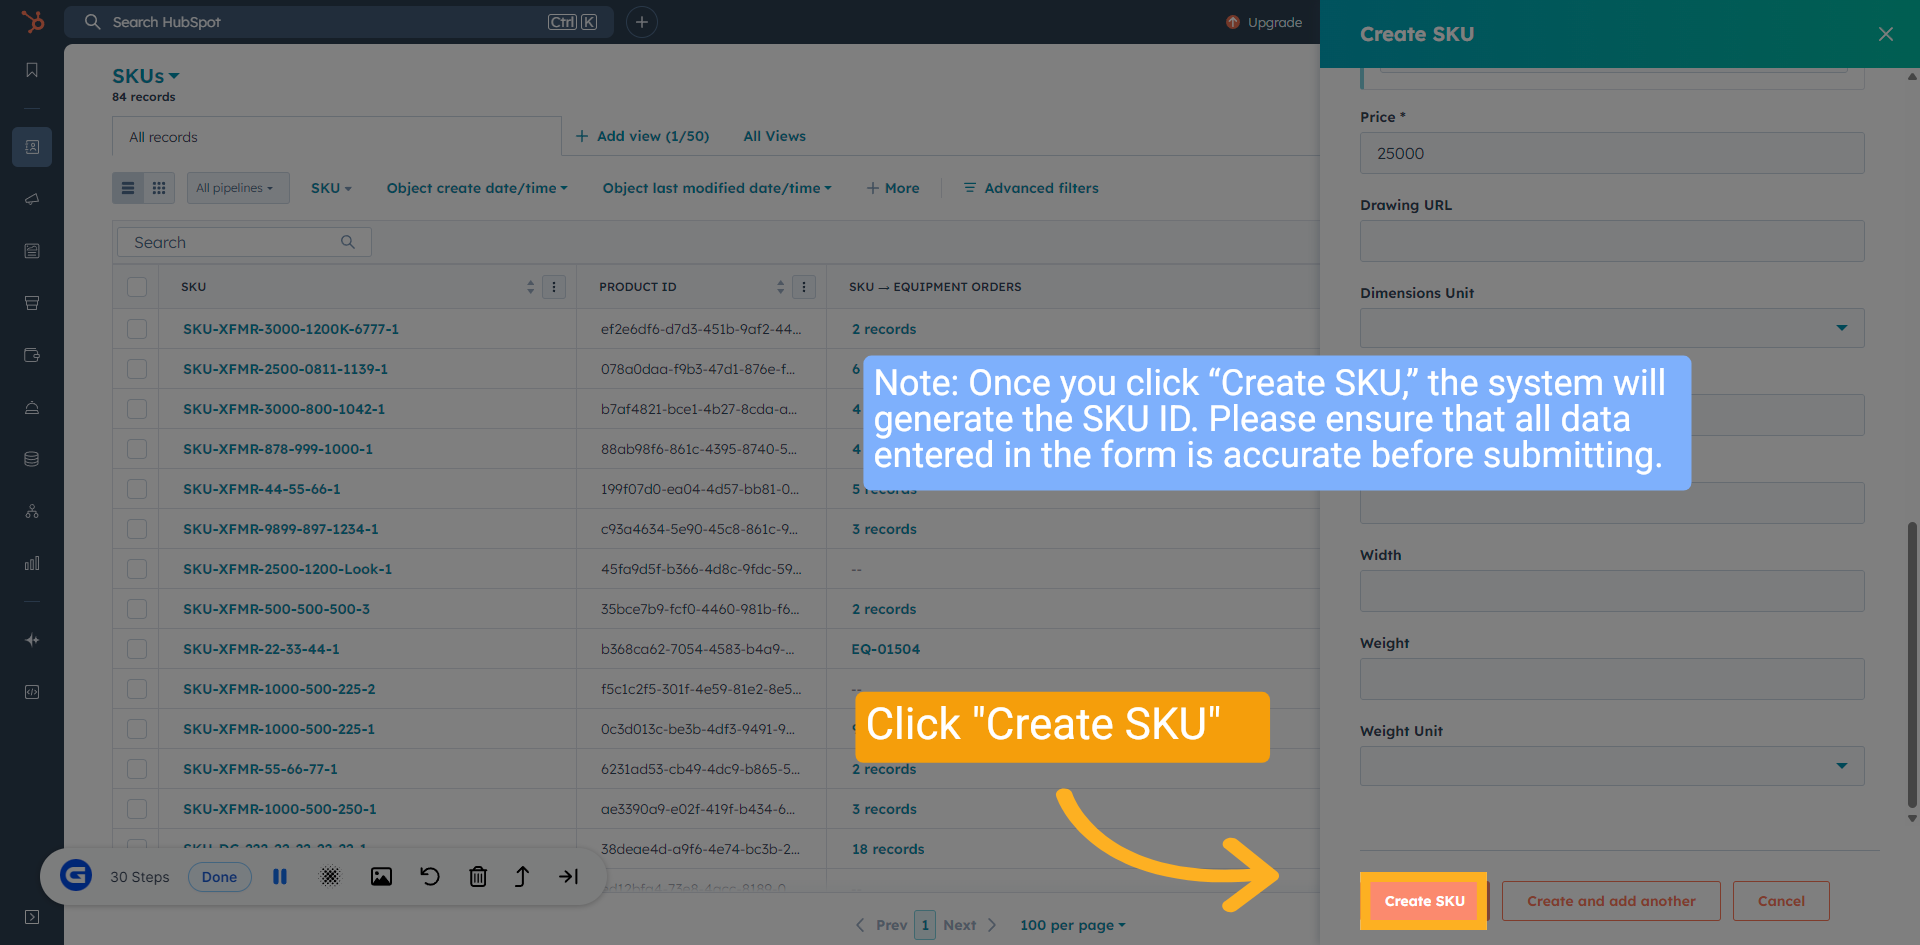
16 Create SKU
Note: Once you click “Create SKU,” the system will generate the SKU ID. Please ensure that all data entered in the form is accurate before submitting.
Click "Create SKU"
17 SKU is Created
A new SKU has been generated based on the variables you selected in the form.
When the page first loads, it will display the SKU and product, along with the name and number you entered.
Please wait a couple of seconds, refresh your browser, and the SKU will be generated automatically.

18 Wrap up
This guide covers how to create a new SKU from a Customer order, as well as individually in HubSpot and help manage SKUs within your post-sales process.
Thank You!