Deleting SKU or Serial in HubSpot
1 Introduction
In this guide, you will learn how to un-associate / remove a SKU or Serial. The CDHS will remove the SKU or Serial from any connected records across your integrated systems, ensuring your product data stays clean and accurate. Let’s get started.

2 How to Delete a SKU or Serial
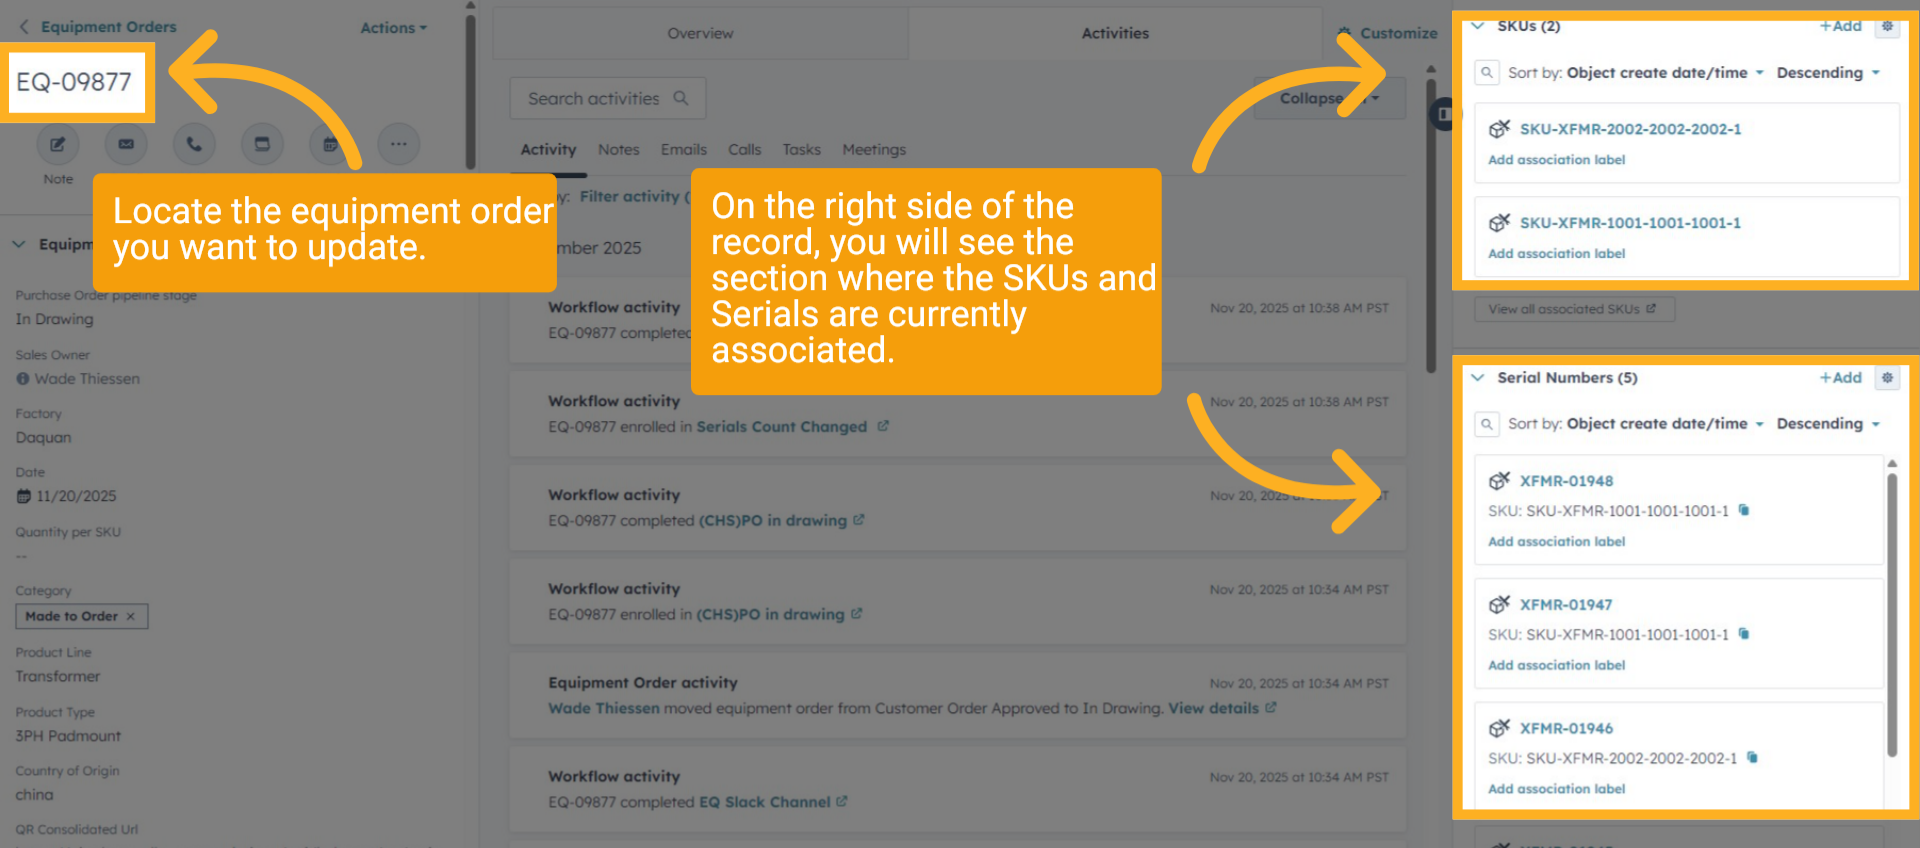
Locate the equipment order you want to update. On the right side of the record, you will see the section where the SKUs and Serials are currently associated.
3 Select SKU
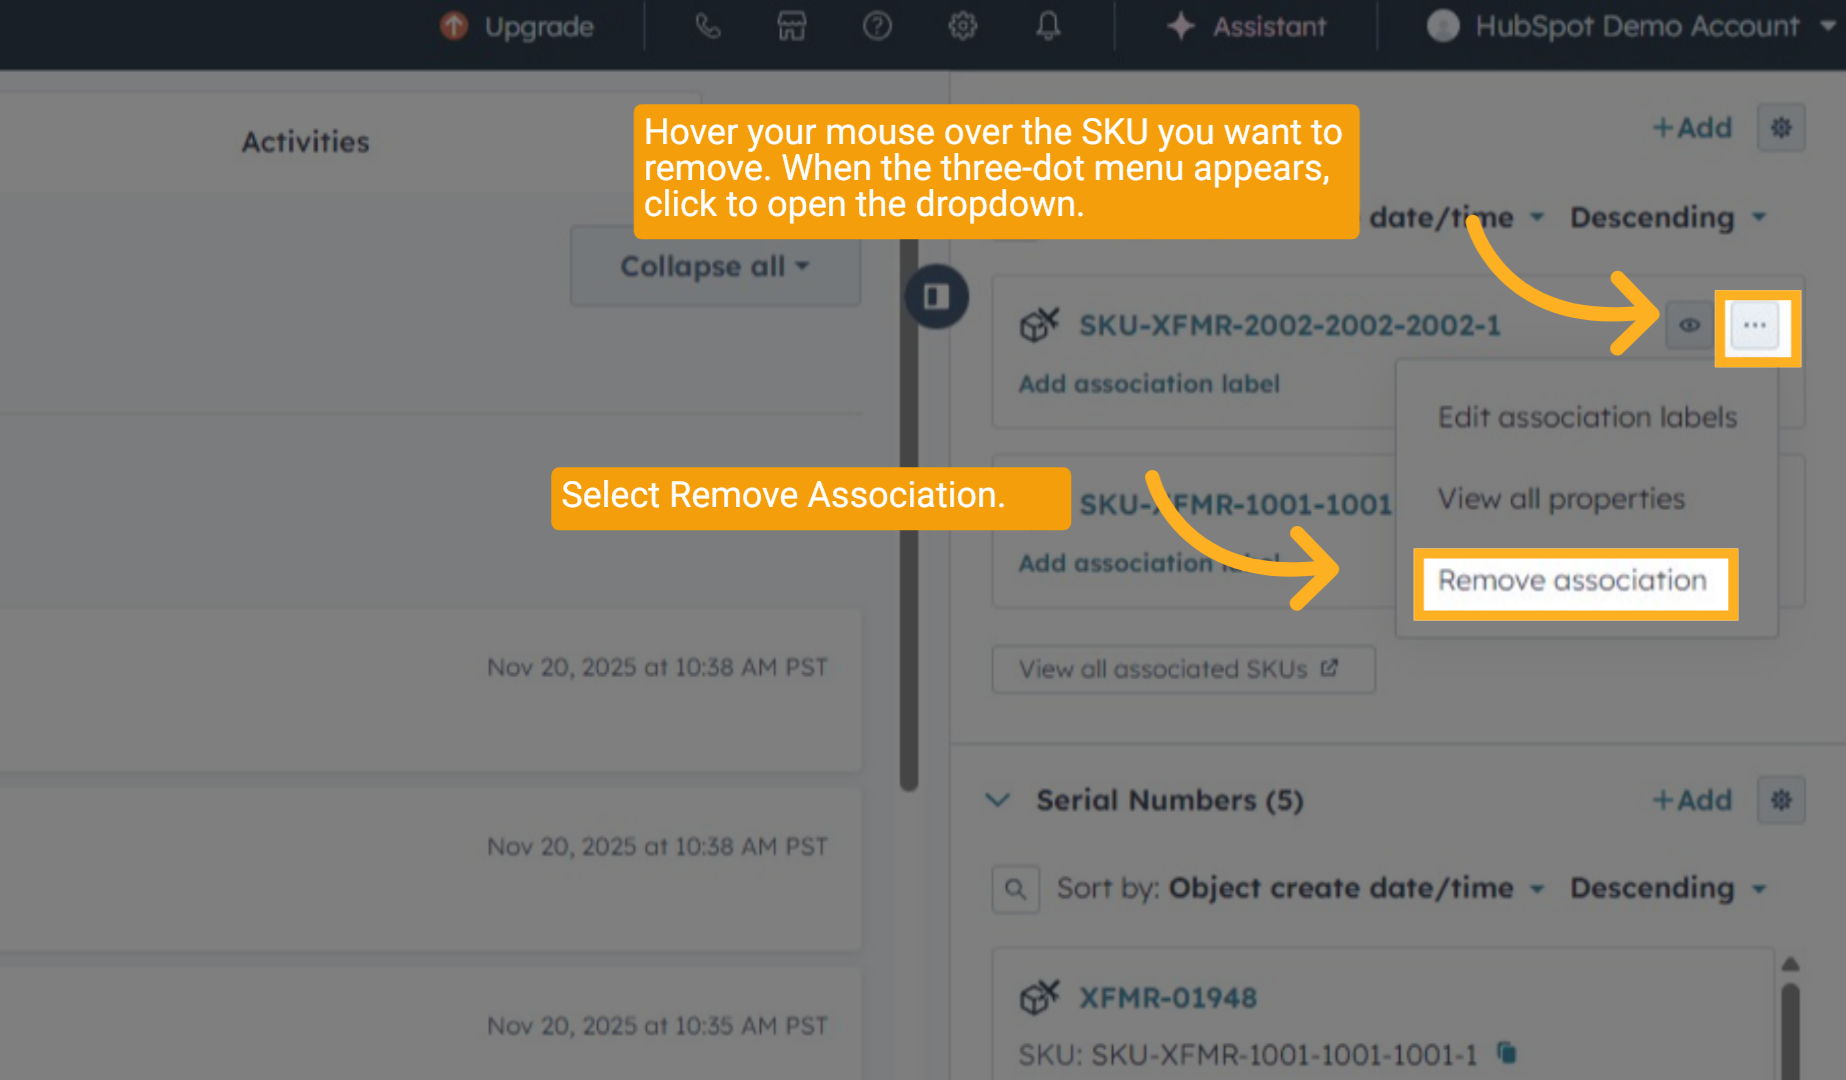
Hover your mouse over the SKU you want to remove. When the three-dot menu appears, click to open the dropdown and select Remove Association.
4 Select Serial
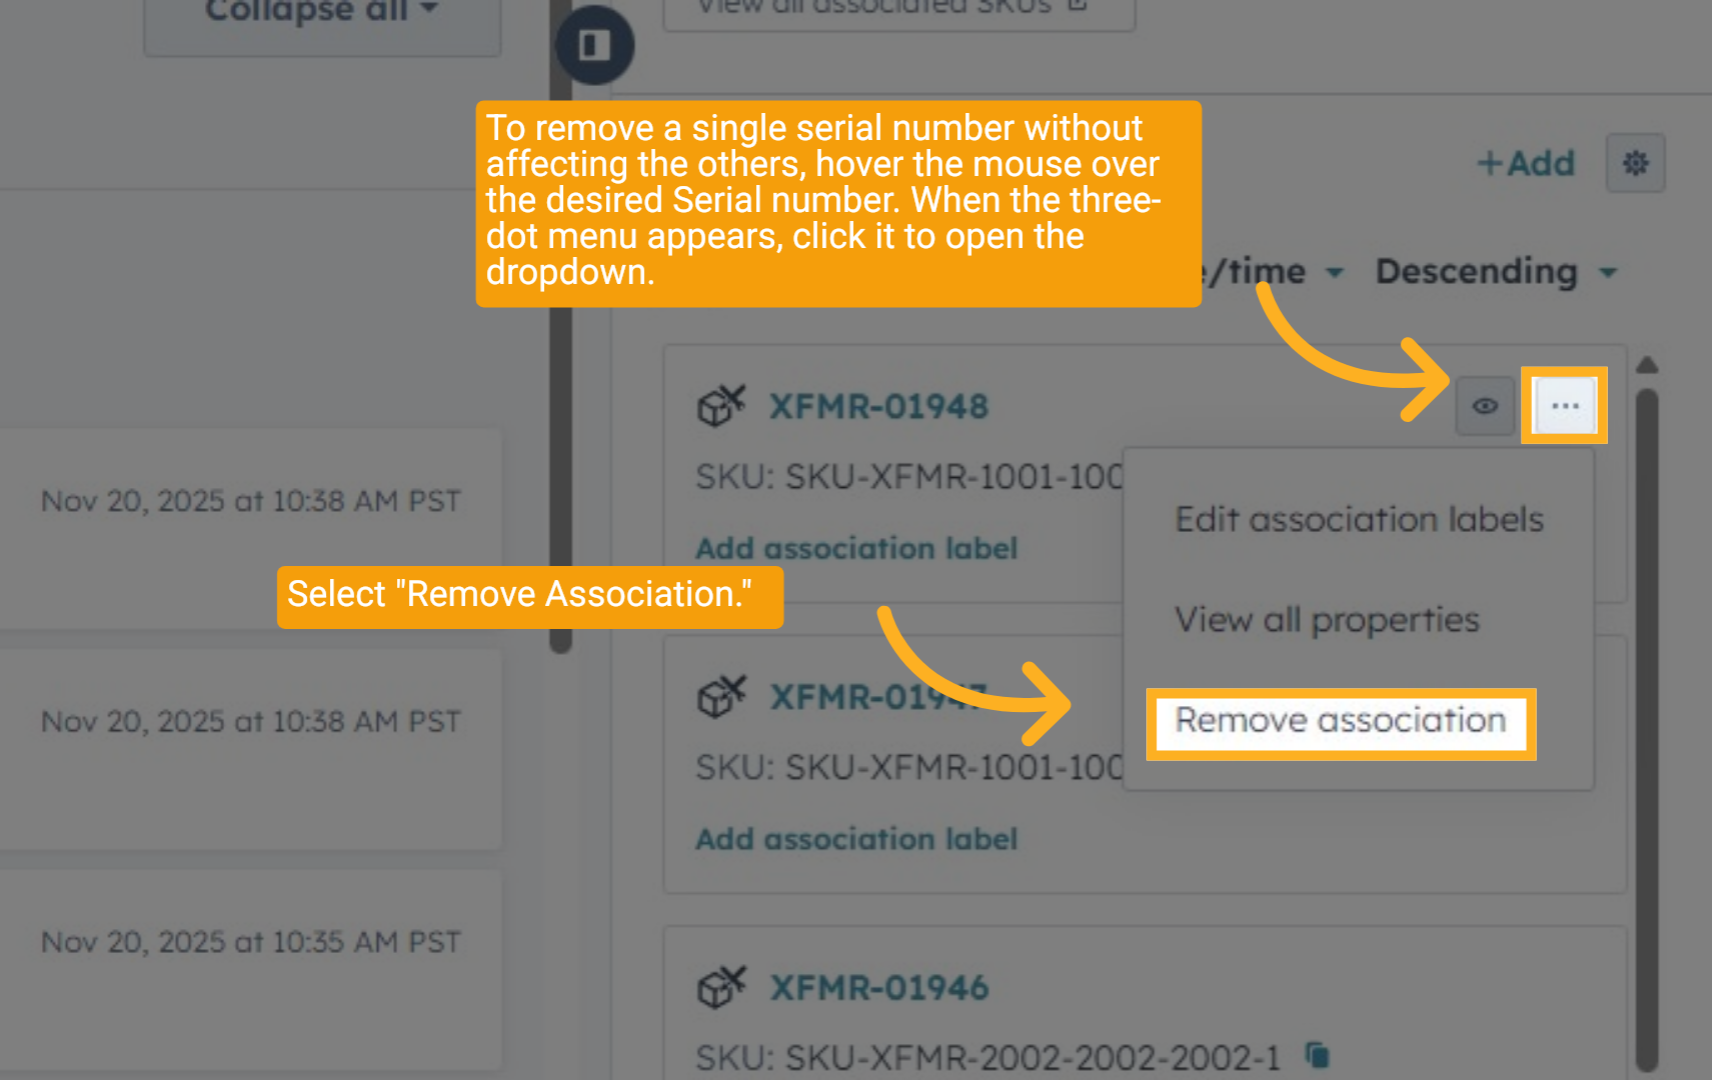
To remove a single serial number without affecting the others, hover your mouse over the desired Serial number. When the three-dot menu appears, click it to open the dropdown, then select "Remove Association."
5 Remove Association
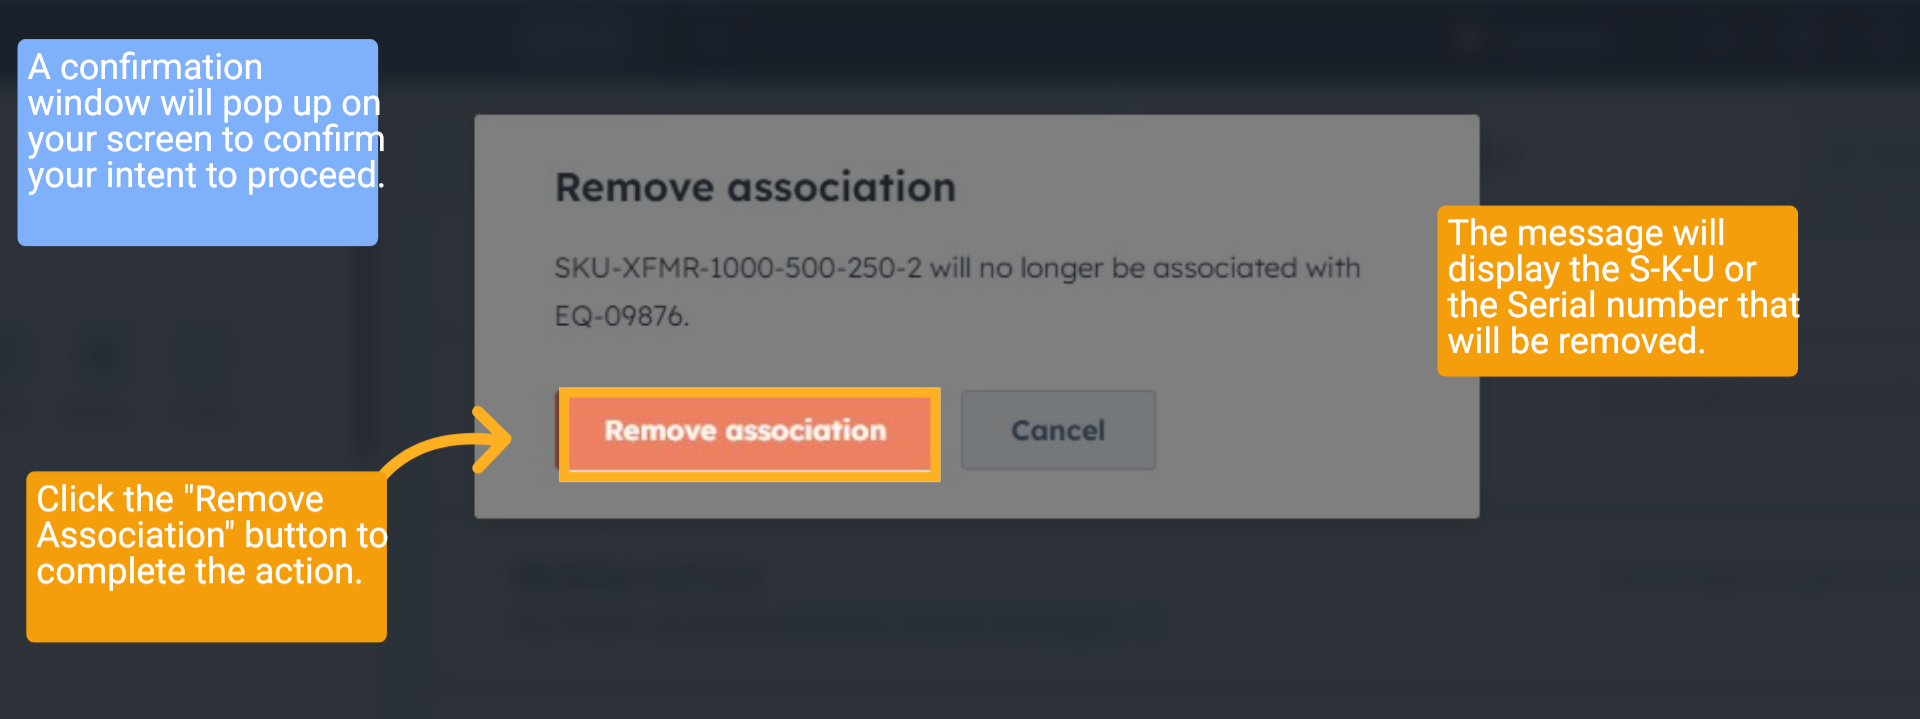
A confirmation window will pop up on your screen to confirm your intent to proceed. Click the "Remove Association" button to complete the action. The message will display the S-K-U or the Serial number that will be removed.
6 1st Confirmation Message
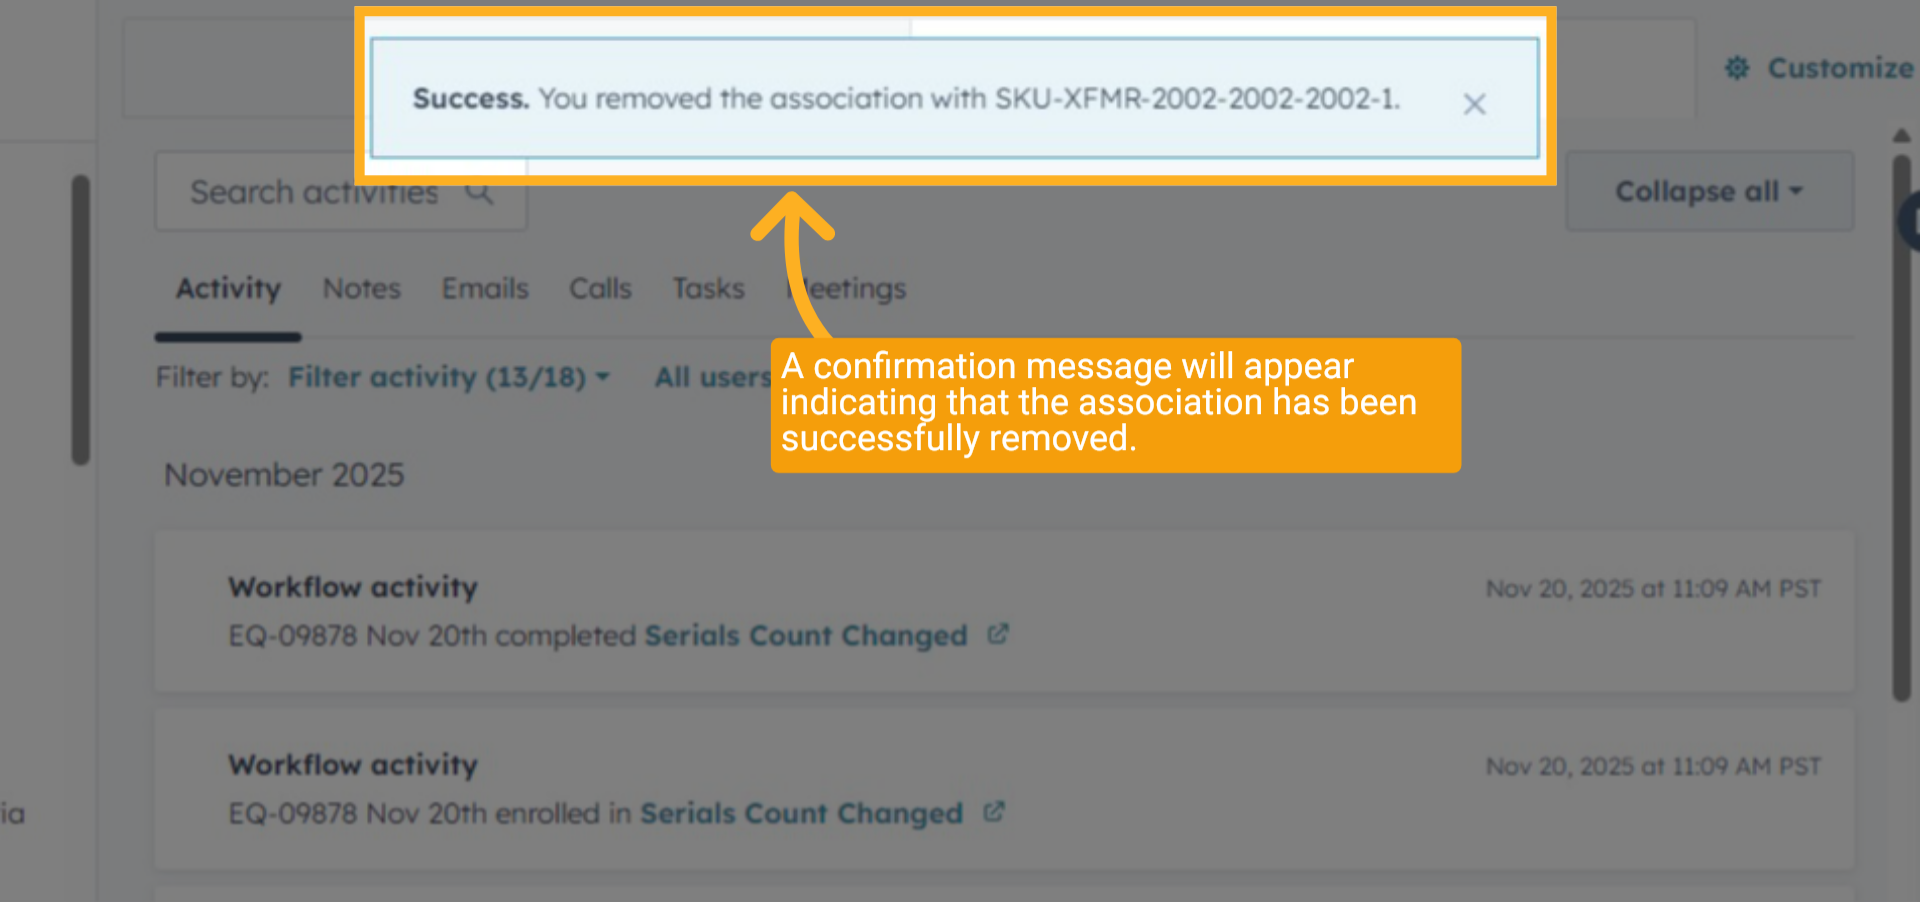
A confirmation message will appear indicating that the association has been successfully removed.
7 Slack Channel
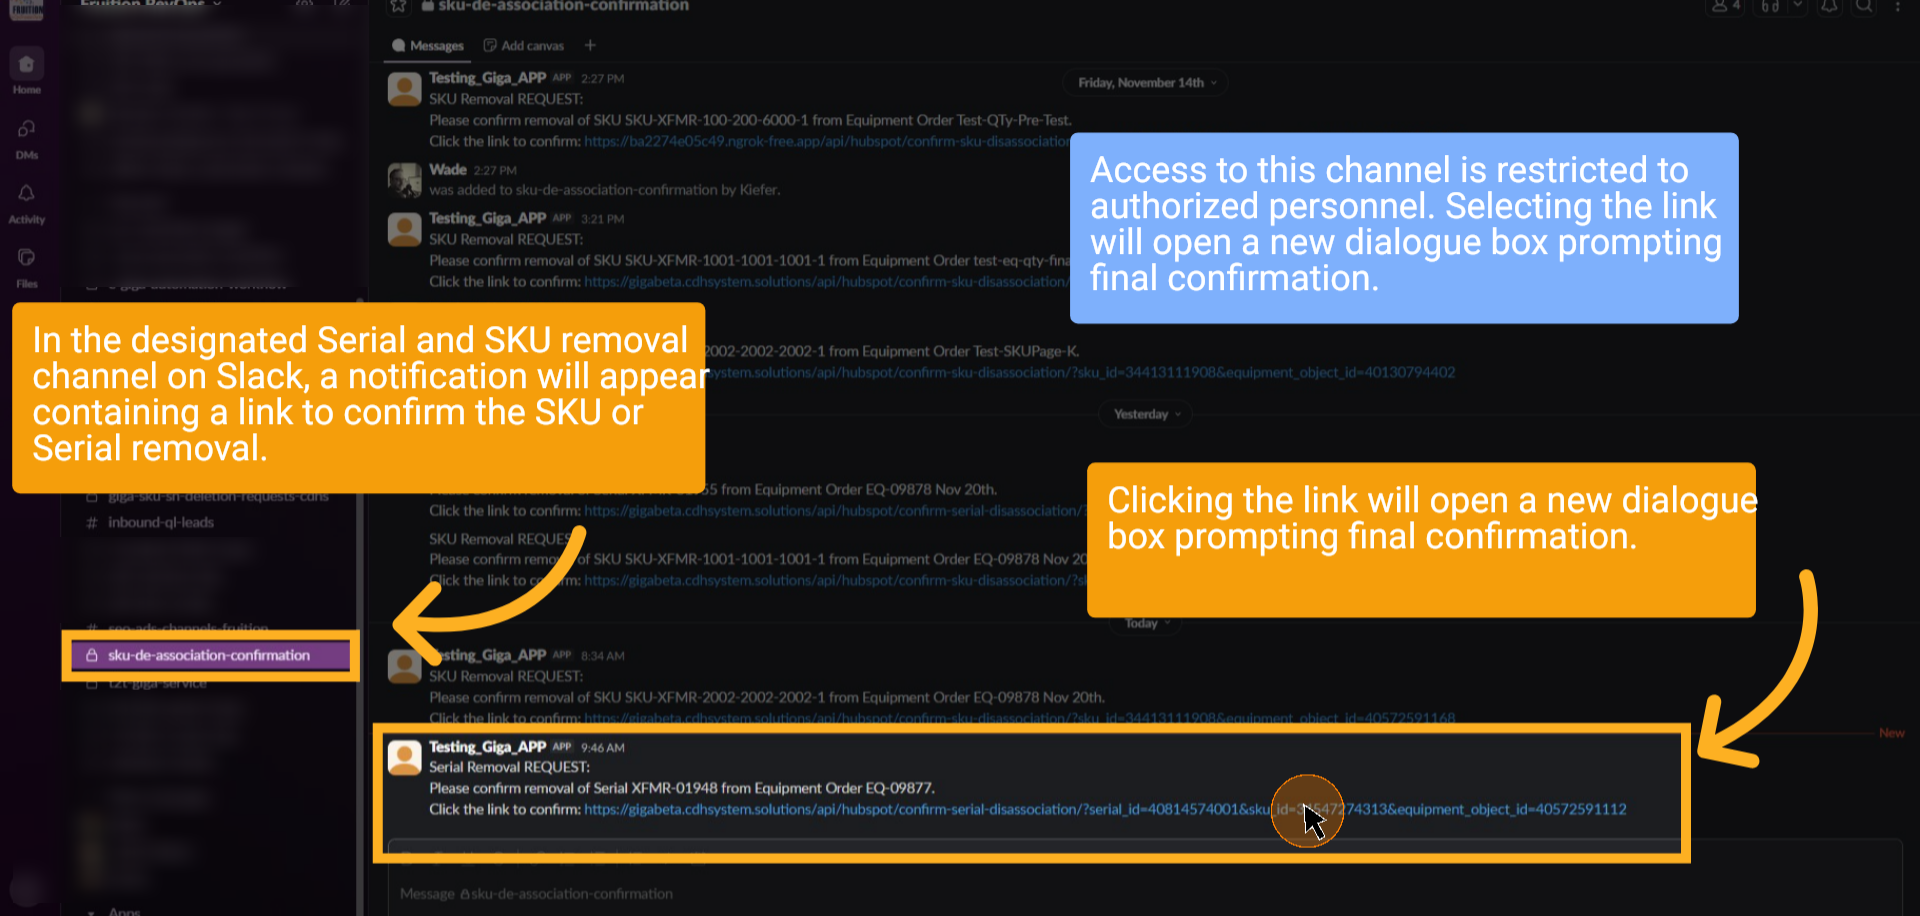
In the designated Serial and SKU removal channel on Slack, a notification will appear containing a link to confirm the SKU removal. Access to this channel is restricted to authorized personnel. Clicking the link will open a new dialogue box prompting final confirmation.
8 Finalize the SKU Removal
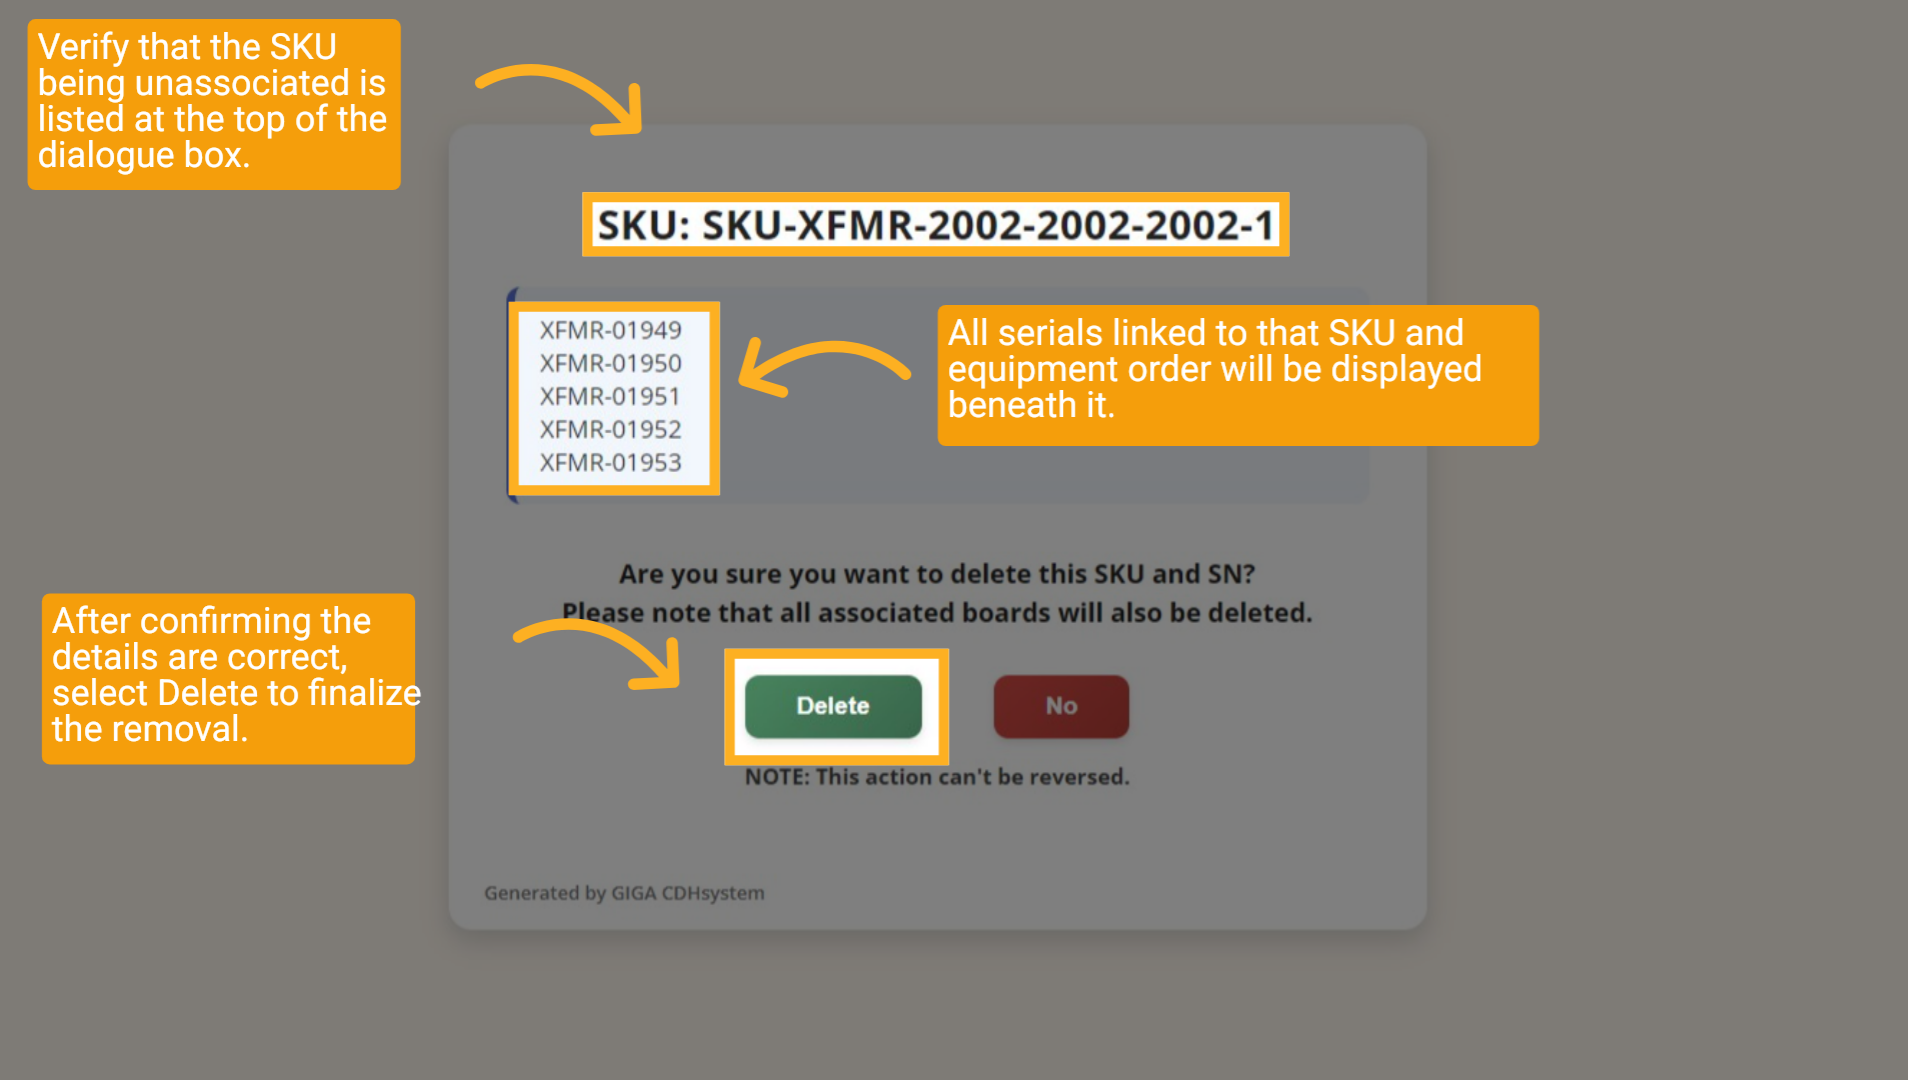
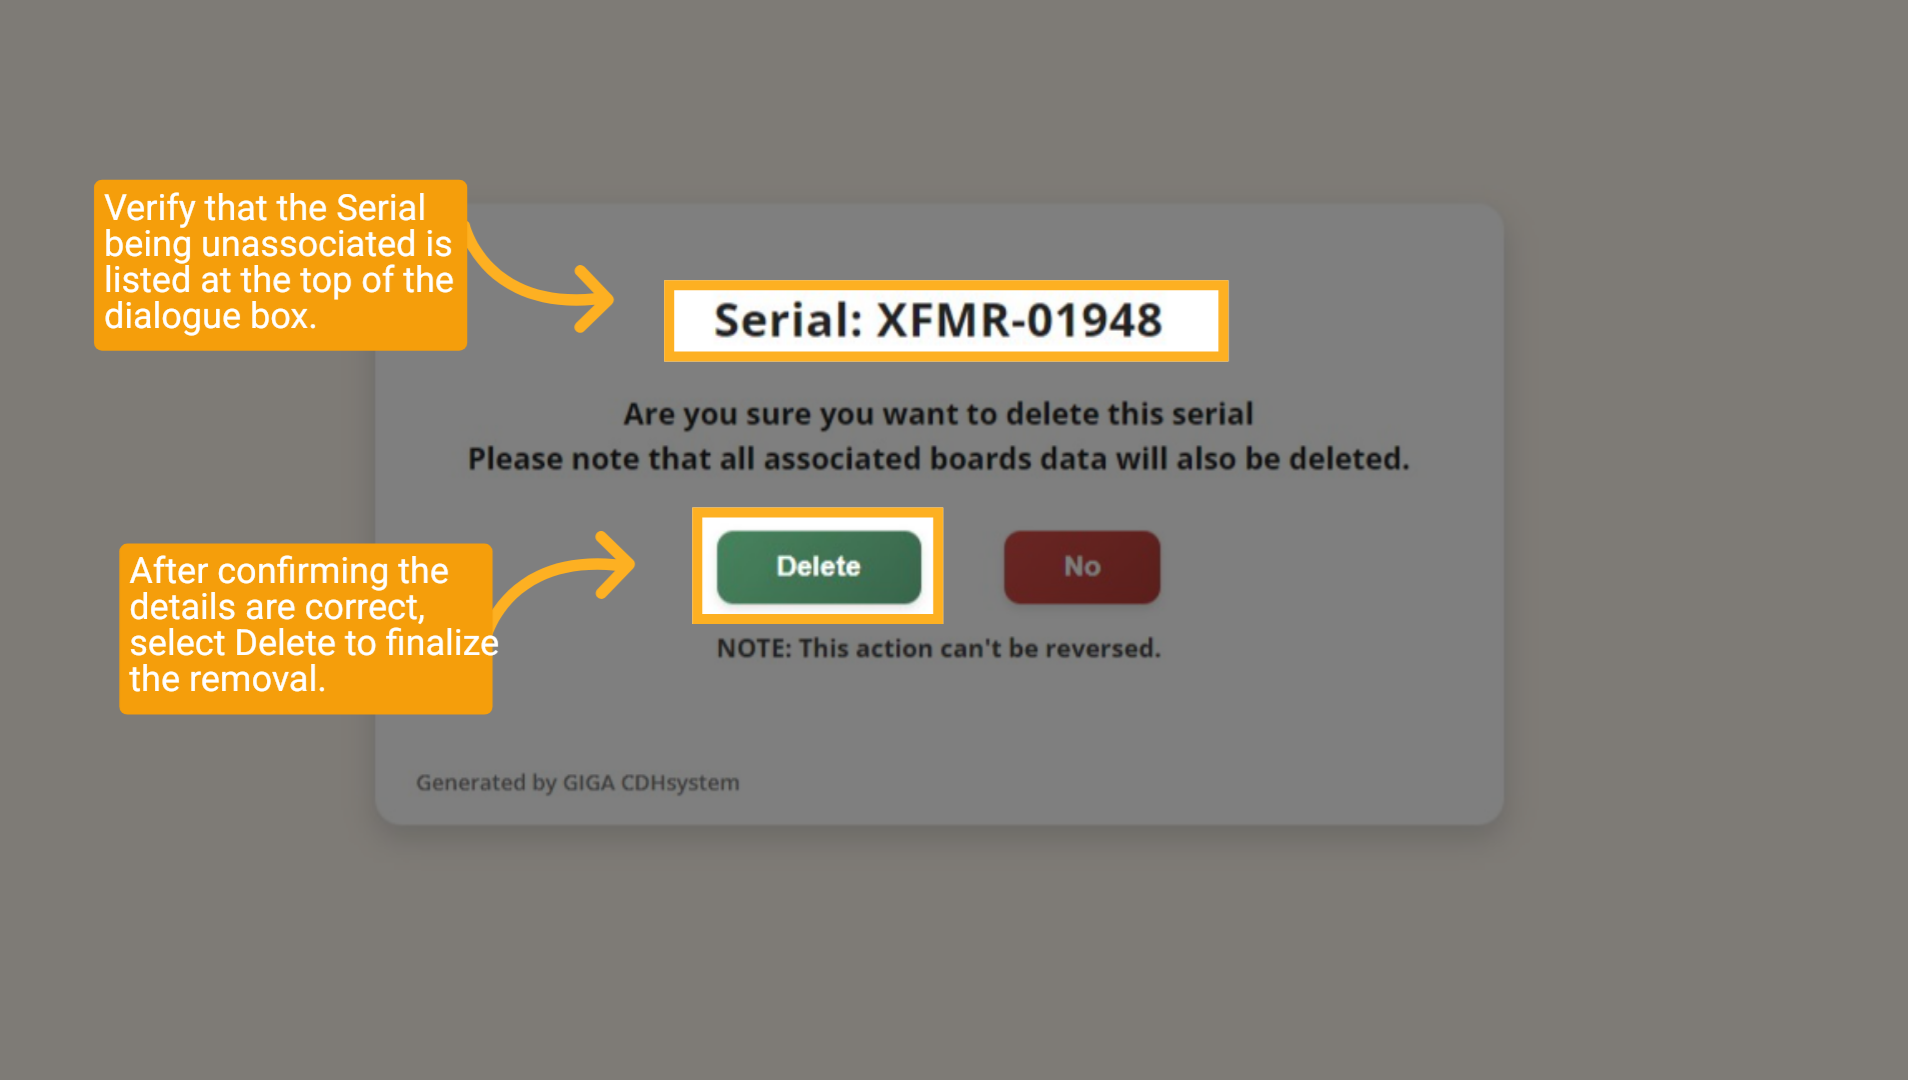
Verify that the S-K-U being unassociated is listed at the top of the dialogue box. All serials linked to that S-K-U and equipment order will be displayed beneath it. After confirming the details are correct, select Delete to finalize the removal.
9 Finalize the Serial Removal
Verify that the Serial being unassociated is listed at the top of the dialogue box. After confirming the details are correct, select Delete to finalize the removal.
10 Final SKU Confirmation
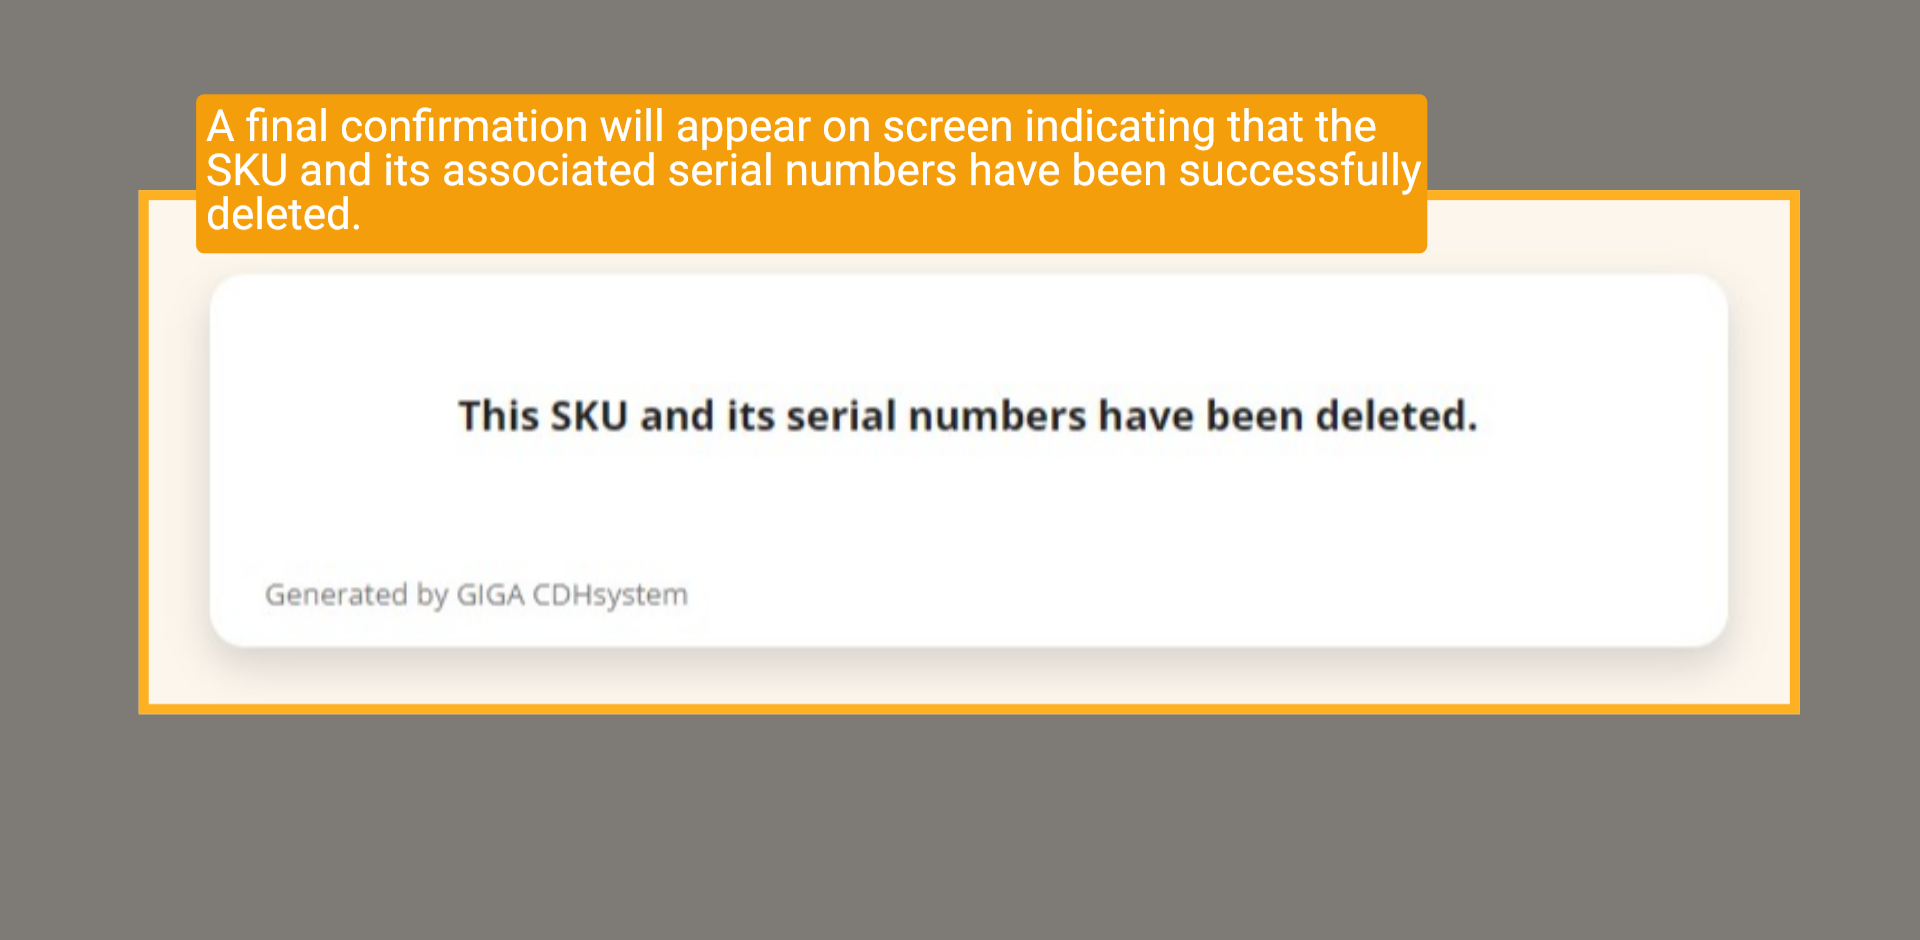
A final confirmation will appear on screen indicating that the SKU and its associated serial numbers have been successfully deleted.
11 Final Serial Confirmation
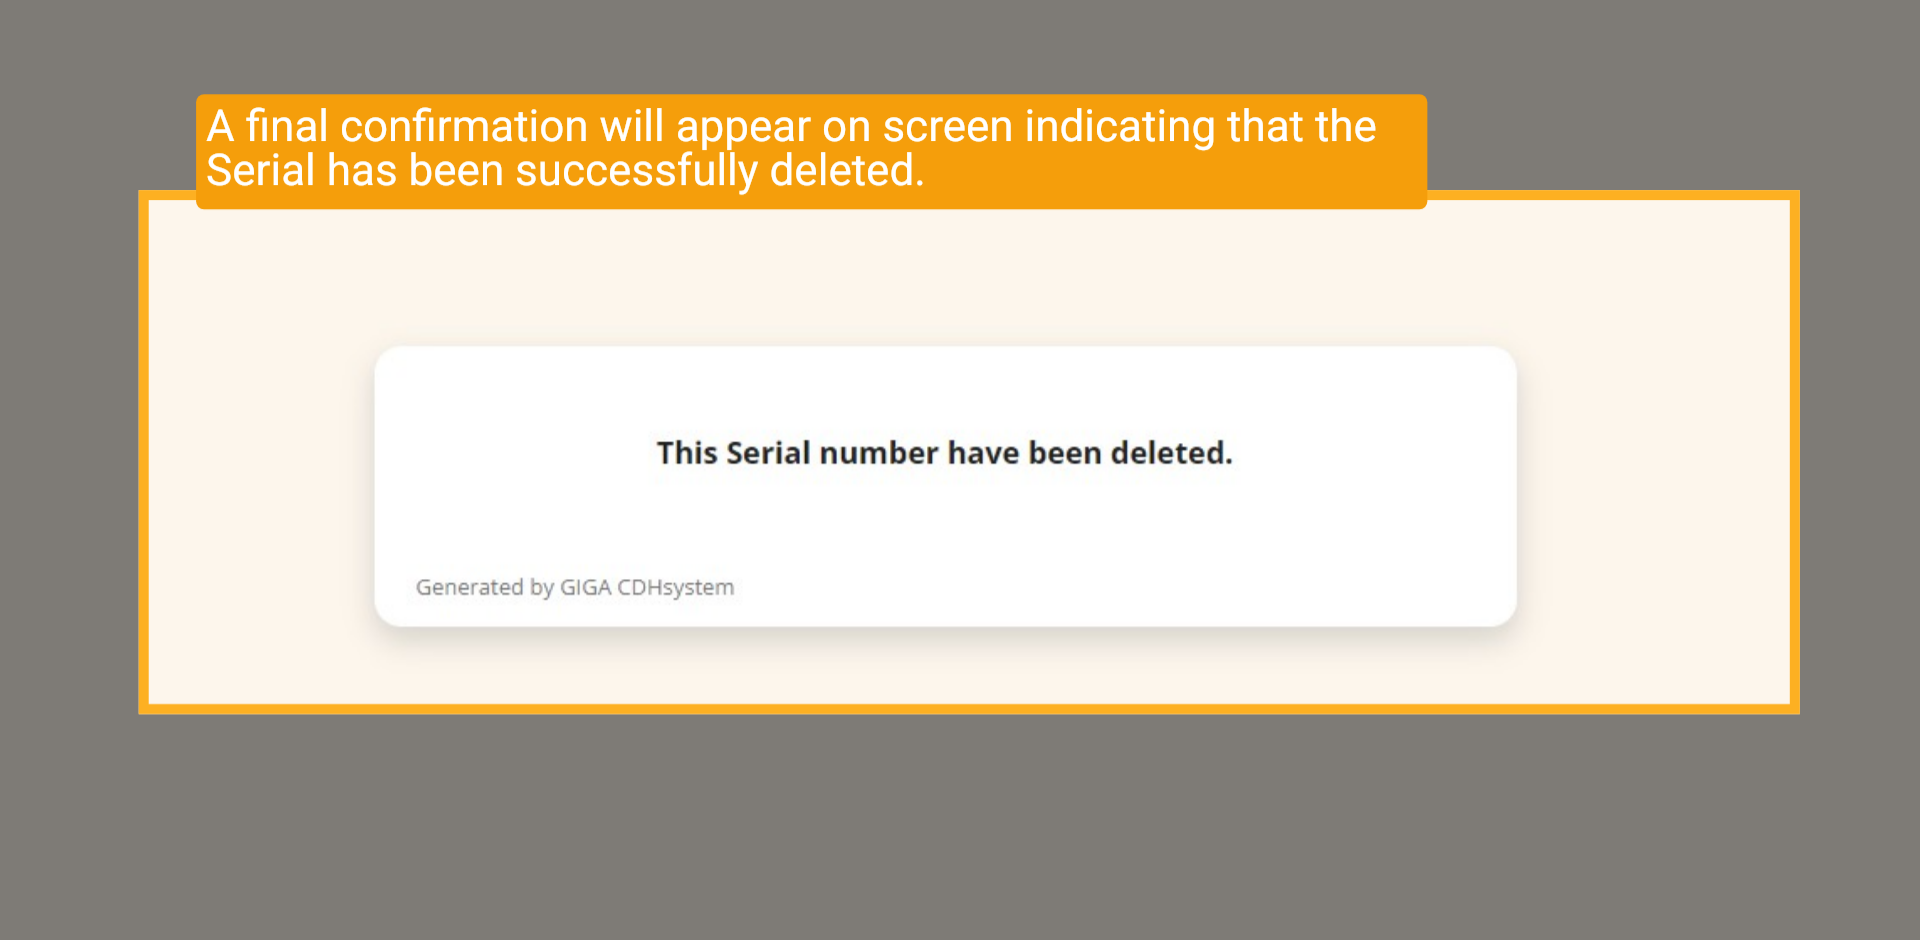
A final confirmation will appear on screen indicating that the Serial has been successfully deleted.
12 EQ Folder Deleted
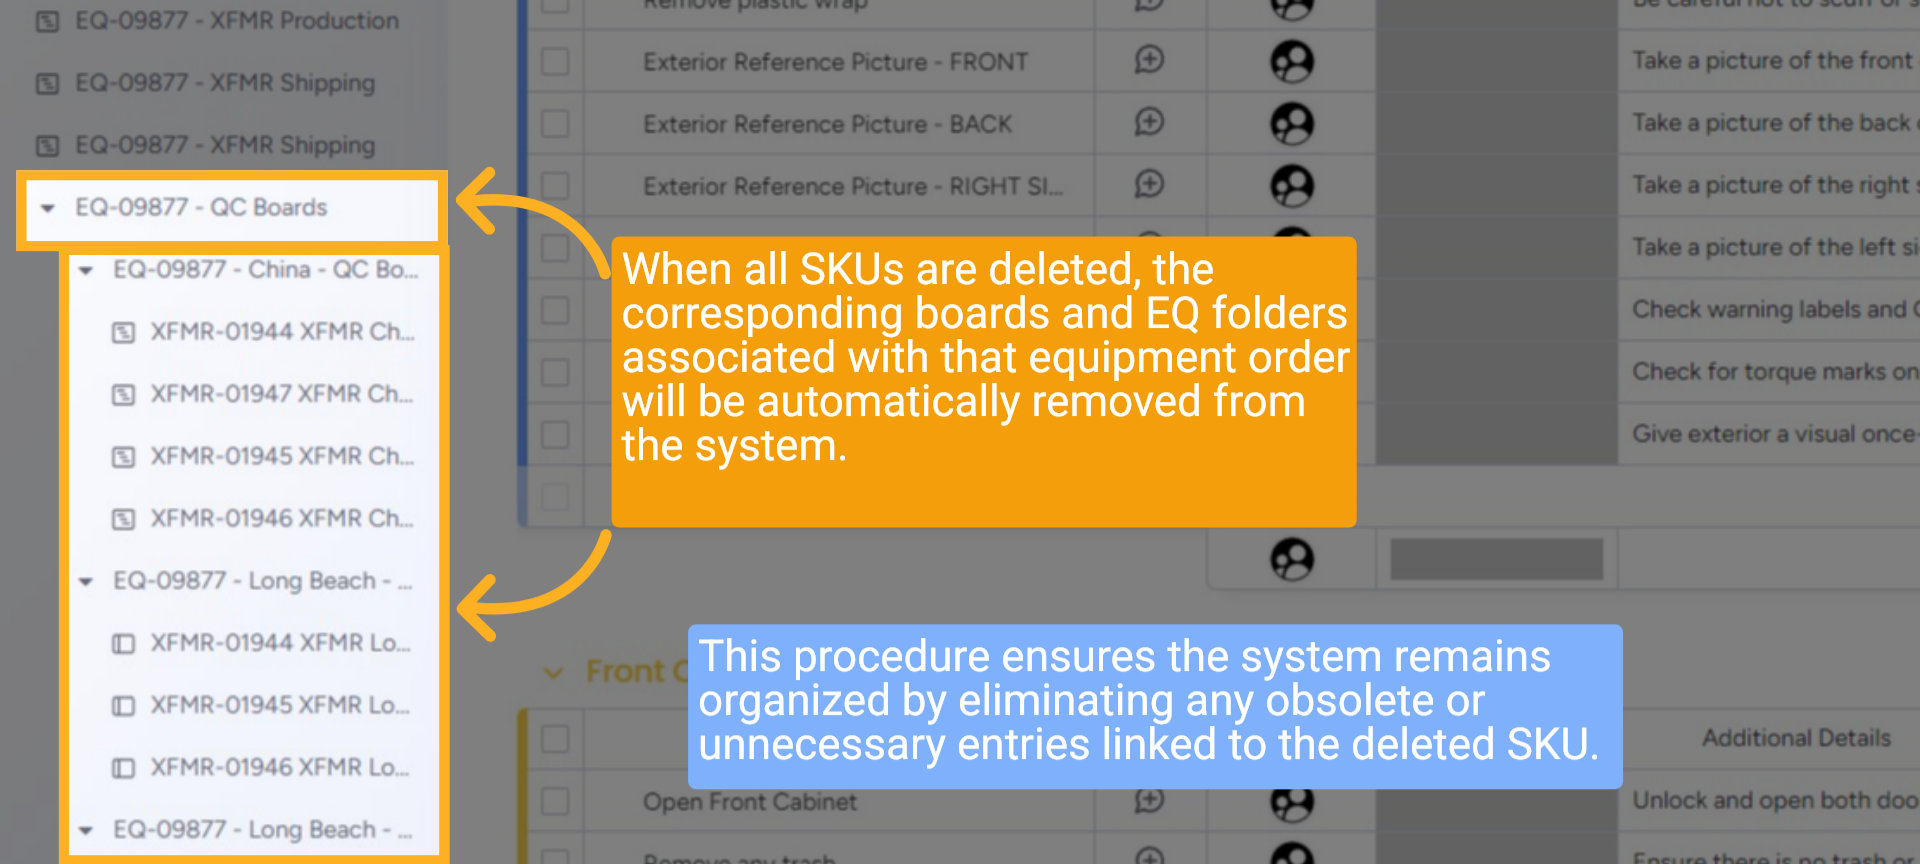
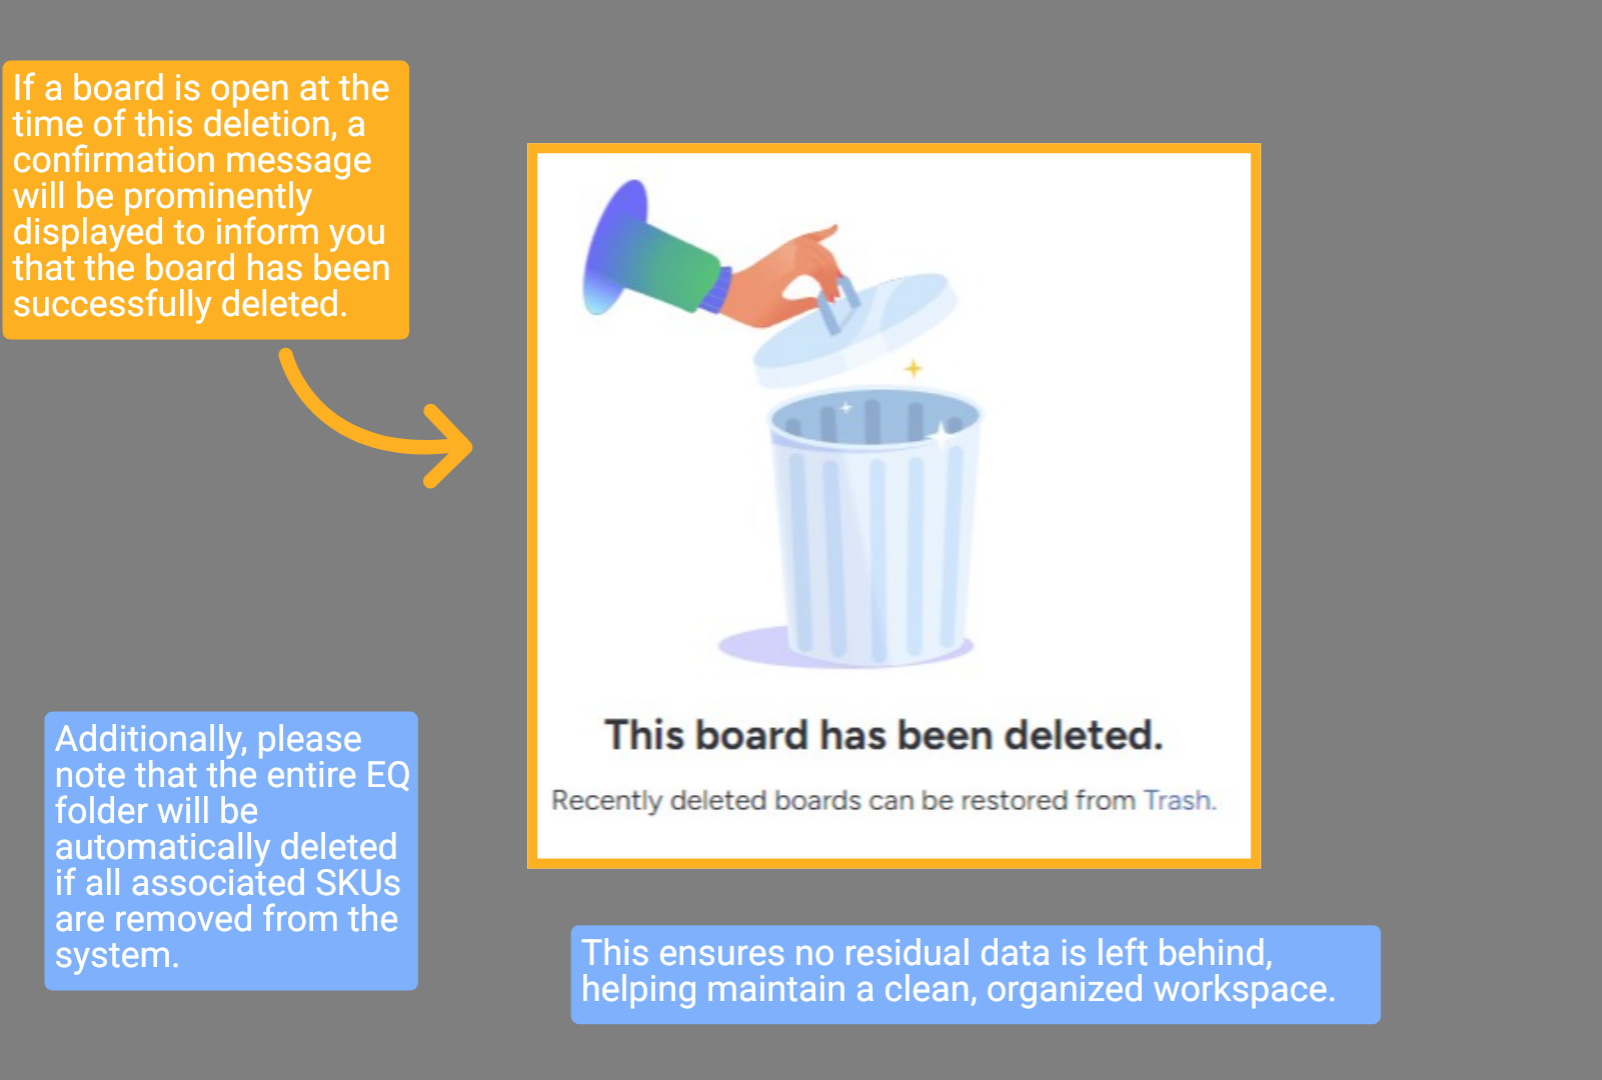
When all SKUs are deleted, the corresponding boards and EQ folders associated with that equipment order will be automatically removed from the system. This procedure ensures the system remains organized by eliminating any obsolete or unnecessary entries linked to the deleted SKU.
13 Monday Board Notification
If a board is open at the time of this deletion, a confirmation message will be prominently displayed to inform you that the board has been successfully deleted. Additionally, please note that the entire EQ folder will be automatically deleted if all associated SKUs are removed from the system. This ensures no residual data is left behind, helping maintain a clean, organized workspace.
14 Add New SKU (Optional)
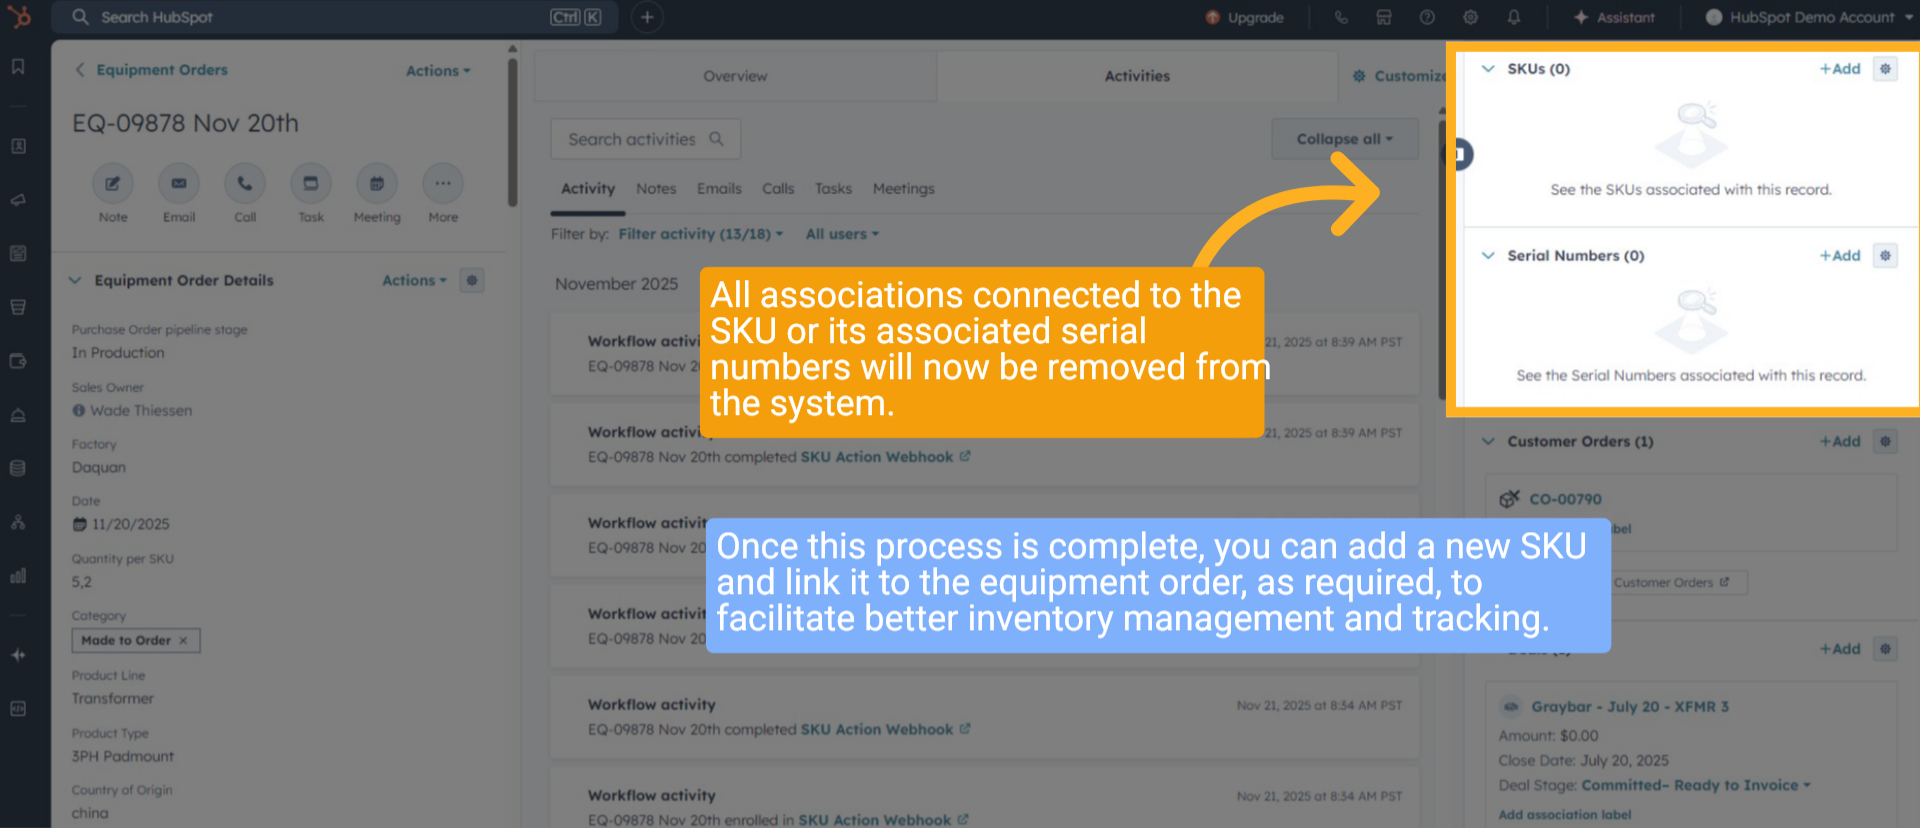
All associations connected to the SKU or its associated serial numbers will now be removed from the system. Once this process is complete, you can add a new SKU and link it to the equipment order, as required, to facilitate better inventory management and tracking.
15 Deleted Serial (Only One Removed)
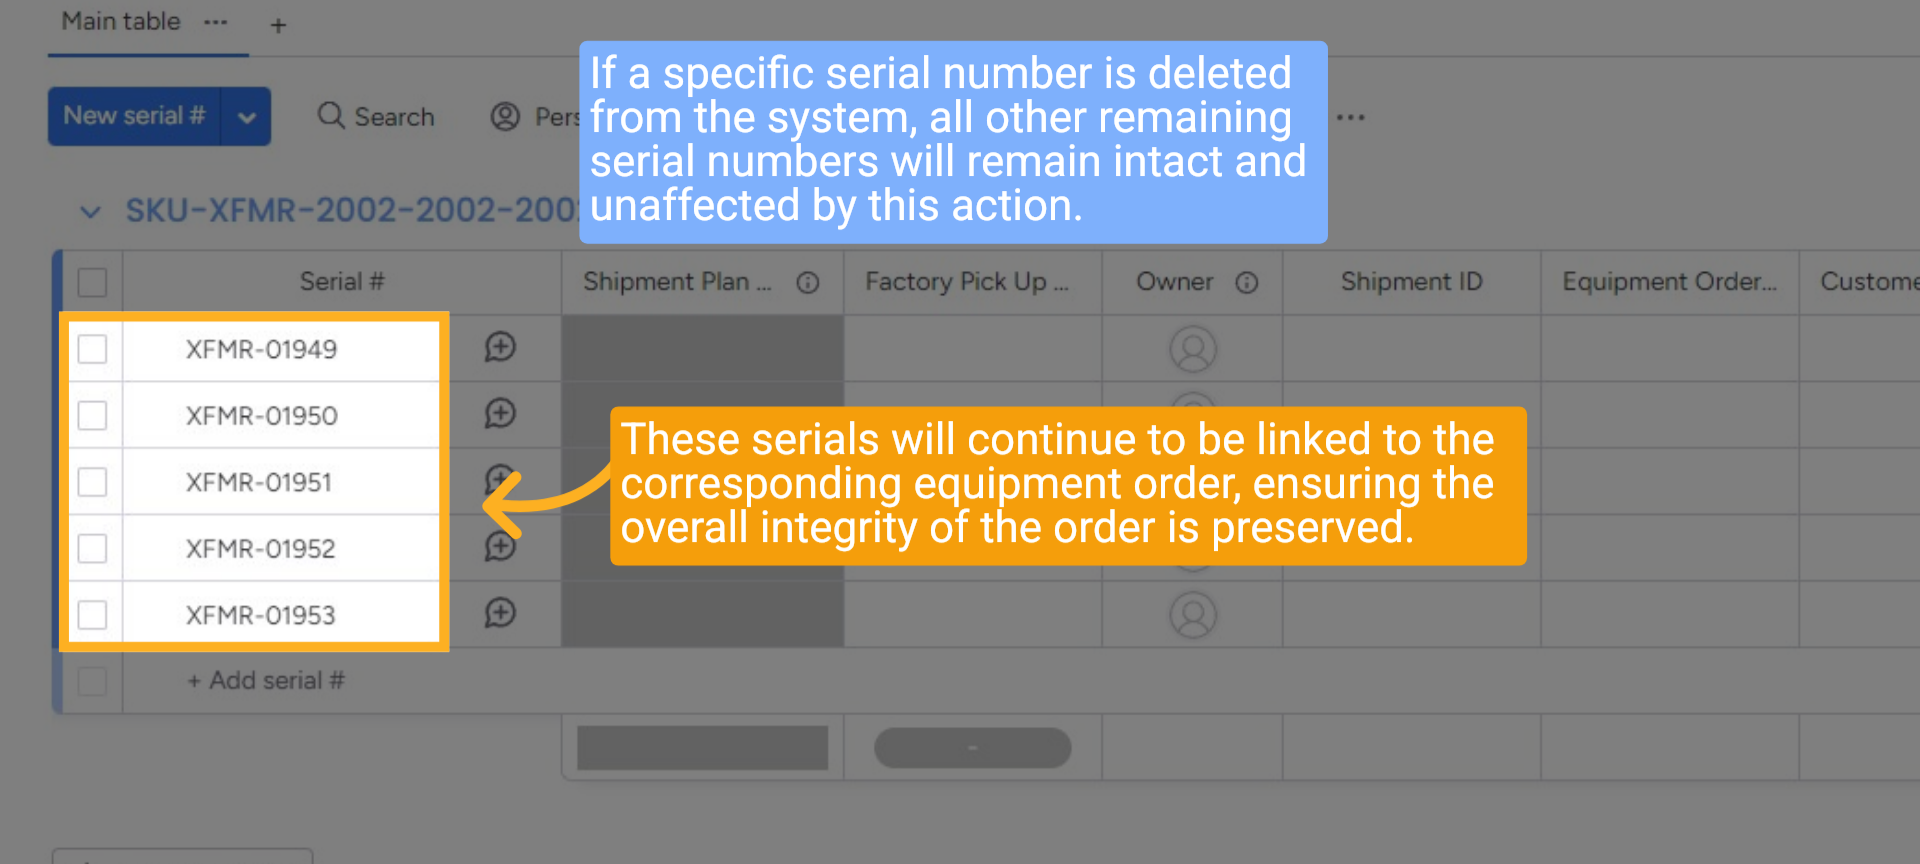
If a specific serial number is deleted from the system, all other remaining serial numbers will remain intact and unaffected by this action. These serials will continue to be linked to the corresponding equipment order, ensuring the overall integrity of the order is preserved.
16 Wrap up
This guide outlines the complete workflow for unassociating a SKU, removing individual serial numbers, confirming actions via Slack, and executing comprehensive SKU and serial number removals when necessary. It also clarifies the distinction between removing a single serial and deleting an entire SKU group. Adhering to these steps ensures consistent, accurate data management across all integrated systems.
Thank You!
Thank You!